
I
So I wanted to make a quick, simple tutorial on how to properly remove your helix screws without damaging them or your clutch, as well as how to install delrin washers and a new secondary spring. I know, plenty of us know how already, this is for those who don't and would like to save some trouble and money performing their own simple upgrades.
Step 1- remove your secondary, making sure not to drop the washers from your jackshaft, they will usually stick to the back of your secondary output shaft from the grease on the jackshaft. No pictures needed.
Step 2- Buy a Snap on or similar high-quality (I have used them all, the snapon is the best IMO) T27 socket for a 3/8 drive.
Before attempting removal, spray some Aero-Kroil or similar penetrating oil in the gap around each screw.(deep creep, pb work but Aero is the best again IMO) Then use a propane or Map gas torch to heat each screw individually. You are looking to burn the yellow loc-tite on the screw for easy removal.
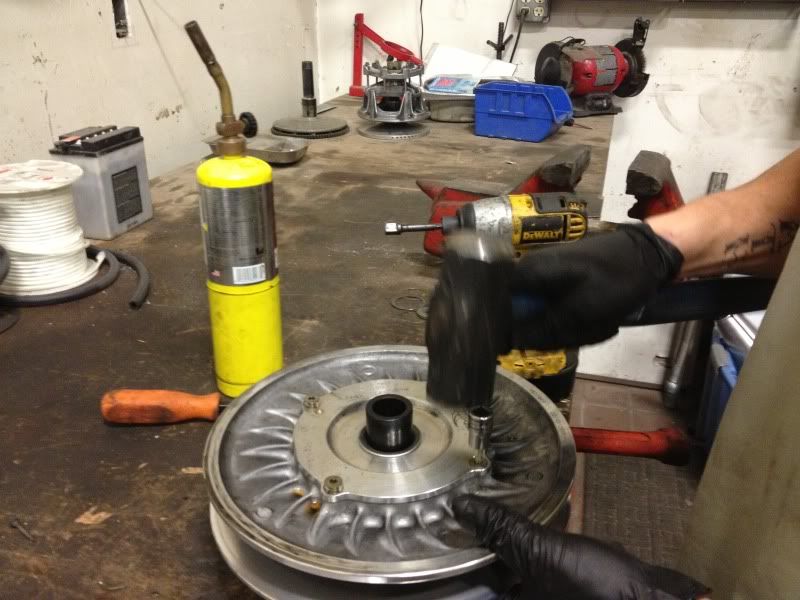
Step 3- Hammer the t27 bit down into the screw until the thud turns to a metallic clank as the bit bottoms in the screw face. Hold the clutch from the underside, and using a light duty impact gun, loosen the screw. If you have to hold the trigger more than a 1 second to get it to break loose, stop and re-heat the screw some more. If you do this correctly you will have a 100% success rate.
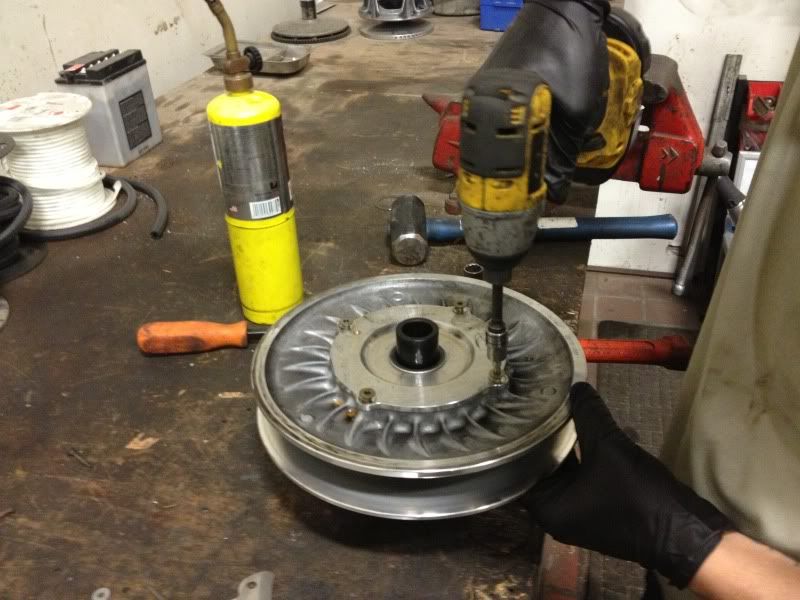
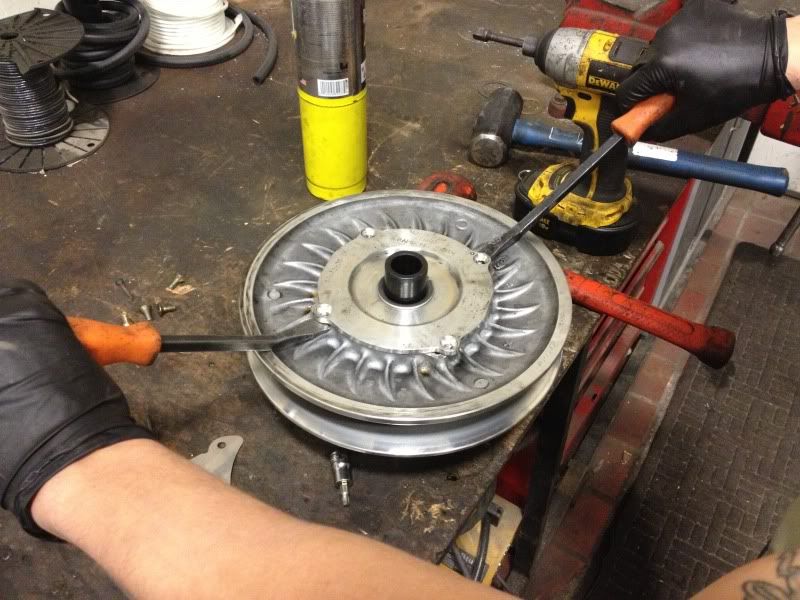
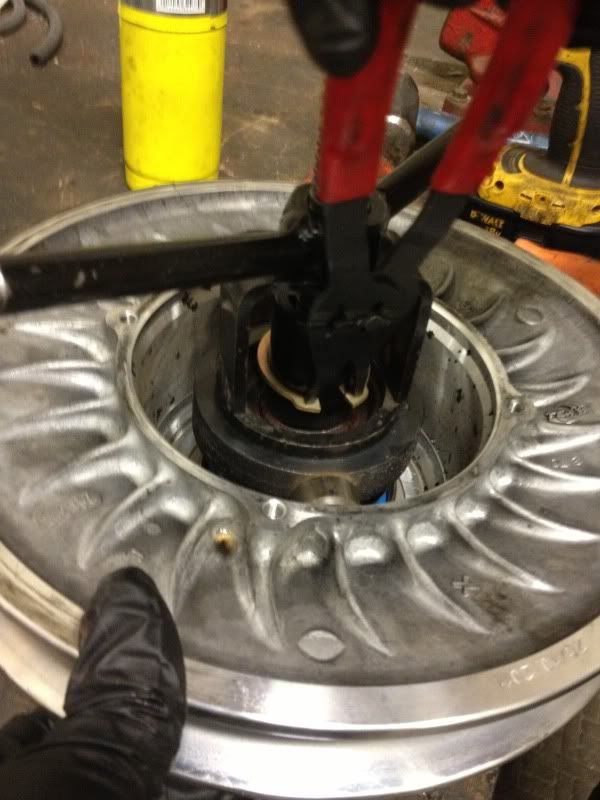
Next, use a dead blow or plastic hammer to rotate the helix slightly so you have a ledge to pry against. Then use 2 pry bars or screw drivers to release the helix- it just needs a little help. It's not under pressure, you don't need to worry about spring tension yet.
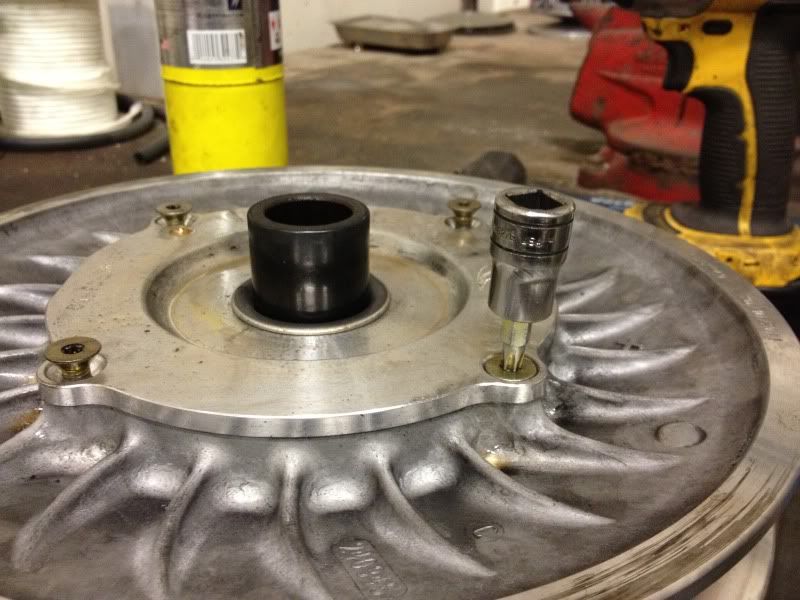
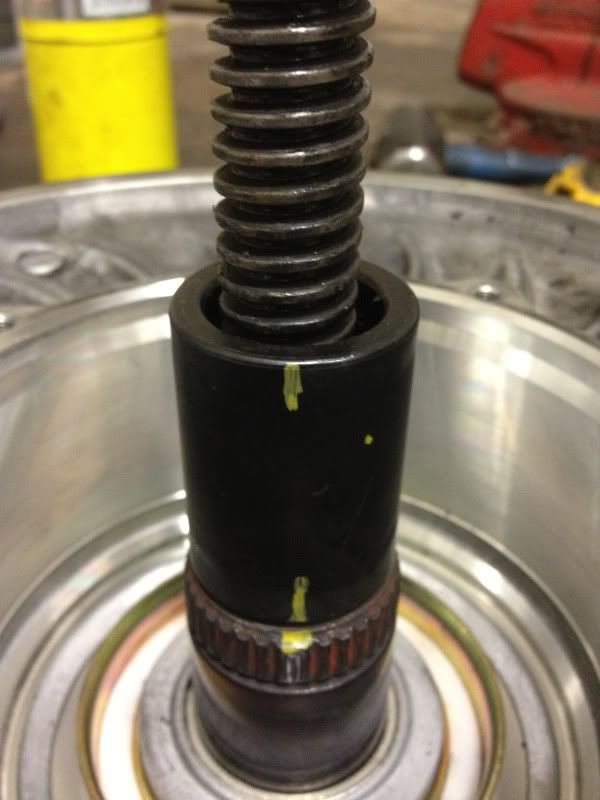
Step 4- Use a threaded clutch compressor to compress the roller spider down to prepare for releasing of the output shaft circlip. Some use the SLP lever-style tool, I prefer the threaded tool because it does not move the spider back and forth as you attempt to reinstall it onto the splined output shaft.
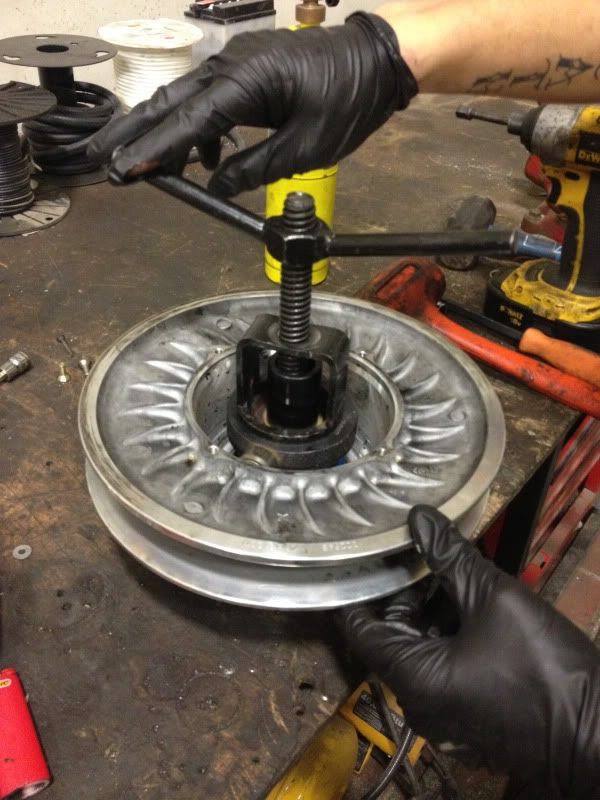
Release the circlip and loosen your clutch compressor, exposing the spring.
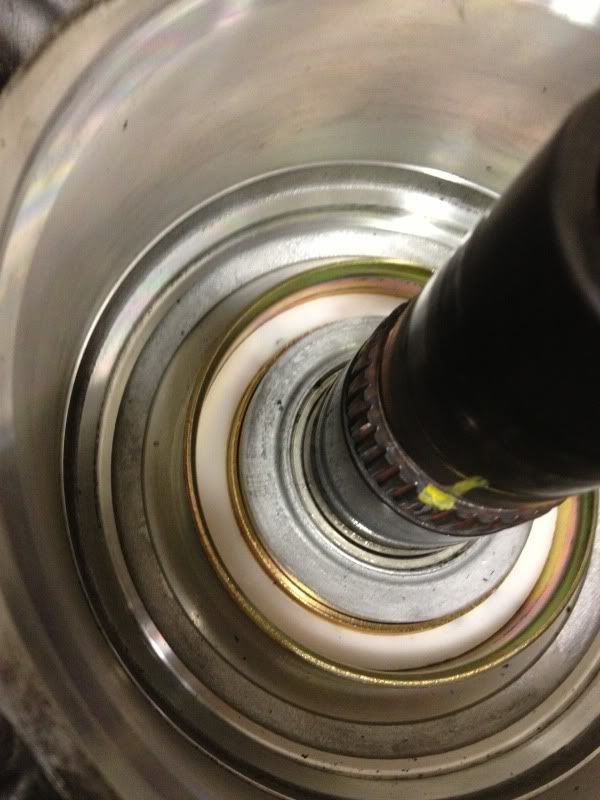
Step 5- install one delrin washer into the lower spring cup, and 1 into the underside of the roller spider. Boom, you just tightened up the RPM delivery of your Pro bigtime for $11. Install your secondary spring (hopefully a black/purple for a Pro)
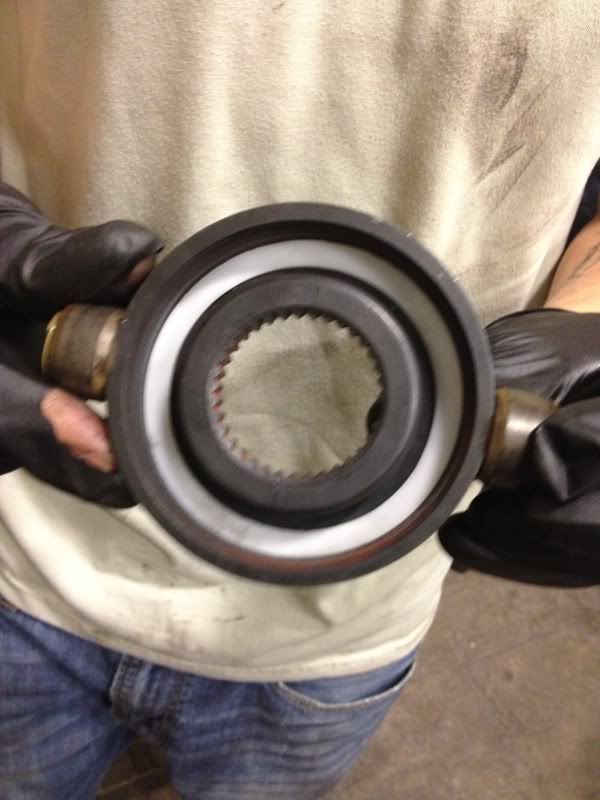
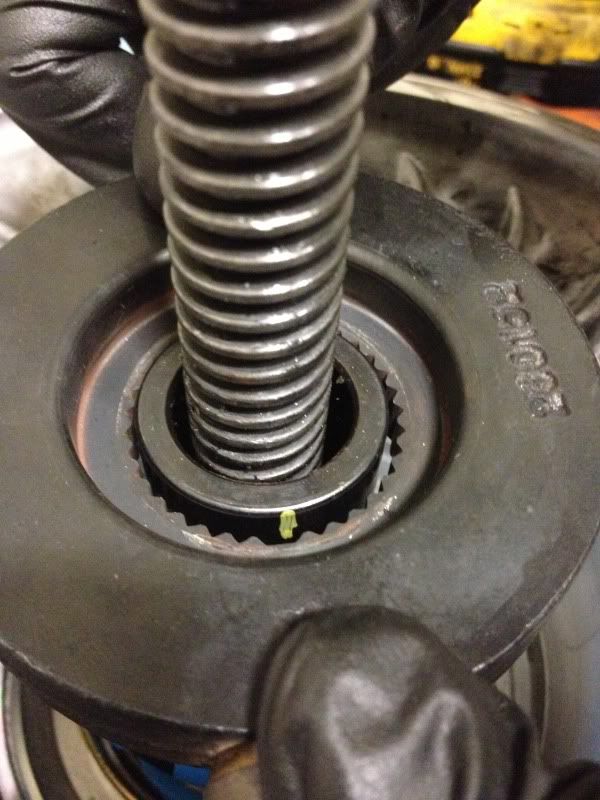
Step 6- you are now ready to reinstall the roller spider. Do yourself a big favor and grab a marking pen, and looking at the output shaft splines, find the double-tooth spline and mark above it vertically. This will help you line up the spider onto the shaft: the X on the spider will align with your mark above the splines as you compress it downward.
Make sure you seat the circlip solid back into its groove. Install your helix with the desired angle facing the "x" on the backside of the sheave, but more importantly, make sure you drop the helix angle onto the rollers in the desired track. The backside of the secondary can be spun to where the X does not match the roller orientation in some instances, particularly with a Tied clutch.
Do not impact the screws back in. Tighten them until the helix is flat in the sheave and just torque them very lightly- like 10 ft lbs.
Hopefully this well help some people save their bits, screws and frustration. Feel free to add anything particularly pertinent.
Step 1- remove your secondary, making sure not to drop the washers from your jackshaft, they will usually stick to the back of your secondary output shaft from the grease on the jackshaft. No pictures needed.
Step 2- Buy a Snap on or similar high-quality (I have used them all, the snapon is the best IMO) T27 socket for a 3/8 drive.
Before attempting removal, spray some Aero-Kroil or similar penetrating oil in the gap around each screw.(deep creep, pb work but Aero is the best again IMO) Then use a propane or Map gas torch to heat each screw individually. You are looking to burn the yellow loc-tite on the screw for easy removal.


Step 3- Hammer the t27 bit down into the screw until the thud turns to a metallic clank as the bit bottoms in the screw face. Hold the clutch from the underside, and using a light duty impact gun, loosen the screw. If you have to hold the trigger more than a 1 second to get it to break loose, stop and re-heat the screw some more. If you do this correctly you will have a 100% success rate.

Next, use a dead blow or plastic hammer to rotate the helix slightly so you have a ledge to pry against. Then use 2 pry bars or screw drivers to release the helix- it just needs a little help. It's not under pressure, you don't need to worry about spring tension yet.

Step 4- Use a threaded clutch compressor to compress the roller spider down to prepare for releasing of the output shaft circlip. Some use the SLP lever-style tool, I prefer the threaded tool because it does not move the spider back and forth as you attempt to reinstall it onto the splined output shaft.

Release the circlip and loosen your clutch compressor, exposing the spring.

Step 5- install one delrin washer into the lower spring cup, and 1 into the underside of the roller spider. Boom, you just tightened up the RPM delivery of your Pro bigtime for $11. Install your secondary spring (hopefully a black/purple for a Pro)


Step 6- you are now ready to reinstall the roller spider. Do yourself a big favor and grab a marking pen, and looking at the output shaft splines, find the double-tooth spline and mark above it vertically. This will help you line up the spider onto the shaft: the X on the spider will align with your mark above the splines as you compress it downward.


Make sure you seat the circlip solid back into its groove. Install your helix with the desired angle facing the "x" on the backside of the sheave, but more importantly, make sure you drop the helix angle onto the rollers in the desired track. The backside of the secondary can be spun to where the X does not match the roller orientation in some instances, particularly with a Tied clutch.
Do not impact the screws back in. Tighten them until the helix is flat in the sheave and just torque them very lightly- like 10 ft lbs.
Hopefully this well help some people save their bits, screws and frustration. Feel free to add anything particularly pertinent.
Last edited by a moderator: