• Don't miss out on all the fun! Register on our forums to post and have added features! Membership levels include a FREE membership tier.

Installation & Review: Yamaha OEM Turbo & MPI Stage One Upgrade

2Huskies

Well-known member
Lifetime Membership
Jul 19, 2009
581
206
43
Rigby, Idaho
Part 2

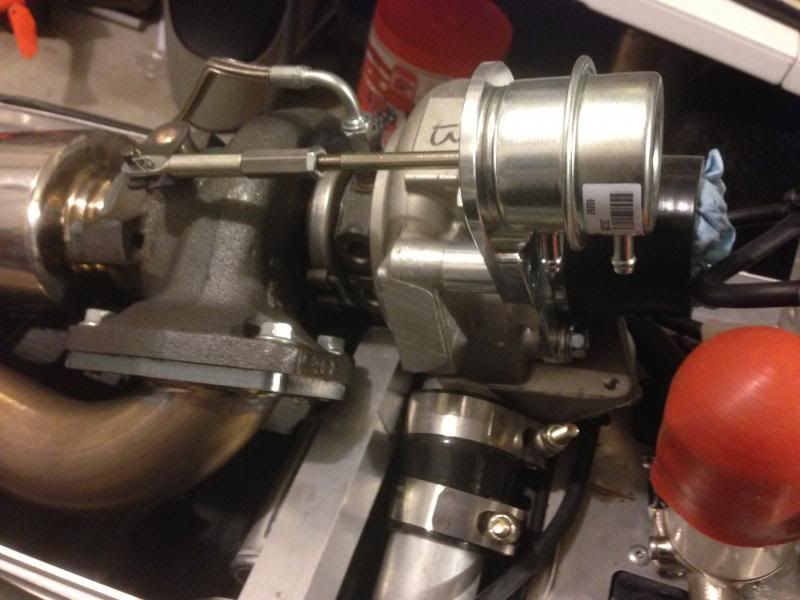
Now with the new airline established, we will replace the waste-gate. Now here you can notice that I have removed it. Really easy to remove, all it takes is two screws and on pin on the end of it.

Stage1Upgrade014.jpg


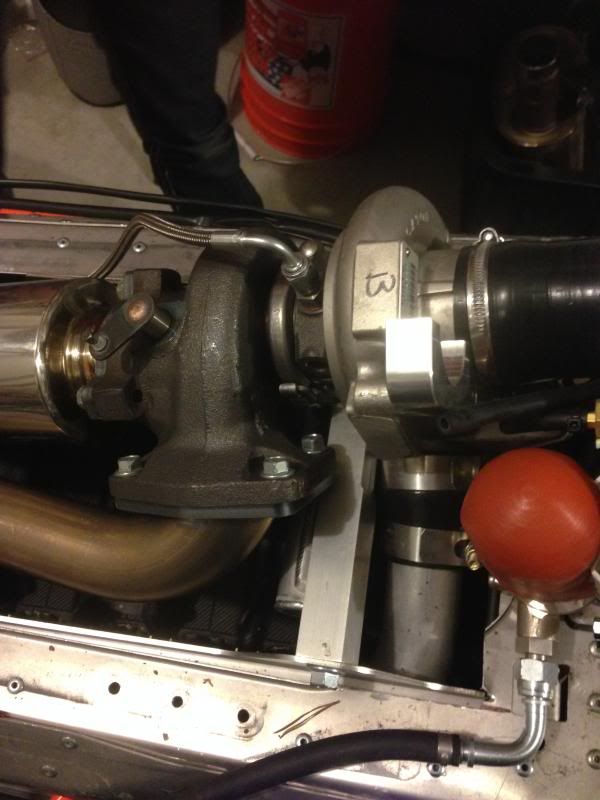
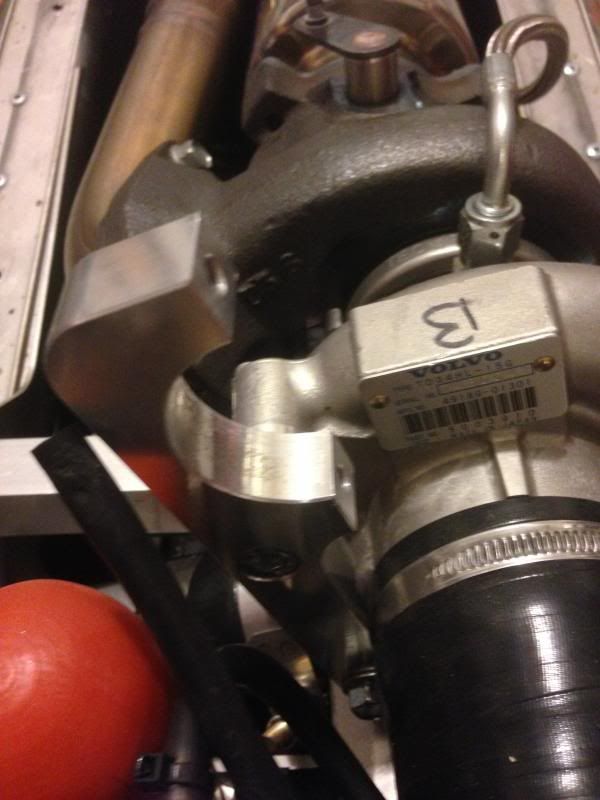
Next, the mounting for the waste-gate must be removed and replaced with the new supplied mounting bracket. This is the circle looking mounting bracket.


Remove
Stage1Upgrade015.jpg


Replace with top left bag

Stage1Upgrade013.jpg


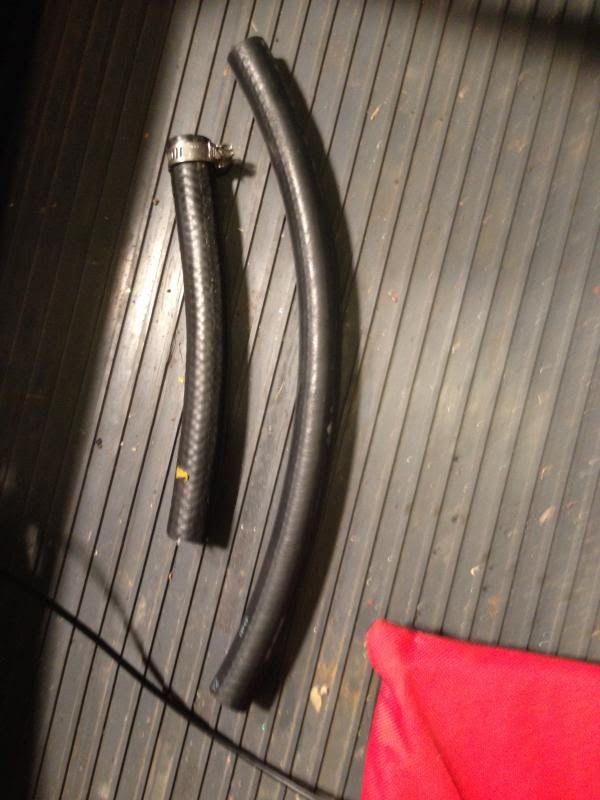
As a side note make sure that you save the pin that locks the end of the waste-gate, that is not provided
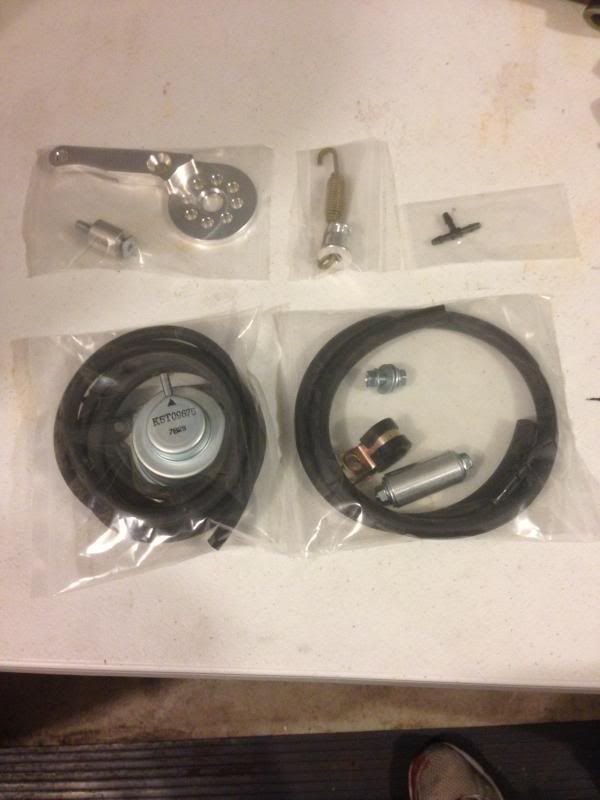
 

2Huskies

Well-known member
Lifetime Membership
Jul 19, 2009
581
206
43
Rigby, Idaho
Now here you can see the new waste-gate has been installed.

Stage1Upgrade022.jpg


Now you will notice the new mounting bracket, and with the current waste-gate there are two tips. Reconnect the airline from the previous waste-gate to the tip closest to the end of the sled not the front of the sled and ziptie.

Allow the tip closer to the front of the sled to vent to atmosphere.

(attach the line to the tip beneath the sticker haha)

Now the last point is that when you mount the waste-gate you want to insure that the tip of the waste-gate does not just slip over tip at the end.

You need to insure that you pull the waste-gate onto it, now you should only have to pull it a half hole to fit. What i mean by that is that the end of the waste-gate should sit on top of the pin and you should be able to see half of the pin through the hole on the end of the waste-gate. Then just pull it the rest of the way onto it and lock it down.

I hope that makes sense, It took me a few conversation with Matt@MPI to understand all that. haha
 

2Huskies

Well-known member
Lifetime Membership
Jul 19, 2009
581
206
43
Rigby, Idaho
Well with the rear of the sled completed, I buttoned up everything. Installed the heat shield, the seat, zip tied all of the airlines and oil lines back into place and moved back to the front of the sled.

Alright this is what mine looked like before I started the inter-cooler install on the front.

Stage1Upgrade002.jpg


With that, I undid the steering column like i mentioned before. Then pulled out the airbox that was there.

Stage1Upgrade009.jpg


With that out there are two things to keep in mind. First, you will need to remove the blow-off valve from the airbox to install on the inter-cooler. Make sure that you keep the O-Ring from it as another one is not provided.

Alright with that out of the way we now have a nice sized gap in the sled haha

Stage1Upgrade008.jpg
 

2Huskies

Well-known member
Lifetime Membership
Jul 19, 2009
581
206
43
Rigby, Idaho
Ok now for what was probably the most annoying part of the entire install.

There is a black air tube that runs to the bottom of the airbox, when you pull the airbox out you leave all the tubes behind. But when you go to install the intercooler there is a really good chance that the black thick airtube will be to short and it will have to be replaced.

The tube on the left is the one already install and the one on the right was the new one i had to buy. Now the size difference is off, i ended up finding out that the tube was actually only 1 inch to short. I needed about 9 or 8 and 1/2 inches of tubing to make it.

Stage1Upgrade028.jpg


Well the only way to really see if it fits is to go ahead and throw the inter-cooler into the sled and see if the tubing fits.

Stage1Upgrade029.jpg


Matt made it clear that this line really needs to fit perfectly as its going to be under full boost pressure. Make sure its securely clamped at both ends.
 

2Huskies

Well-known member
Lifetime Membership
Jul 19, 2009
581
206
43
Rigby, Idaho
Had the same issue with mine. They should include a longer one in the kit.


Yea Matt and I had a chat about that. That is now the plan, to start including longer hoses so you dont have to go out and buy one.


To PowderMan.

I guess some people just have all the luck haha
 

2Huskies

Well-known member
Lifetime Membership
Jul 19, 2009
581
206
43
Rigby, Idaho
Now once you are sure that the hose is going to fit you are ready to install the intercooler.
I installed the additional spring mount on the right hand side (facing the front of the sled) and had to tighten the left hand one.


Haha forgive me I forgot a step.

(There's no real manual to doing this thing)
Before the intercooler will even fit inside the sled you will need to remove the radiator reservoir and cut and file down the metal bracket that it is attached to.

Make sure you file it down nice and smooth or it will cut into the inter-cooler when it is installed.

From there you will need to remove your tool pouch from the front of the sled and install the reservoir there instead. For me it just took a few zipties and it was as secure as could be.

I wasn't able to figure out how to do it with the parts provided. I know Matt included a new mounting bracket but I just couldnt figure out how to make it work. Did you guys get it??
 

Matt@MPI

Well-known member
Lifetime Membership
Dec 3, 2010
293
264
63
Now once you are sure that the hose is going to fit you are ready to install the intercooler.
I installed the additional spring mount on the right hand side (facing the front of the sled) and had to tighten the left hand one.


Haha forgive me I forgot a step.

(There's no real manual to doing this thing)
Before the intercooler will even fit inside the sled you will need to remove the radiator reservoir and cut and file down the metal bracket that it is attached to.

Make sure you file it down nice and smooth or it will cut into the inter-cooler when it is installed.

From there you will need to remove your tool pouch from the front of the sled and install the reservoir there instead. For me it just took a few zipties and it was as secure as could be.

I wasn't able to figure out how to do it with the parts provided. I know Matt included a new mounting bracket but I just couldnt figure out how to make it work. Did you guys get it??

I've already cut new longer hose and installed them into all the kits we have on the shelf.

Here's a picture of the coolant bottle.

nytro coolant bottle.jpg
 
G
Jan 21, 2008
1,222
426
83
Wabush NL, Canada
Now once you are sure that the hose is going to fit you are ready to install the intercooler.
I installed the additional spring mount on the right hand side (facing the front of the sled) and had to tighten the left hand one.


Haha forgive me I forgot a step.

(There's no real manual to doing this thing)
Before the intercooler will even fit inside the sled you will need to remove the radiator reservoir and cut and file down the metal bracket that it is attached to.

Make sure you file it down nice and smooth or it will cut into the inter-cooler when it is installed.

From there you will need to remove your tool pouch from the front of the sled and install the reservoir there instead. For me it just took a few zipties and it was as secure as could be.

I wasn't able to figure out how to do it with the parts provided. I know Matt included a new mounting bracket but I just couldnt figure out how to make it work. Did you guys get it??

Look at my thread and you can see how I mounted mine. I had to use a longer bolt and a bigger clamp to get it around the frame. Did you modify the relay bracket too?
 

Powder Man

Active member
Lifetime Membership
Dec 10, 2009
267
36
28
Kennewick wa
I mounted mine the same as grease monkey, used a longer bolt I had and fought with the clamp to make it work. I didn't end up flipping the relay mount around, I just drilled one new hole and bent it around to make it fit.
 

2Huskies

Well-known member
Lifetime Membership
Jul 19, 2009
581
206
43
Rigby, Idaho
Yea I need a larger mounting bracket. That was the main issue with getting the overflow re-positioned. But Matt that picture does explain how to make it fit.


(I would have more pictures but my sled is currently at the shop just having a general check up after last weeks ride, along with trying to track down an electrical problem)

My sled wont start with the key if its cold, I had to take a wrench and touch the solenoid and spark it to start. Once it warmed up the key worked the whole day. We are tracking that down.

We are thinking that my tether is failing, so we are having that replaced.

With the relay bracket, I moved it out of the way, i reinserted the push pin in the hole at the front of the sled and then using a metal ziptie attached the one further toward the rear.

The relay mount was not flipped around just bent back and then i have the rubber mounting on the relay bracket against the intercooler.
 
T

TRUEBLUEMAX

Well-known member
Aug 4, 2010
751
280
63
Hooper, Utah
If the tether was bad the sled wouldn't start. It's probably a bad starter relay. If the tether goes bad the ECM doesn't have power to it so jump wring the relay would crank the motor over but it wouldn't start.


Sent from my iPhone using Tapatalk - now Free
 

2Huskies

Well-known member
Lifetime Membership
Jul 19, 2009
581
206
43
Rigby, Idaho
Alright the relay had been replaced, we let the sled freeze overnight and no issues at all!

So the wrap had shown up for the sled and we are gonna go through the last stage of the intercooler install.

I'm on tapa right now, as soon as I'm back to my computer I'll finish it.
 

2Huskies

Well-known member
Lifetime Membership
Jul 19, 2009
581
206
43
Rigby, Idaho
Hey Matt when you get a moment can you explain the air T connection for everyone. Iv typed it a few times and it just doesn't sound good.

Anyway guys, see were at the point where the coolant overflow has been relocated to where the tool bag normally sits. And since that toolbag is life or death for me, I'll be getting a skinz tunnel bag to carry it in instead.

So with that done, we move onto installing the airbox again.

So both spring mounts are in, go ahead and slide the intercooler in, attach the black hose on the bottom, then screw the four screws into place, attach the two mounting springs and book you have an intercooler.
4y8amybe.jpg
 

2Huskies

Well-known member
Lifetime Membership
Jul 19, 2009
581
206
43
Rigby, Idaho
Now onto the charge tubes, and the airlines and bov.

Did anyone else have trouble with the charge tubes? Bc I had a bit.It took me some work to get them to fit, just curious before I continue.

Haha could be I was being to gentle
 
G
Jan 21, 2008
1,222
426
83
Wabush NL, Canada
Now onto the charge tubes, and the airlines and bov.

Did anyone else have trouble with the charge tubes? Bc I had a bit.It took me some work to get them to fit, just curious before I continue.

Haha could be I was being to gentle

Yeah I wish the bends on the tube were a little different. I managed to get it in place but I had to wrap a piece of hose around one place so it wouldnt chaffe through on the frame.
 

Powder Man

Active member
Lifetime Membership
Dec 10, 2009
267
36
28
Kennewick wa
It actually fit really good for me but I had to buy a reducer for the smaller diameter mpi tube.

Just got back from riding over 2ft of fresh snow. Sled ran awesome, air/fuel numbers were spot on and I ran it up to 14lbs boost. At 14lbs it started leaning out but I think thats all the stock injectors will handle. At 14lbs its a rocket and I plan on running most the time at 12lbs. I'm super happy with the new parts especially the pyschosled bridge controller. No more button pushing and runs like stock with way more power!
 
G
Jan 21, 2008
1,222
426
83
Wabush NL, Canada
It actually fit really good for me but I had to buy a reducer for the smaller diameter mpi tube.

Just got back from riding over 2ft of fresh snow. Sled ran awesome, air/fuel numbers were spot on and I ran it up to 14lbs boost. At 14lbs it started leaning out but I think thats all the stock injectors will handle. At 14lbs its a rocket and I plan on running most the time at 12lbs. I'm super happy with the new parts especially the pyschosled bridge controller. No more button pushing and runs like stock with way more power!

So you have the MPI upgrade and psychosled bridge installed on a push 180 kit? Do you have anything else on there to bring it up to 12 psi like a bigger fuel pump or head shim?
 
Premium Features