S
seanc
Well-known member
C3 Forward Post Install Instructions
Included with the kit:
2 CNC Post Forward Brackets
4 10mm Short Bolts
2 10mm Long Bolts
6 Ny-Lock Nuts
Optional Straight Chromoly Steering Post
Optional Pre Modified Lower Blocks
Tools Needed:
Socket Wrench
10mm wrench
10mm socket
Extension
13mm socket
16 mm wrench
17mm wrench
Drill or Grinder or Hammer and Chisel
Tools and Detailed instructions on how to remove the hood, sides panels, dash/headlights, tank shroud, airbox and seat are not included.
1) Remove seat
2) Remove hood
3) Remove side Panels
4) Remove dash and headlights
5) Remove tank shroud
6) Remove front plastic piece
7) Remove exhaust pipe
8) Remove the air box
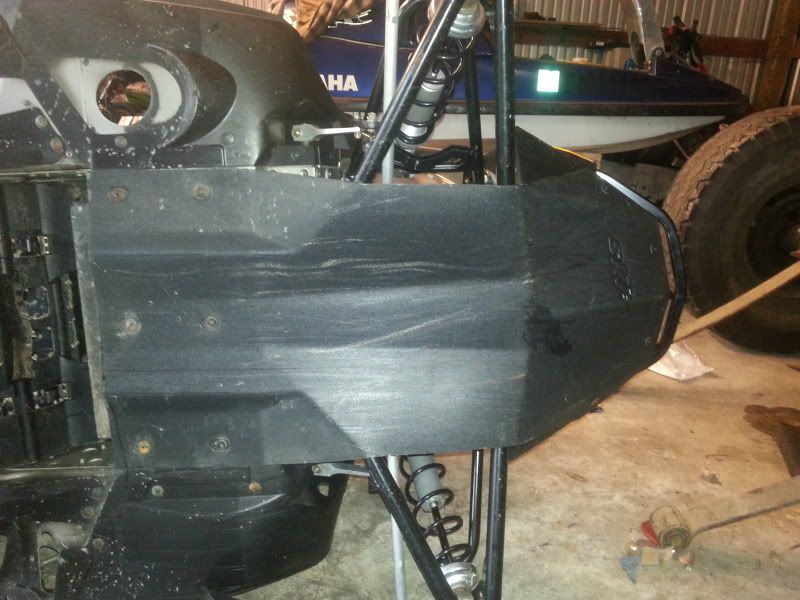
9) Remove the (10) rivets holding the bottom skid plate on. (Mine spun when trying to drill so I used a hammer and chisel)
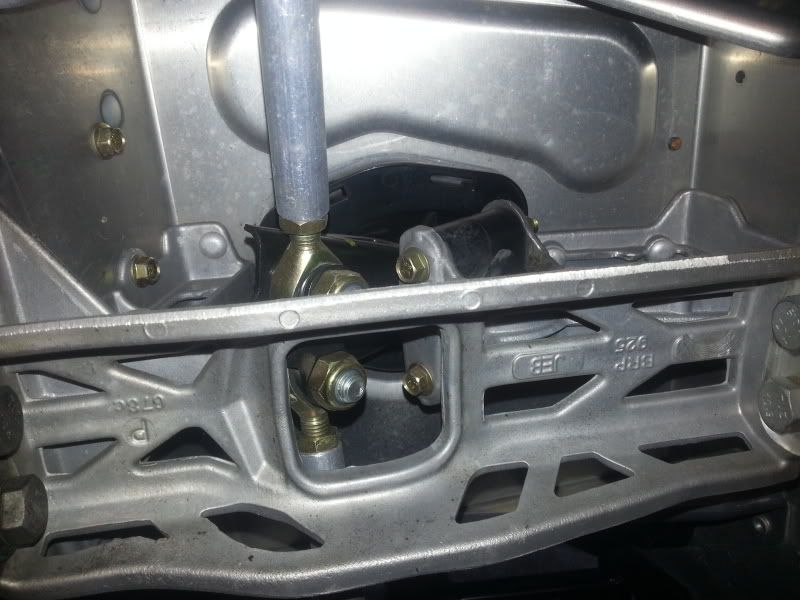
10) Remove the (2) bolts holding the tie rods to the steering post. Once they are removed you can remove the (2) 10mm bolts holding the lower steering block in.
11) Remove the (4) 13mm bolts holding the steering riser on and put it aside.
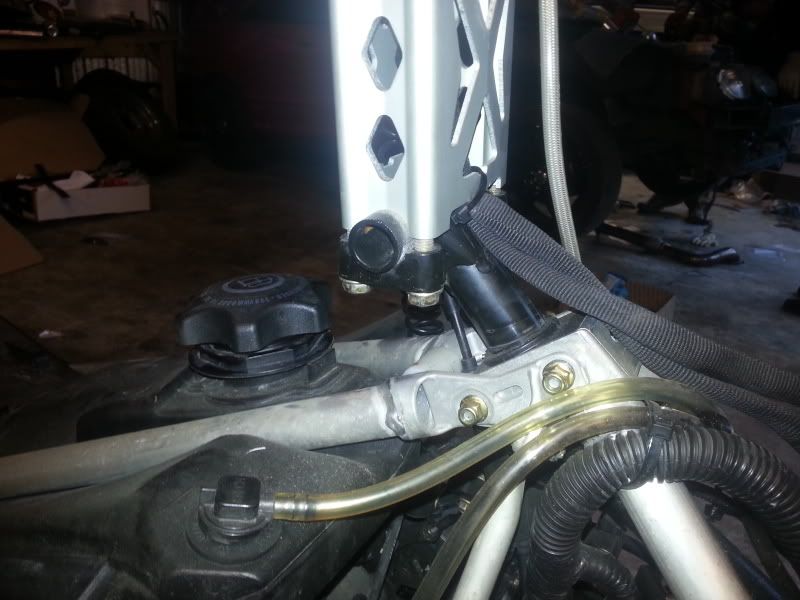
12) Remove the (2) long 10mm bolts holding the upper steering block in, and the (2) 10mm holding the small side supports.
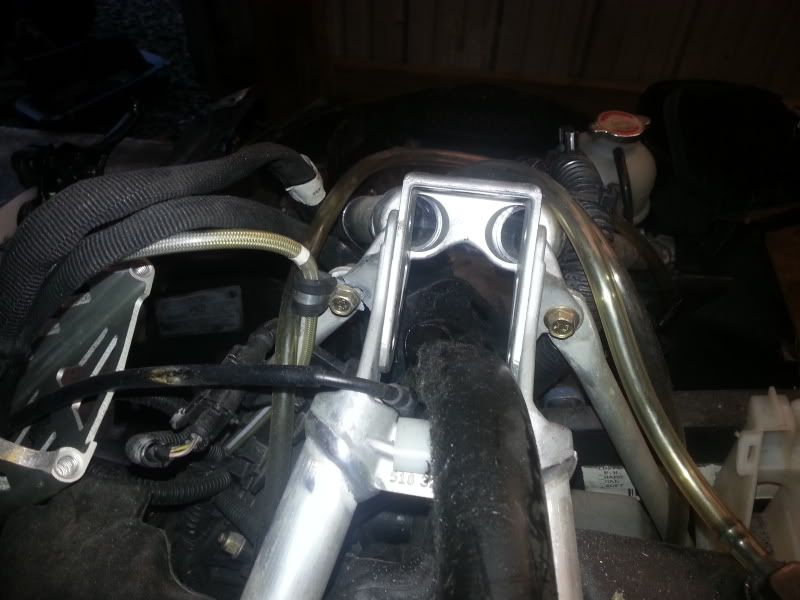
13) Remove the plastic shrouds in middle of tank by pulling out on the bottom then up exposing the (2) 13mm nuts holding the tank and rear triangle on that can then be removed. Then lift the rear of the tank and pull the triangle off of the sled.
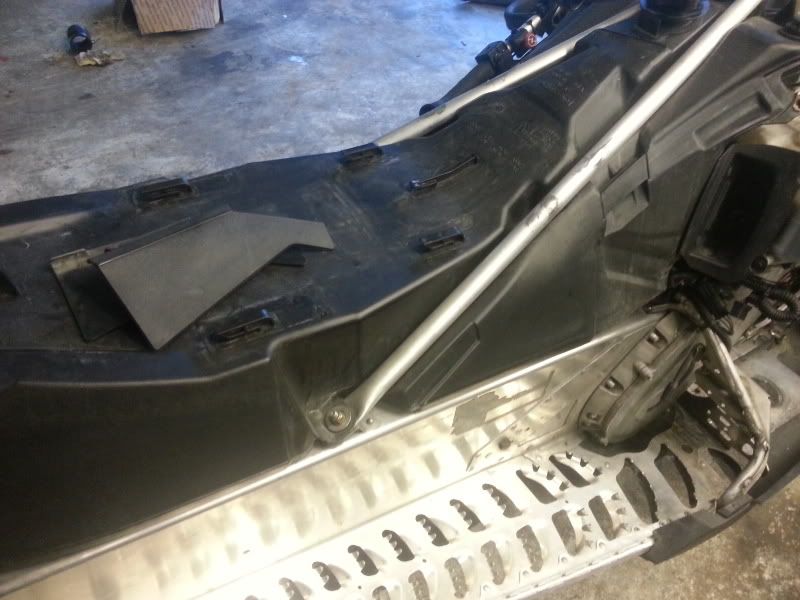
14) Pull the plastic cover up from the belly pan towards the engine compartment then pull it off of the shroud.
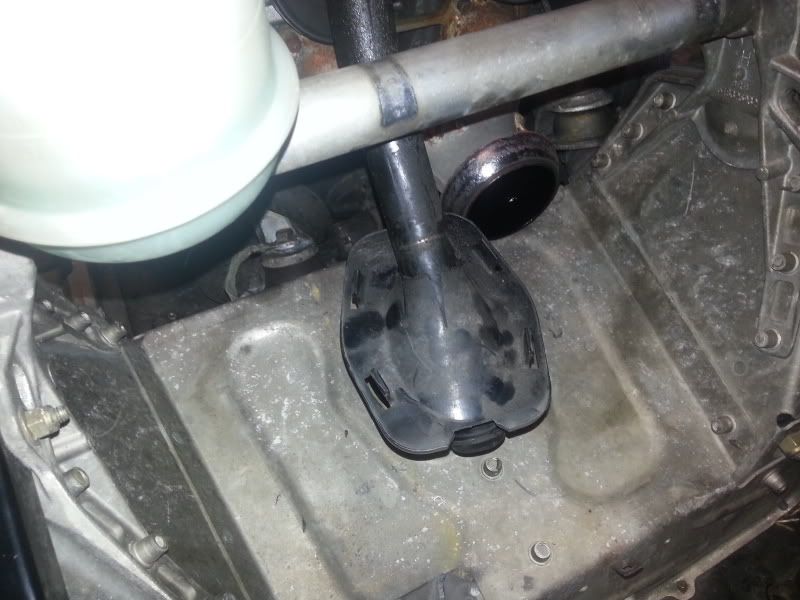
15) You can then pull the factory steering post out from the bottom and then out of the sled.
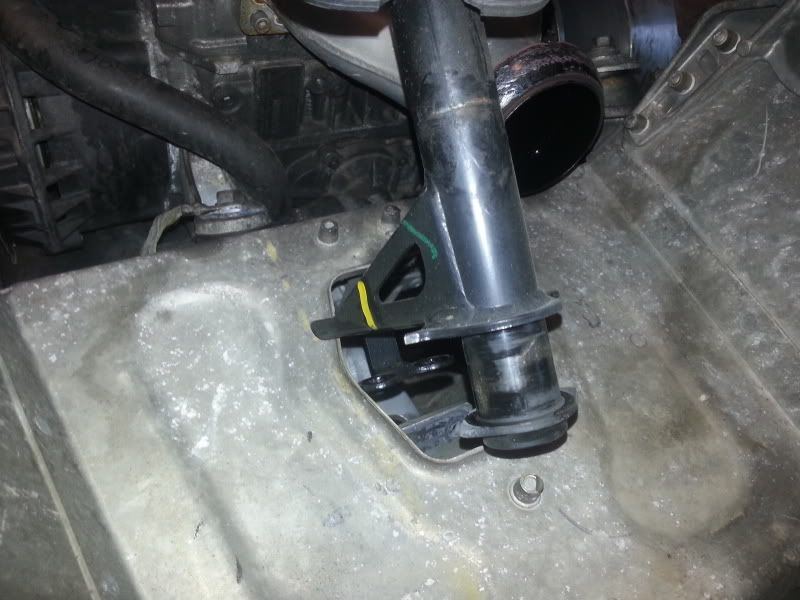
16) Place your rear triangle back and loosely put your C3 Brackets on using the (4) supplied short bolts and ny-lock nuts. Be sure to route your throttle cable up through where the factory post went. And put the fuel tank vent under the small support.
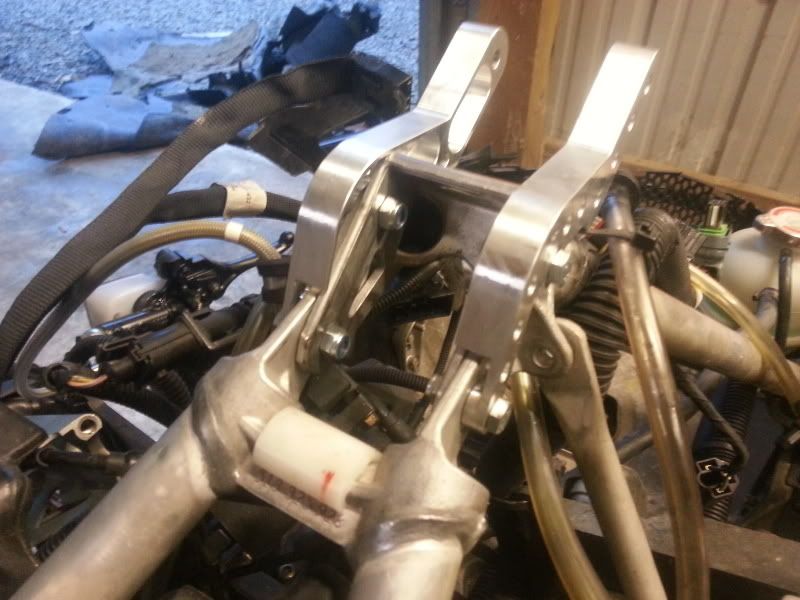
17) Then place the modified lower blocks on the steering post with the upper grinded half facing forward and the lower grinded half facing back. This allows the steering post to lean forward.
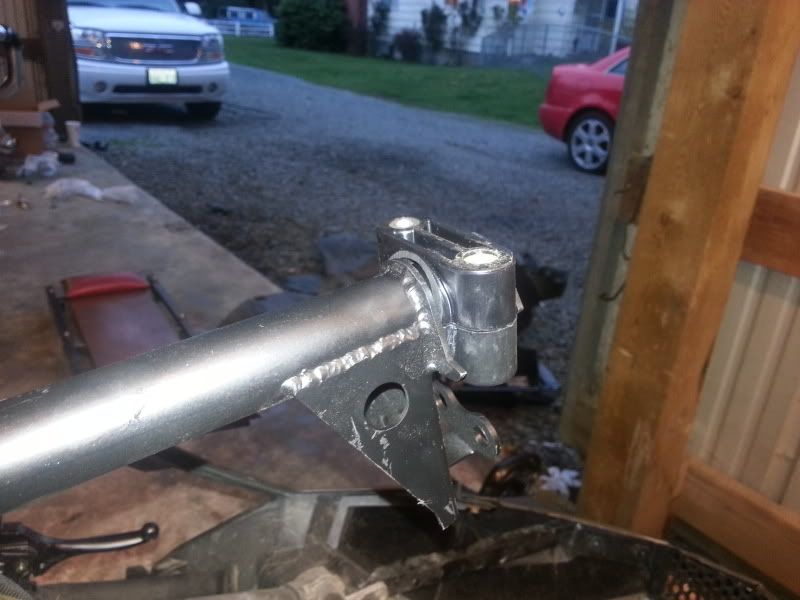
18) Then you can place the steering post down through the belly pan. Now set the original (2) 10mm through the lower block and mounting bracket and hand tighten the nuts.
19) Reuse the factory upper block and put the steering post in the C3 CNC Brackets and use the (2) long 10mm supplied with the kit to secure the upper block into the brackets. (Here you can see the best routing for the throttle cable and fuel tank vent)
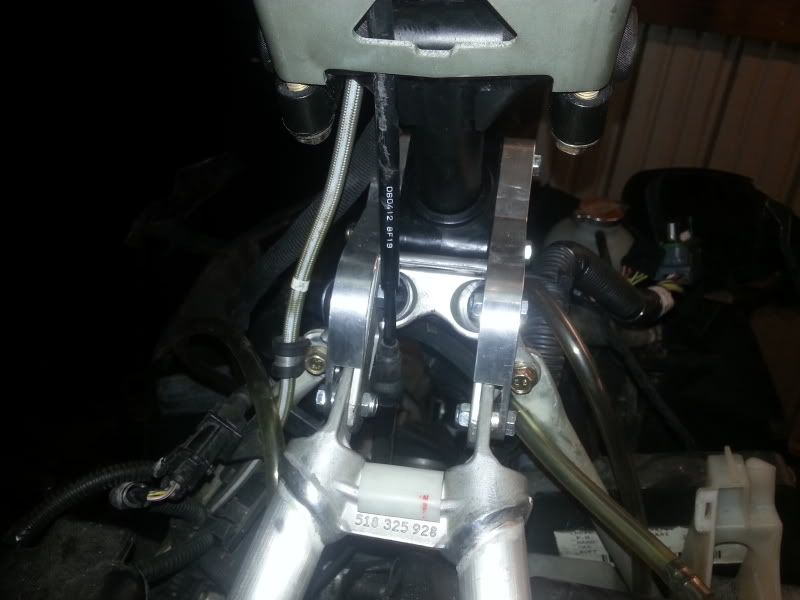
20) Tighten the (6) 10mm bolts on the C3 Brackets.
21) Tighten the (2) 13mm bolts that hold the tank and rear triangle on and you can put the plastic pieces back.

22) Put the steering riser back on and roughly inline with the new steering post.
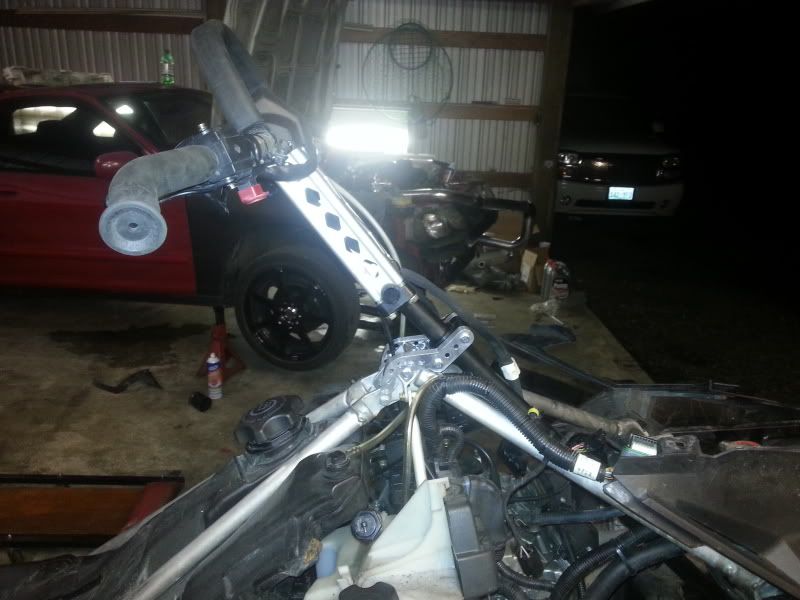
23) Here you can see where the steering box needs to be modified and why.
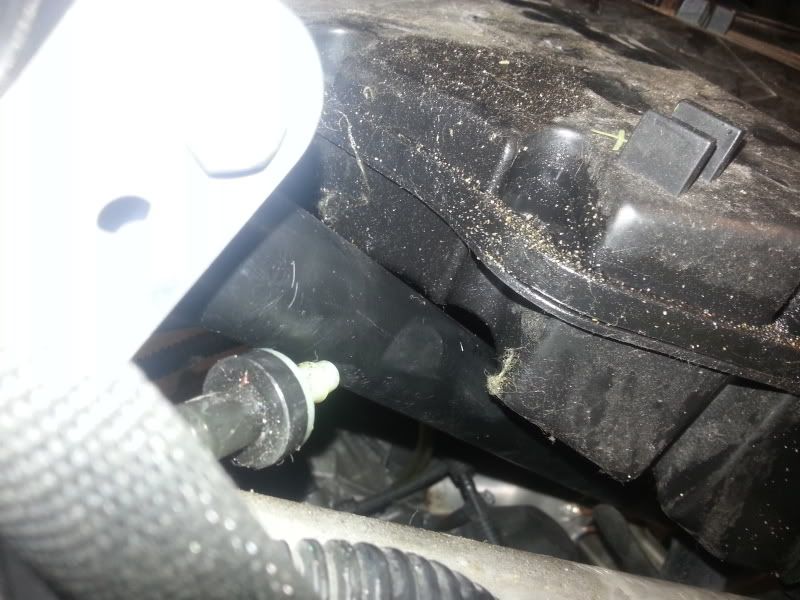
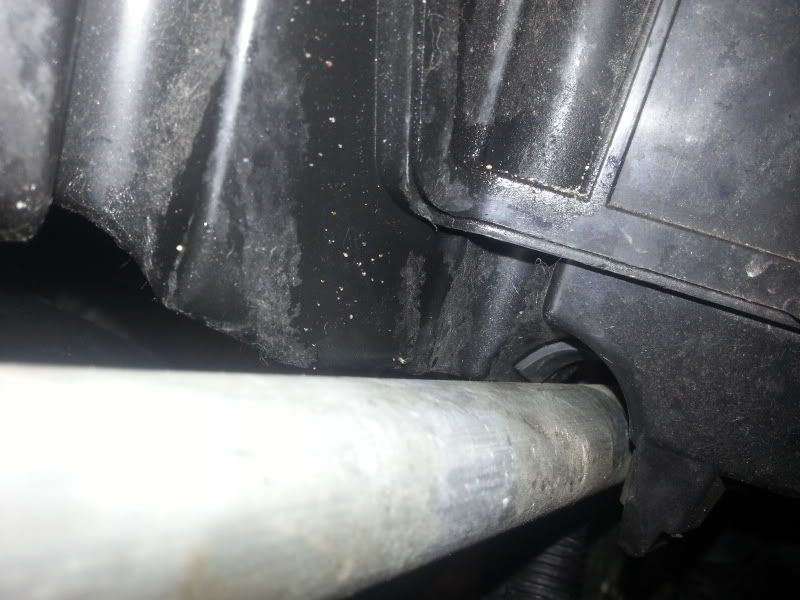
24) Heat up the air box with a heat gun and use a pipe to mold it to fit around the steering post. Pictured is C3’s chromoly straight post which requires much less modifying, and is worth the price
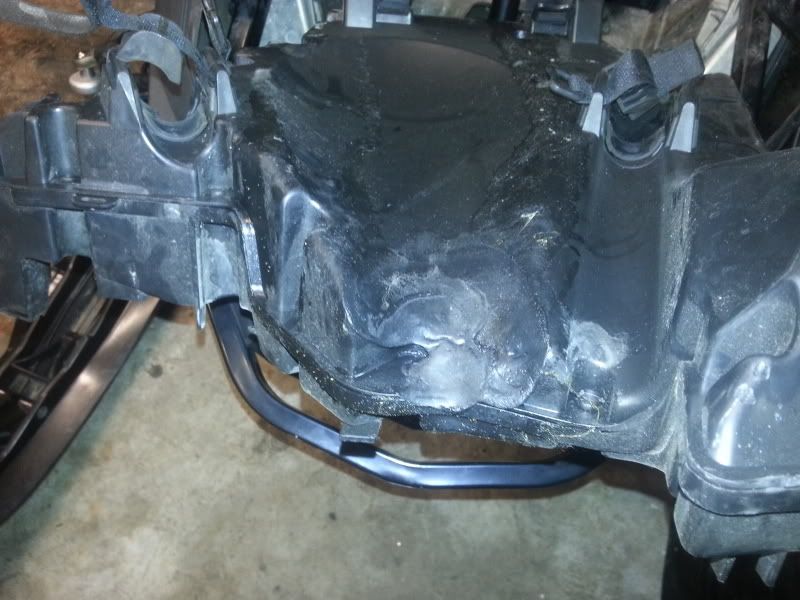
25) Tighten the (2) 10mm bolts holding the lower block under belly pan.
26) Reinstall and tighten the (2) 16mm bolts holding the tie rods on.
27) At this point you can reinstall all the body work, dash and plastics. You will need to trim your tank shroud a bit to fit.
-SeanC
Included with the kit:
2 CNC Post Forward Brackets
4 10mm Short Bolts
2 10mm Long Bolts
6 Ny-Lock Nuts
Optional Straight Chromoly Steering Post
Optional Pre Modified Lower Blocks
Tools Needed:
Socket Wrench
10mm wrench
10mm socket
Extension
13mm socket
16 mm wrench
17mm wrench
Drill or Grinder or Hammer and Chisel
Tools and Detailed instructions on how to remove the hood, sides panels, dash/headlights, tank shroud, airbox and seat are not included.
1) Remove seat
2) Remove hood
3) Remove side Panels
4) Remove dash and headlights
5) Remove tank shroud
6) Remove front plastic piece
7) Remove exhaust pipe
8) Remove the air box
9) Remove the (10) rivets holding the bottom skid plate on. (Mine spun when trying to drill so I used a hammer and chisel)

10) Remove the (2) bolts holding the tie rods to the steering post. Once they are removed you can remove the (2) 10mm bolts holding the lower steering block in.

11) Remove the (4) 13mm bolts holding the steering riser on and put it aside.

12) Remove the (2) long 10mm bolts holding the upper steering block in, and the (2) 10mm holding the small side supports.

13) Remove the plastic shrouds in middle of tank by pulling out on the bottom then up exposing the (2) 13mm nuts holding the tank and rear triangle on that can then be removed. Then lift the rear of the tank and pull the triangle off of the sled.

14) Pull the plastic cover up from the belly pan towards the engine compartment then pull it off of the shroud.

15) You can then pull the factory steering post out from the bottom and then out of the sled.

16) Place your rear triangle back and loosely put your C3 Brackets on using the (4) supplied short bolts and ny-lock nuts. Be sure to route your throttle cable up through where the factory post went. And put the fuel tank vent under the small support.

17) Then place the modified lower blocks on the steering post with the upper grinded half facing forward and the lower grinded half facing back. This allows the steering post to lean forward.

18) Then you can place the steering post down through the belly pan. Now set the original (2) 10mm through the lower block and mounting bracket and hand tighten the nuts.
19) Reuse the factory upper block and put the steering post in the C3 CNC Brackets and use the (2) long 10mm supplied with the kit to secure the upper block into the brackets. (Here you can see the best routing for the throttle cable and fuel tank vent)

20) Tighten the (6) 10mm bolts on the C3 Brackets.
21) Tighten the (2) 13mm bolts that hold the tank and rear triangle on and you can put the plastic pieces back.

22) Put the steering riser back on and roughly inline with the new steering post.

23) Here you can see where the steering box needs to be modified and why.


24) Heat up the air box with a heat gun and use a pipe to mold it to fit around the steering post. Pictured is C3’s chromoly straight post which requires much less modifying, and is worth the price

25) Tighten the (2) 10mm bolts holding the lower block under belly pan.
26) Reinstall and tighten the (2) 16mm bolts holding the tie rods on.
27) At this point you can reinstall all the body work, dash and plastics. You will need to trim your tank shroud a bit to fit.
-SeanC


