Where did you get the shock guards? Thanks
Install the app
How to install the app on iOS
Follow along with the video below to see how to install our site as a web app on your home screen.
Note: This feature may not be available in some browsers.
My summer project is finally coming around
- Thread starter Jkinzer
- Start date
You are using an out of date browser. It may not display this or other websites correctly.
You should upgrade or use an alternative browser.
You should upgrade or use an alternative browser.
- Thread Rating
- 5.00 star(s)
J
the shock guards are a factory polaris part that can be found in their accessories catelog... i will get you a part number tomorrow... or if you're looking for a set i have another set i could sell you. pm if your interested
Last edited:
J
got the new rear axel and 8" billet ice age wheels in this morning... have the front cooler removed and will be putting in the block off plate and uhmw tonight, will post pics of all this as well... any of you guys with RMK chassis not Dragon chassis should do this mod as well... total time is about 15minutes if the skid, track and drive shaft is out of your way... if not probably about an hour job all said and done.. but its an easy cheap way to shave a little weight and get a little more clearance in the front of the tunnel, for now here's a pic of the new wheels installed


B
Man I can't wait to see my sled when it's all done. 
J
the polaris part number is 2876984 (just remember they are sold individually for 2 you need qty 2 of the part number)Where did you get the shock guards? Thanks
Man I can't wait to see my sled when it's all done.
you wish brad... if your lucky i might let you pull the trigger on a chute or two this year though
B
Sounds good to me. I will just pull the little "S" shoot or something in a few ft of pow. Sound good?
J
got the new rear axel and 8" billet ice age wheels in this morning... have the front cooler removed and will be putting in the block off plate and uhmw tonight, will post pics of all this as well... any of you guys with RMK chassis not Dragon chassis should do this mod as well... total time is about 15minutes if the skid, track and drive shaft is out of your way... if not probably about an hour job all said and done.. but its an easy cheap way to shave a little weight and get a little more clearance in the front of the tunnel, for now here's a pic of the new wheels installed

Are you putting the pipe plug in the back of the cyl head like the Dragon? If so dont forget to use the thermostat for the Dragon it has a bypass hole in it.
got the new rear axel and 8" billet ice age wheels in this morning... have the front cooler removed and will be putting in the block off plate and uhmw tonight, will post pics of all this as well... any of you guys with RMK chassis not Dragon chassis should do this mod as well... total time is about 15minutes if the skid, track and drive shaft is out of your way... if not probably about an hour job all said and done.. but its an easy cheap way to shave a little weight and get a little more clearance in the front of the tunnel, for now here's a pic of the new wheels installed

I contemplated leaving my front exchanger out, but, since I do have to ride trails here at home, I left it in.
Your 8" wheels kicks ***.:beer;
J
yes i am putting the pipe plug in and the thermostat is sittin on the shop bench waiting for the motor... thanks for the heads up though
A
Bump.. Great thread Jeremy... Keep those pics coming :beer;
J
okay here's the pics of the cooler removal and install of the uhmw block off plate. to do this you will need polaris part numbers
7052413,2520842, and 7052412. The 2520842 is the dragon coolant bottle which is not needed but gives a much cleaner look, however you can just put a slug in the hose to block it off and use the current coolant bottle. the other two part numbers are the dragon thermostat that has the proper bypass, and the pipe plug to go in the engine head.
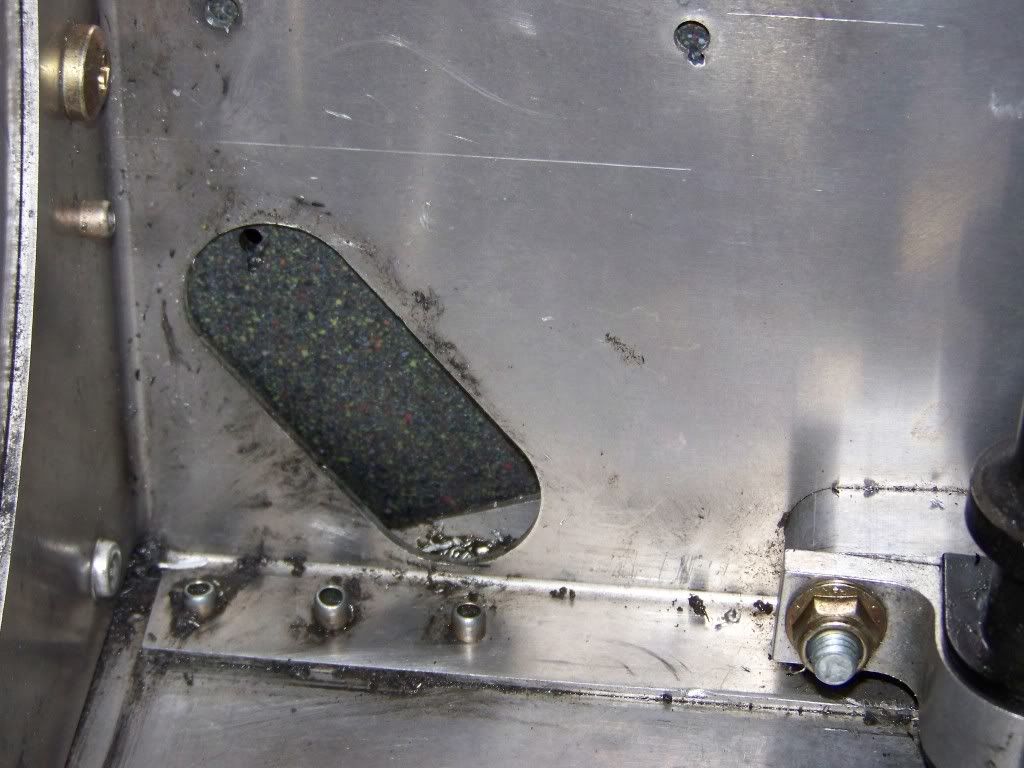
here is the cooler in the front of the tunnel
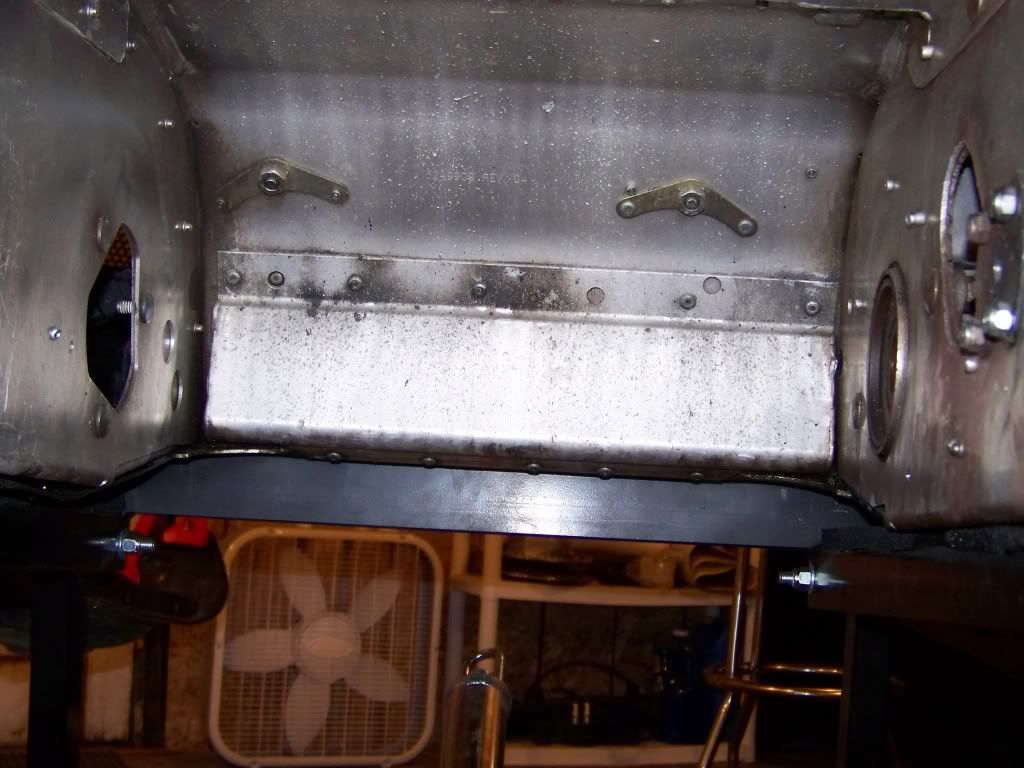
you must drill out the 10 or so rivets and the cooler will come right free
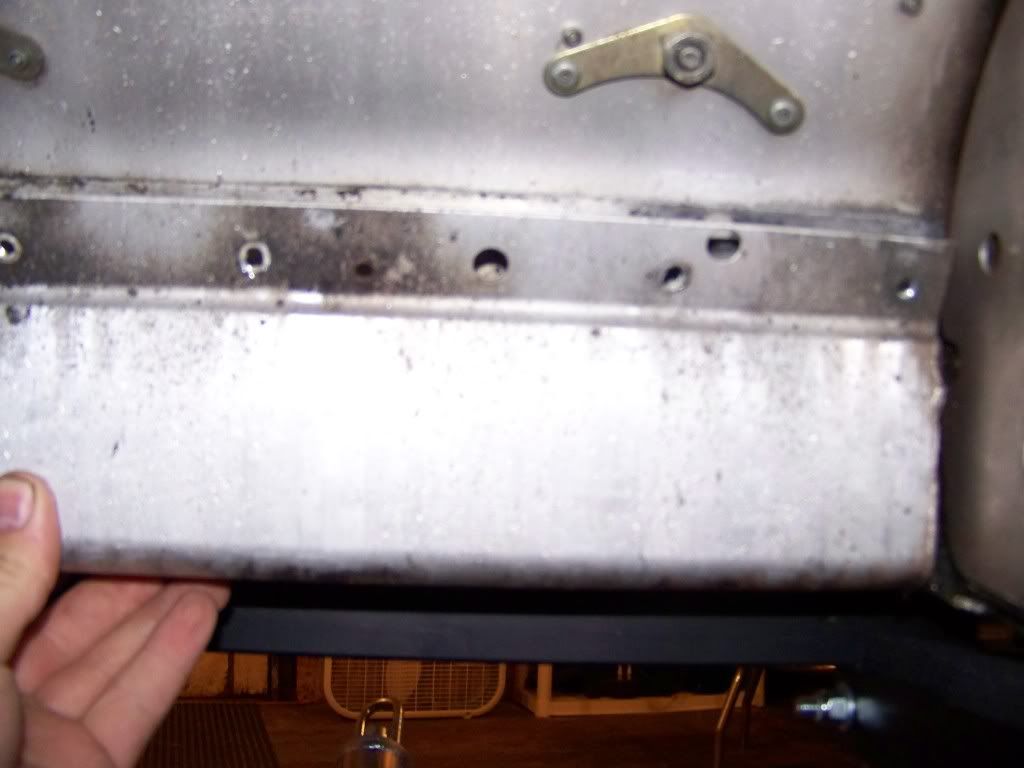
once you have the rivets out you then go to the inside and take off the two hoses to the cooler ( you can do this before you drill the rivets as well)
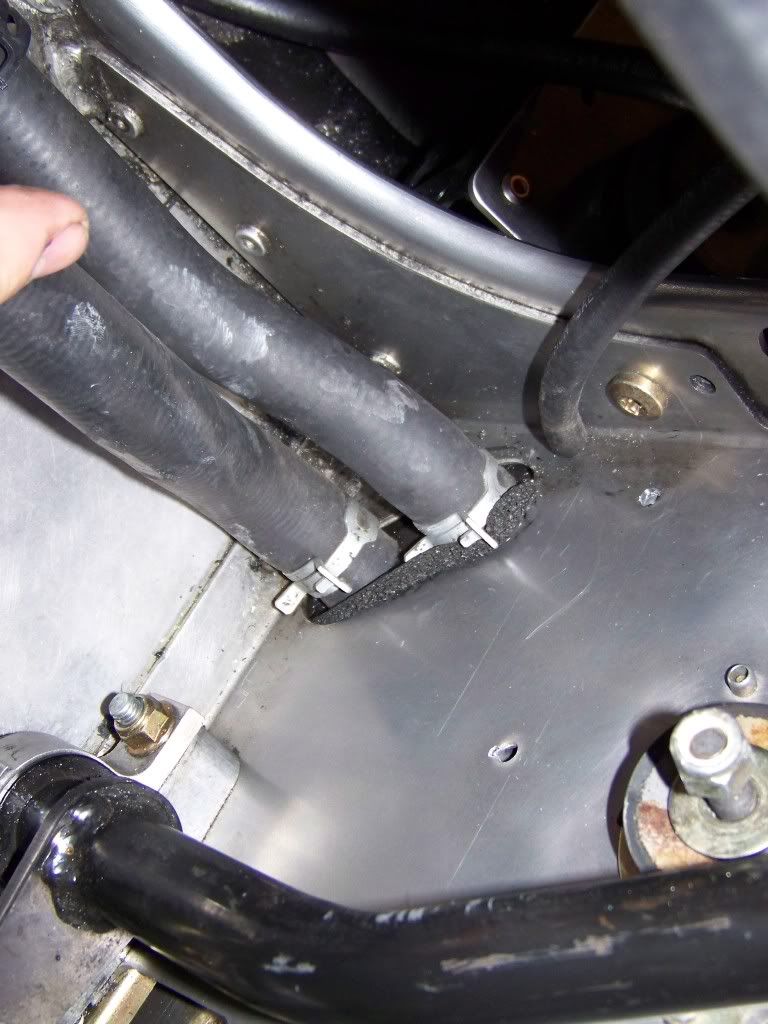
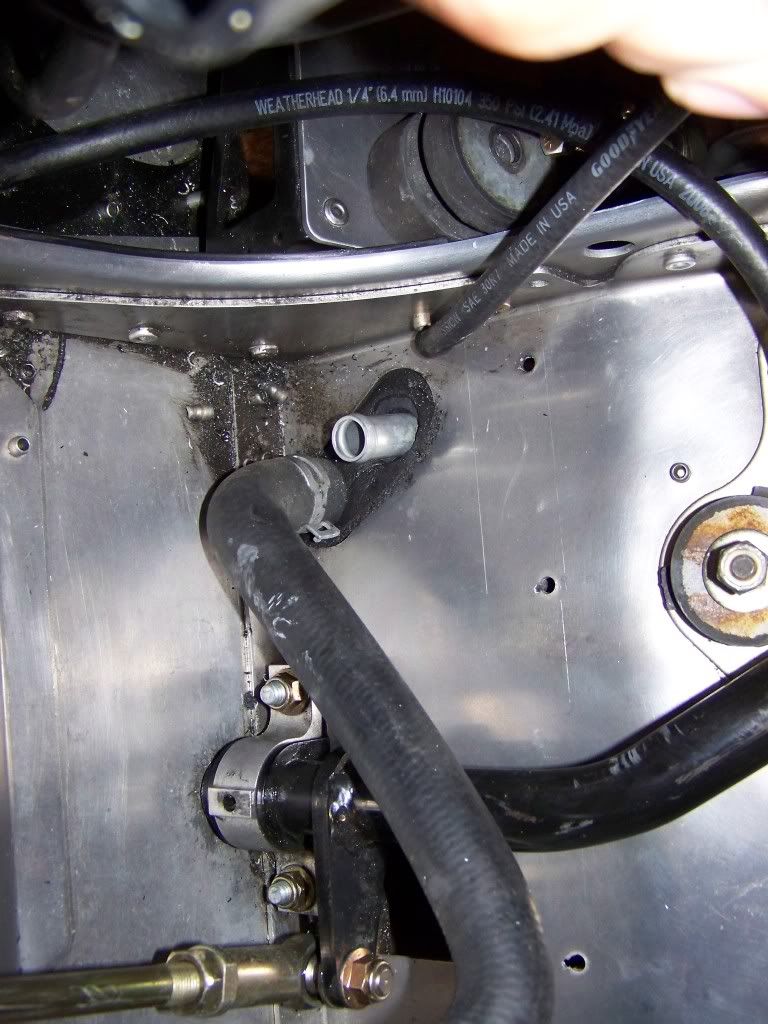
then the cooler should be free to come off the sled
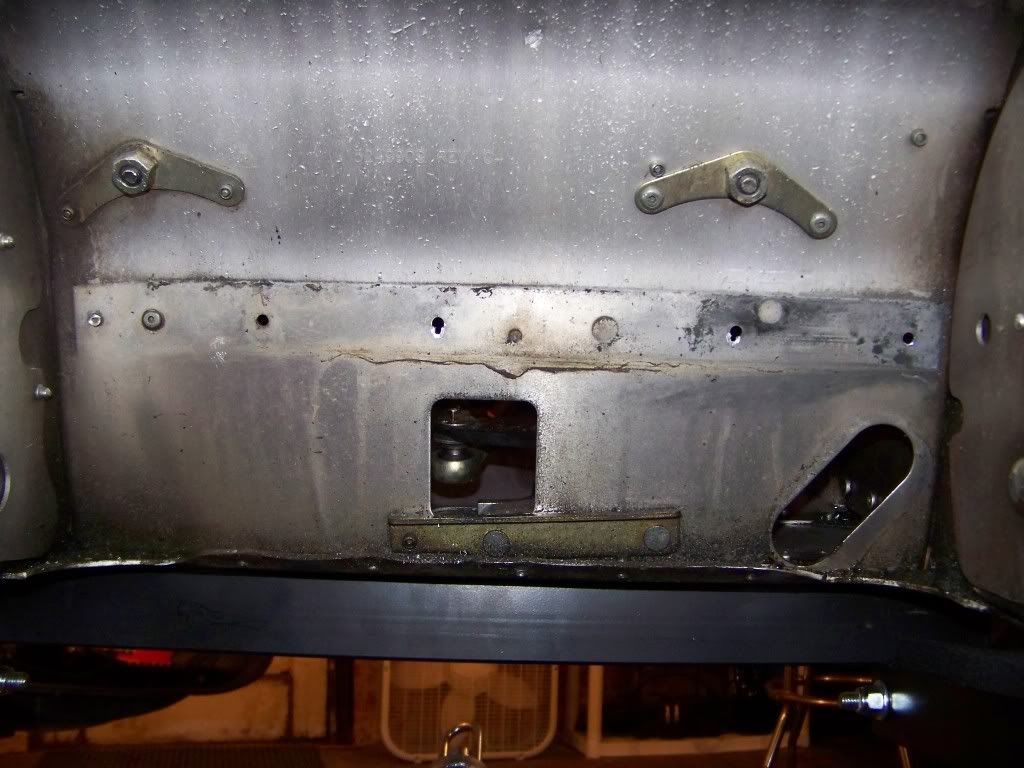
sorry for not getting a better picture of this step but you will also need to get a hammer and pound that tab that held the lower rivets of the cooler on up so it runs parallel with the bulkhead, this will give you a great mounting surface for the uhmw
7052413,2520842, and 7052412. The 2520842 is the dragon coolant bottle which is not needed but gives a much cleaner look, however you can just put a slug in the hose to block it off and use the current coolant bottle. the other two part numbers are the dragon thermostat that has the proper bypass, and the pipe plug to go in the engine head.
here is the cooler in the front of the tunnel

you must drill out the 10 or so rivets and the cooler will come right free

once you have the rivets out you then go to the inside and take off the two hoses to the cooler ( you can do this before you drill the rivets as well)


then the cooler should be free to come off the sled

sorry for not getting a better picture of this step but you will also need to get a hammer and pound that tab that held the lower rivets of the cooler on up so it runs parallel with the bulkhead, this will give you a great mounting surface for the uhmw
Last edited:
J
at this point you can clean up the bulk head and then install the new coolant bottle (or slug in the hose if you choose to use your stock bottle)
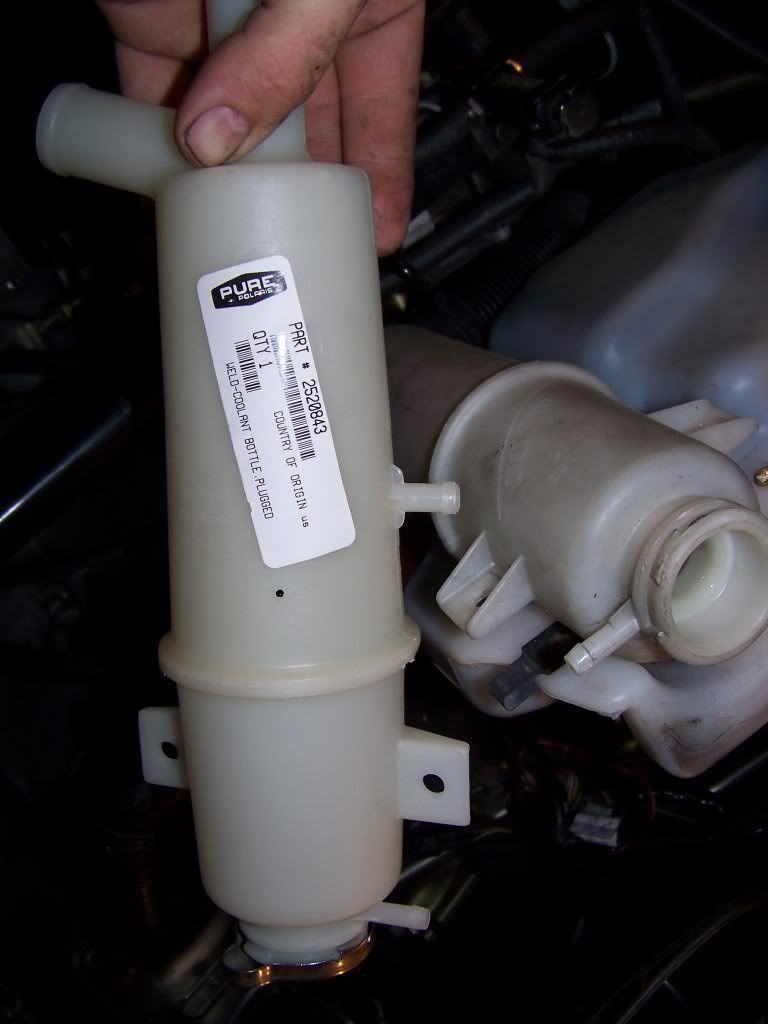
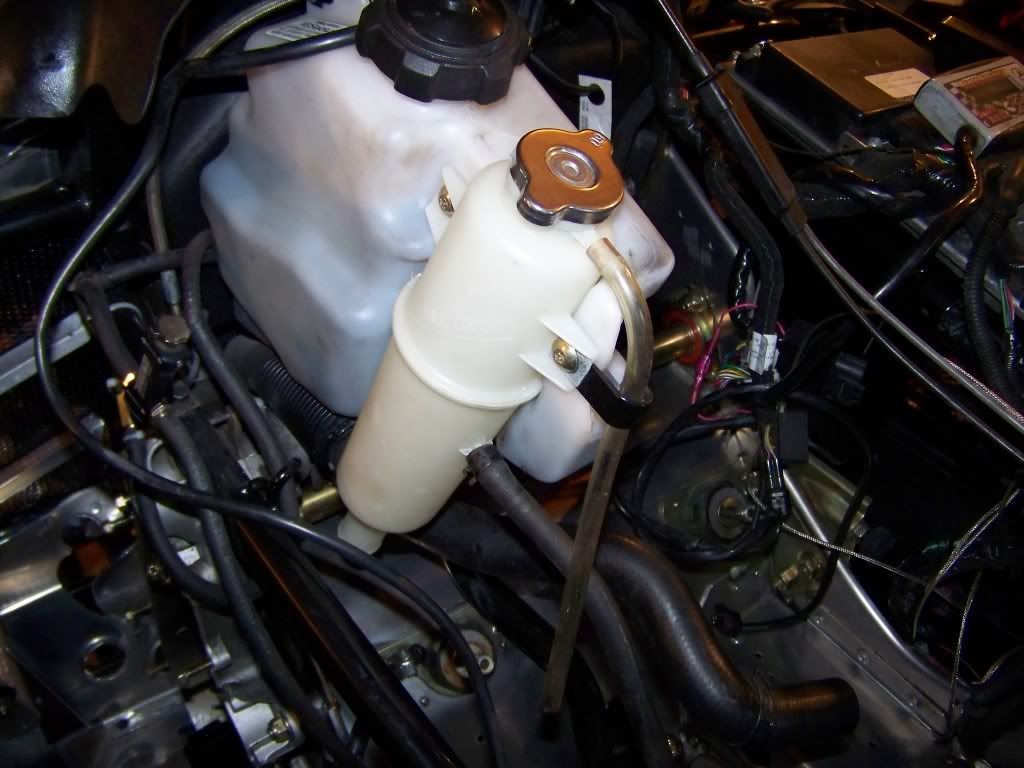
then cut a peice of uhmw the width of the tunnel and the height from the motor mount plates to the exit of the tunnel and rivit it on (probably should use coated rivets, less likely to build up with ice or snow)
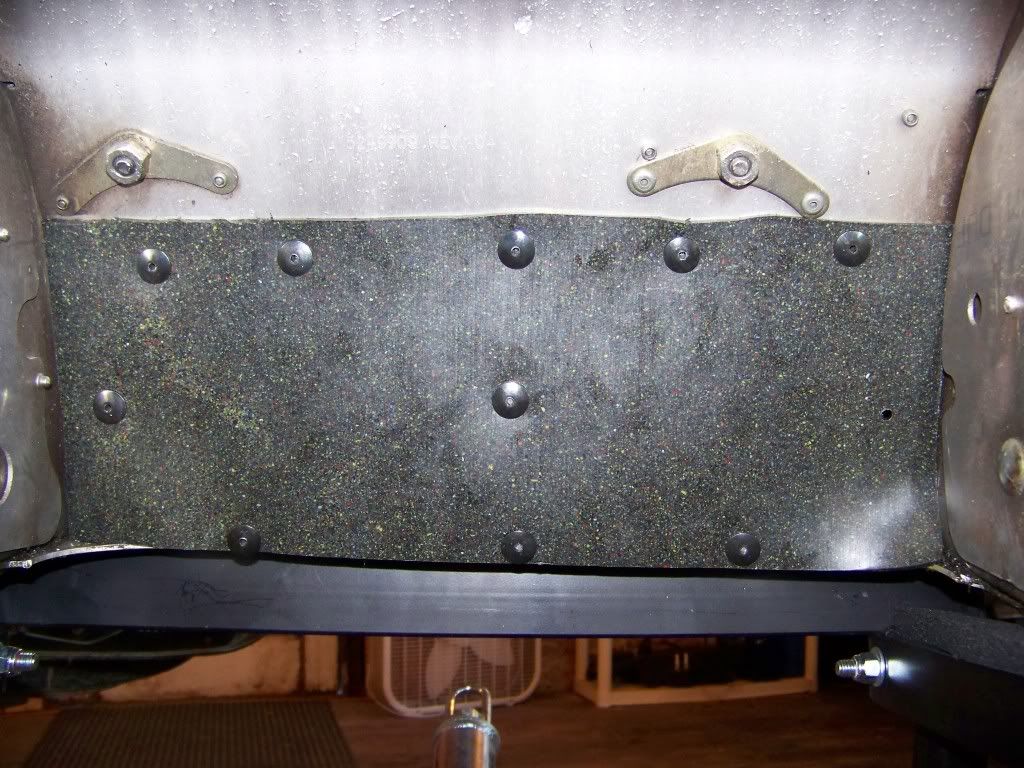
now you can cut a 3.25" plate of aluminum for a block off plate on the inside of the bulkhead where the cooler lines came through before
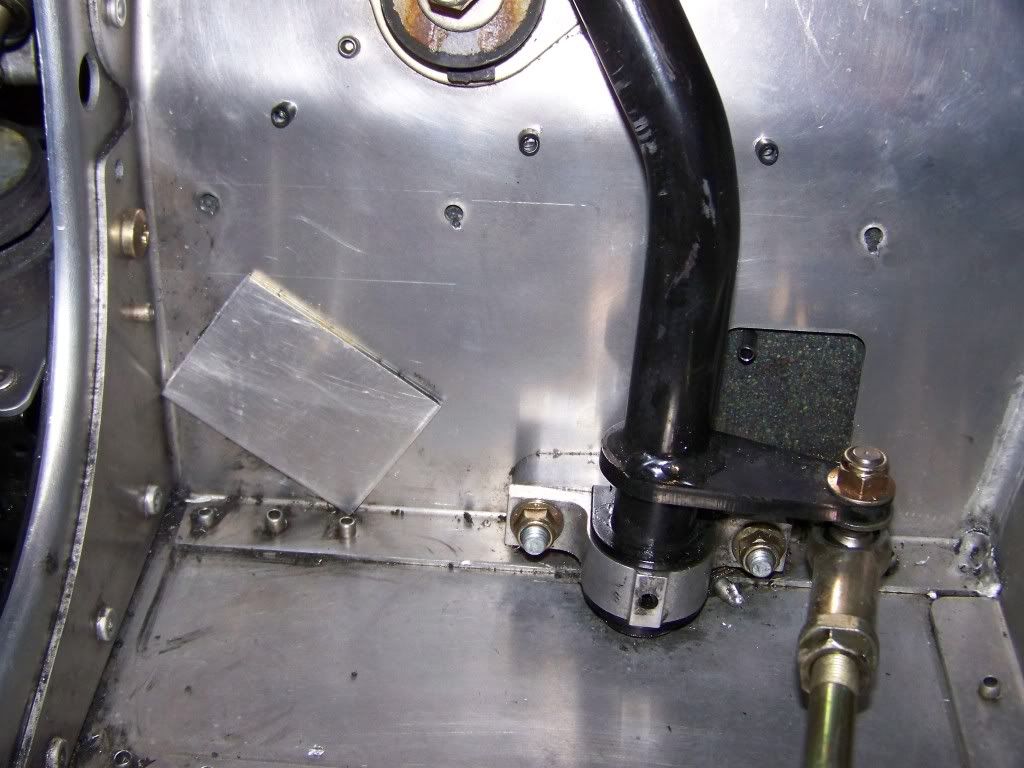


then cut a peice of uhmw the width of the tunnel and the height from the motor mount plates to the exit of the tunnel and rivit it on (probably should use coated rivets, less likely to build up with ice or snow)

now you can cut a 3.25" plate of aluminum for a block off plate on the inside of the bulkhead where the cooler lines came through before


J
i used a few rivets and some aluminum adhesive to hold this plate on
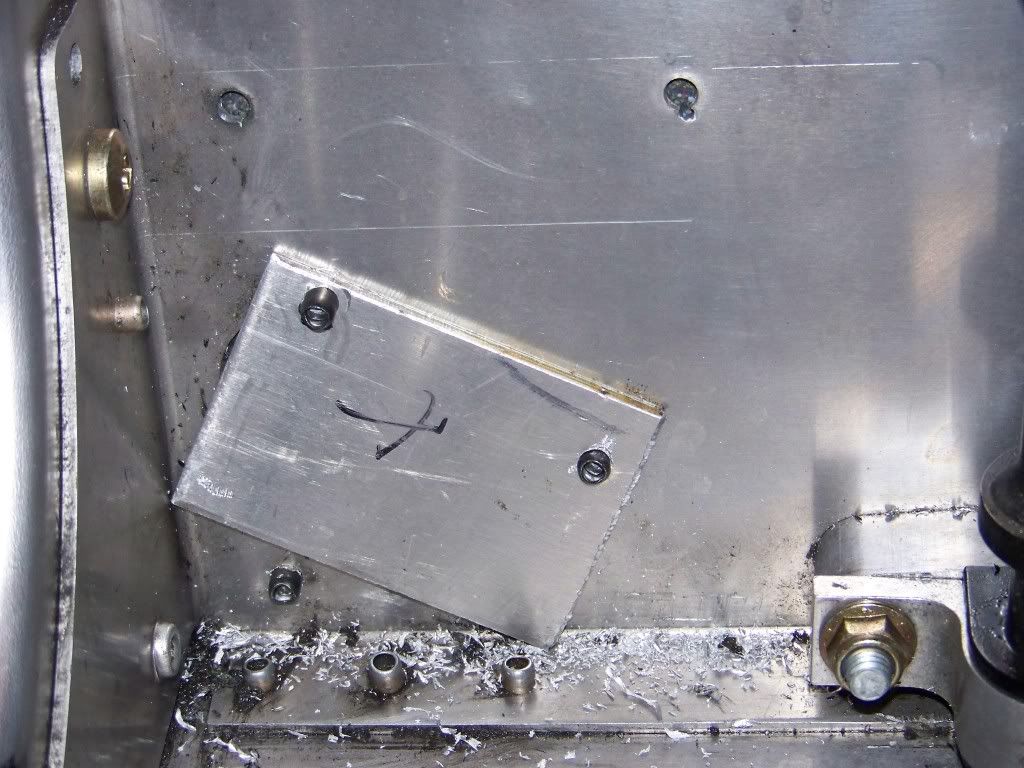
once this plate is installed you can then go back under neath and trim the bottom of the uhmw to fit properly.. i had to trim a little of the lower right corner to get it to fit up insed the tunnel snug. i then added some extra rivets just for re-assurance.
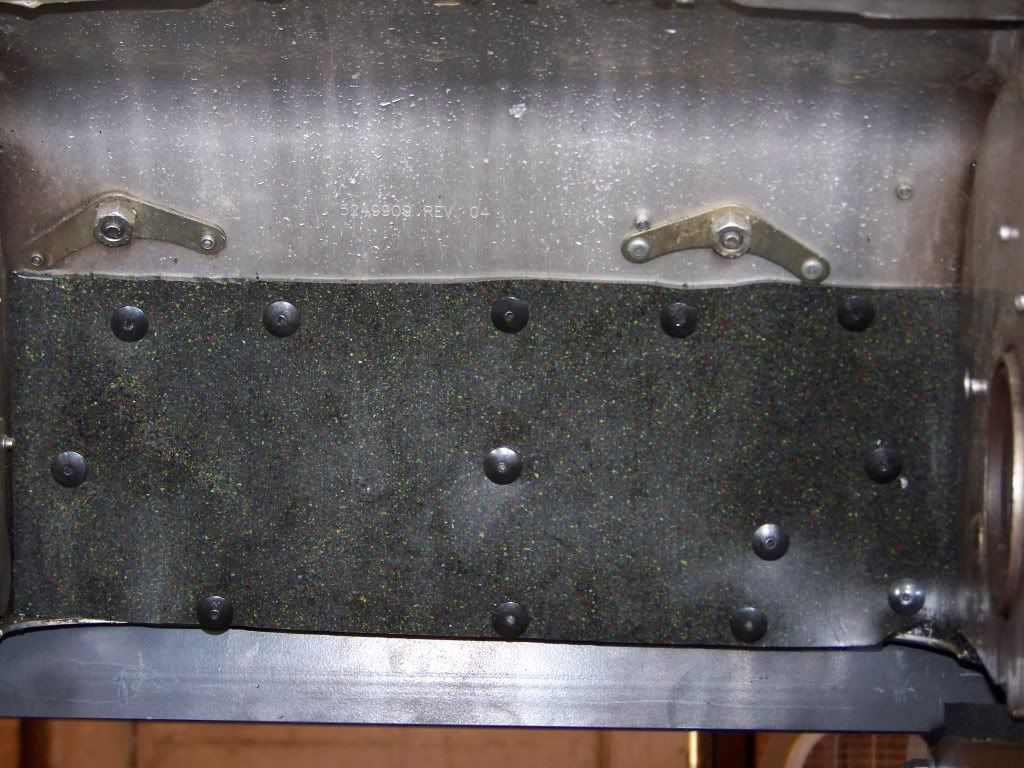
and your done! well you still have to put the plug in the motor and install the new thermostat but i dont have my motor back yet so i dont have any pics of those steps.
by using the uhmw plastic though you create a super slick surface in the front of the tunnel and should gain aruond .15" more clearance.

once this plate is installed you can then go back under neath and trim the bottom of the uhmw to fit properly.. i had to trim a little of the lower right corner to get it to fit up insed the tunnel snug. i then added some extra rivets just for re-assurance.

and your done! well you still have to put the plug in the motor and install the new thermostat but i dont have my motor back yet so i dont have any pics of those steps.
by using the uhmw plastic though you create a super slick surface in the front of the tunnel and should gain aruond .15" more clearance.
Last edited:
A
UHMV down the length of the tunnel?
Jeremy,
Are you planning to install the UHMV down the length of the tunnel to assist in shedding ice/ preventing build up??
Mountainhorse's post is below saying once the drivers and track are out it is a highly recommended mod..
"Simple solution that I cant figure out why Polaris doesnt do... Get a piece of 15.25" wide , 1/16 thick UHMW plastic that is long enough to
wrap inside the tunnel from where the coolers end in the front and wrap to where it exits the tunnel... Rivet that piece of plastic to the inside to the tunnel... There will be NO SNOW or ICE build up in that area PERIOD!!"
The only problem is that you have to pull the skid, track and driveshaft to install it...
Cost for plastic and rivets.... cheap... Thoughts??
Great thread and follow up w/ pics keep up the good work.
akrevrider
Last edited:
J
J
Jeremy,
Are you planning to install the UHMV down the length of the tunnel to assist in shedding ice/ preventing build up??
Mountainhorse had posted something about that and said once the drivers and track was out it is a highly recommended mod??
"Simple solution that I cant figure out why Polaris doesnt do... Get a piece of 15.25" wide , 1/16 thick UHMW plastic that is long enough to
wrap inside the tunnel from where the coolers end in the front and wrap to where it exits the tunnel... Rivet that piece of plastic to the inside to the tunnel... There will be NO SNOW or ICE build up in that area PERIOD!!"
The only problem is that you have to pull the skid, track and driveshaft to install it...
Cost for plastic and rivets.... cheap... Thoughts??
Great thread and follow up w/ pics keep up the good work.
akrevrider
no... i'm not just in the front where the cooler used to be... i couldnt find any uhmw locally so i had a chunk over nighted to me from a factory up north... and the stuff they sent me wasnt as thin as i was hoping for... but this was a last minute idea and i didnt have the time to send it back and get thinner material. with the material that i have it would hinder the clearance to wrap it all the way to the coolers in the top of the tunnel roof. so i just made it about 2" taller than the dragon block off plate up to the bottom of the rear motor mount plates.
Last edited:
J
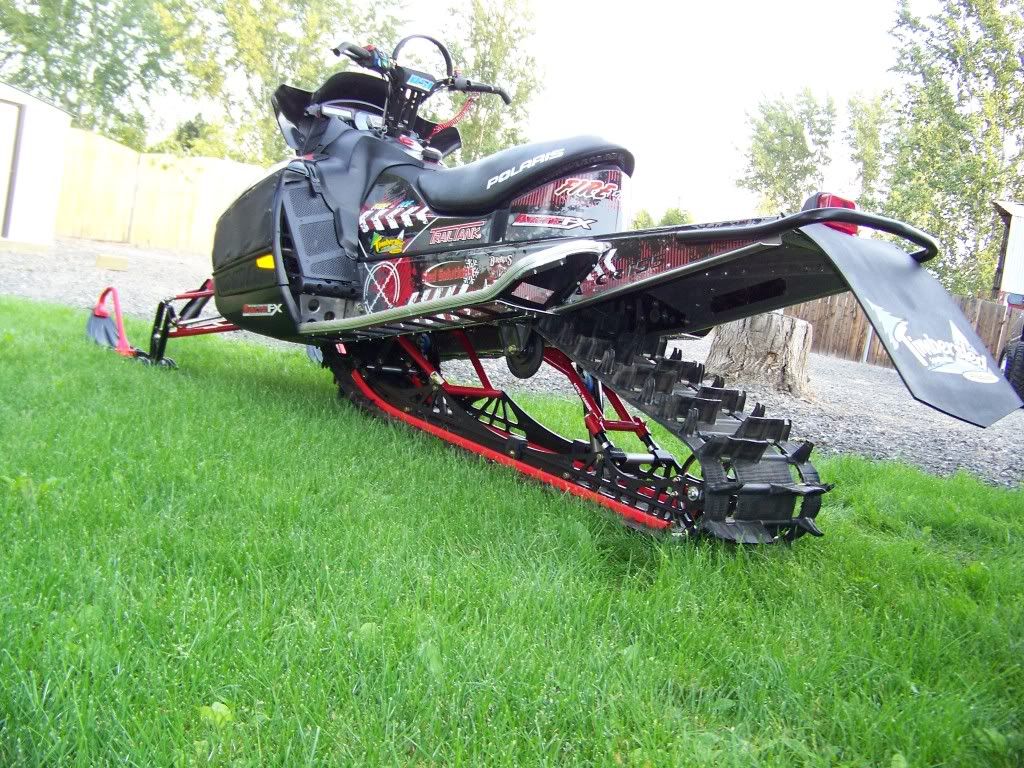
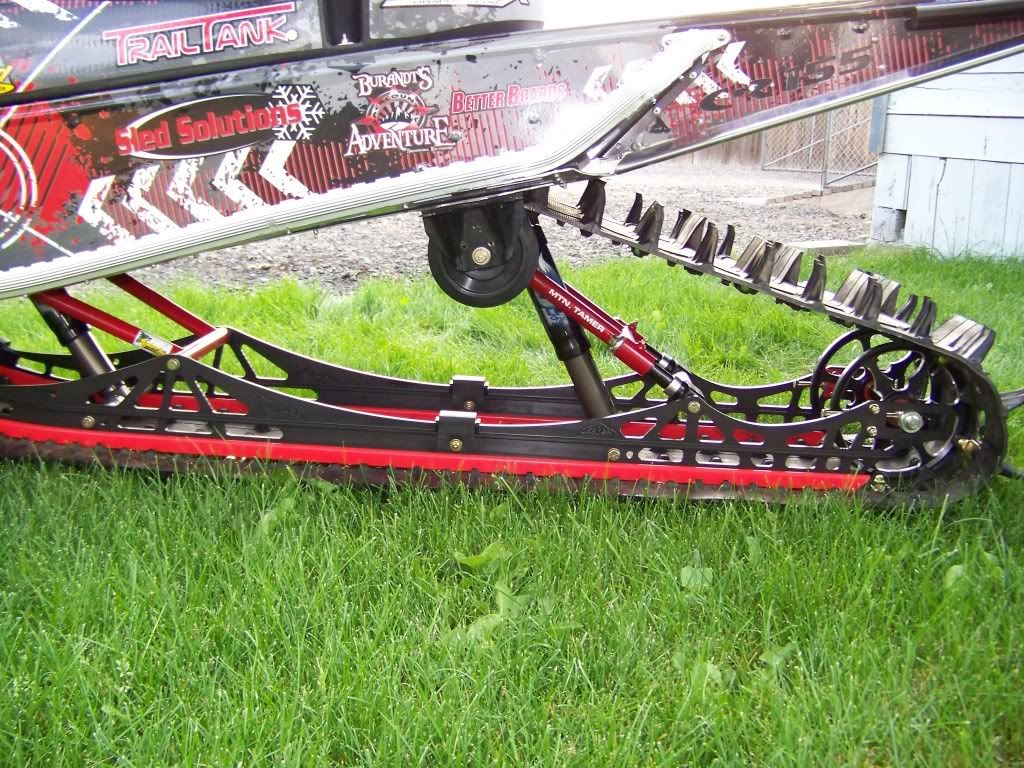
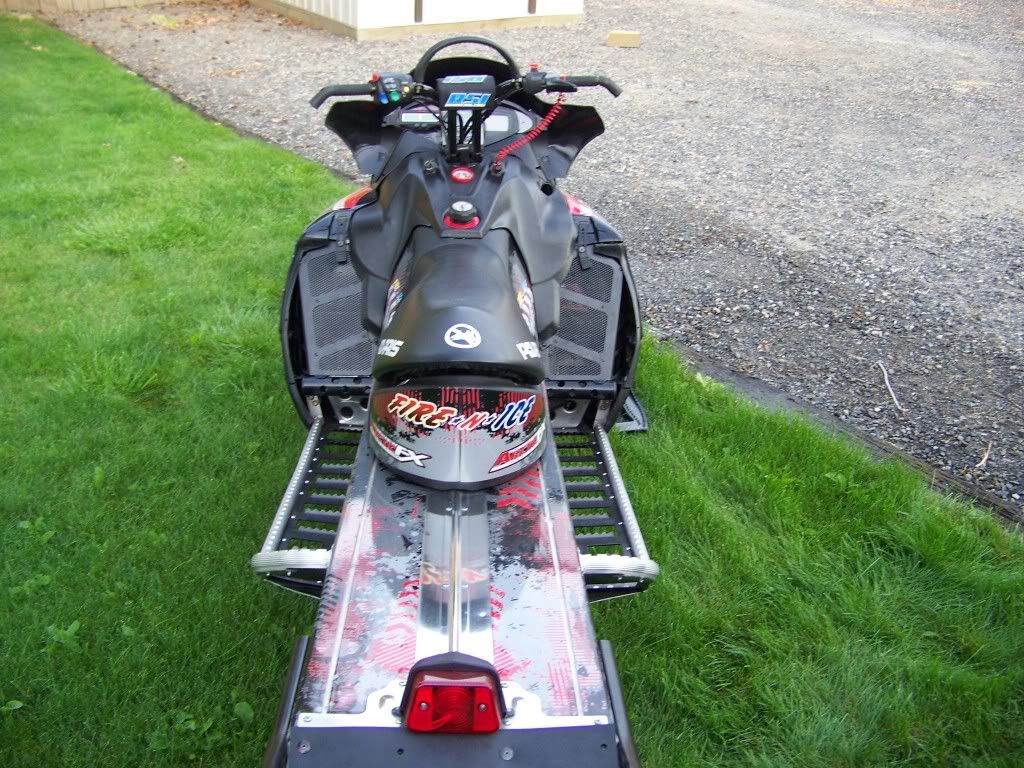
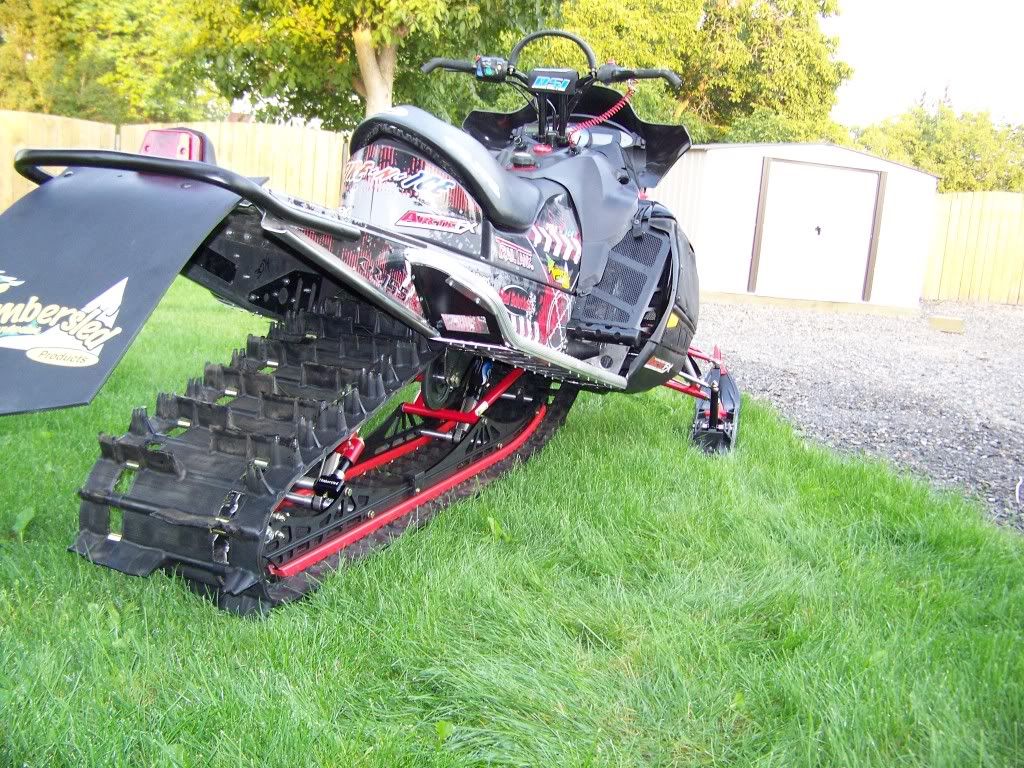
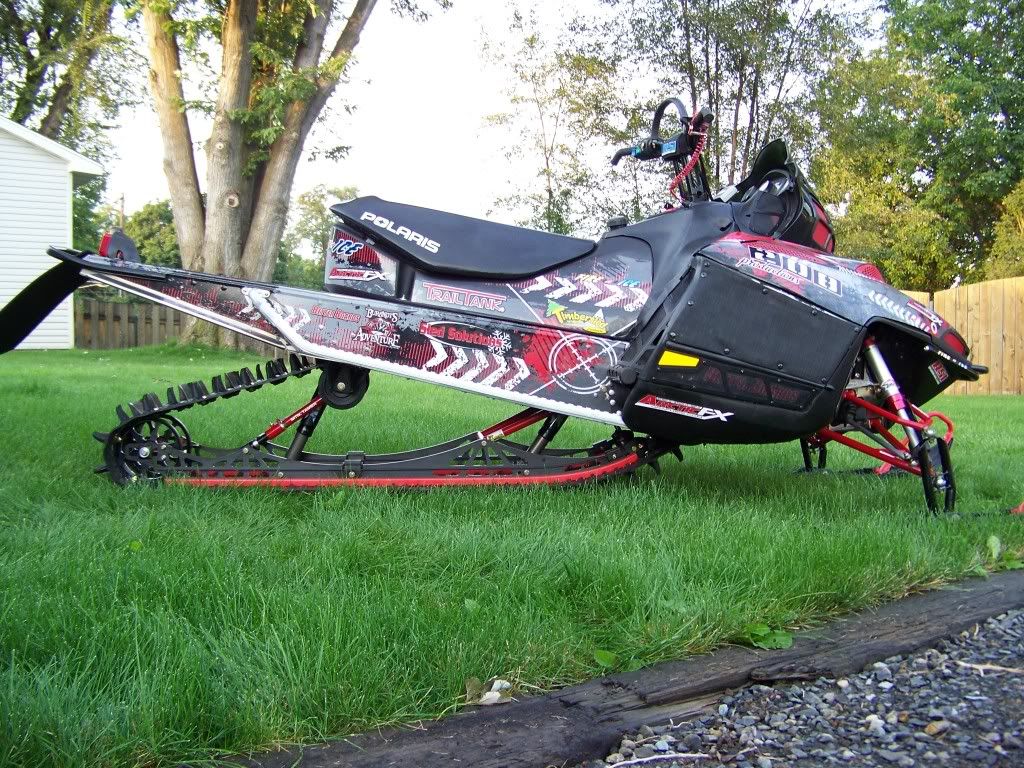
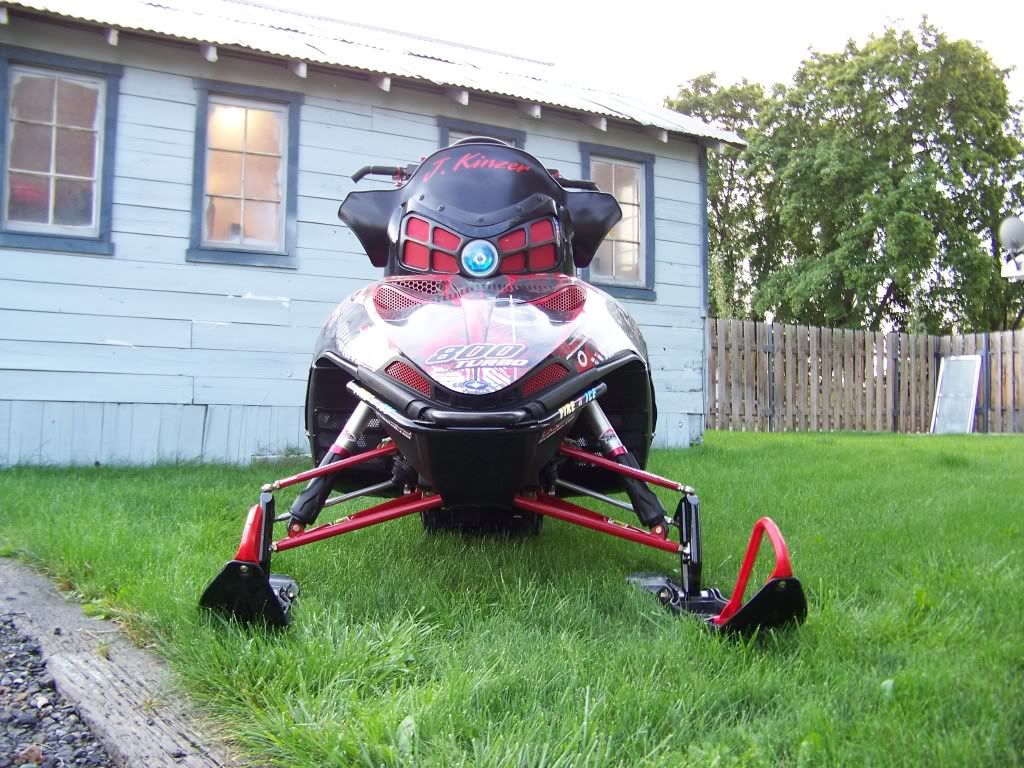
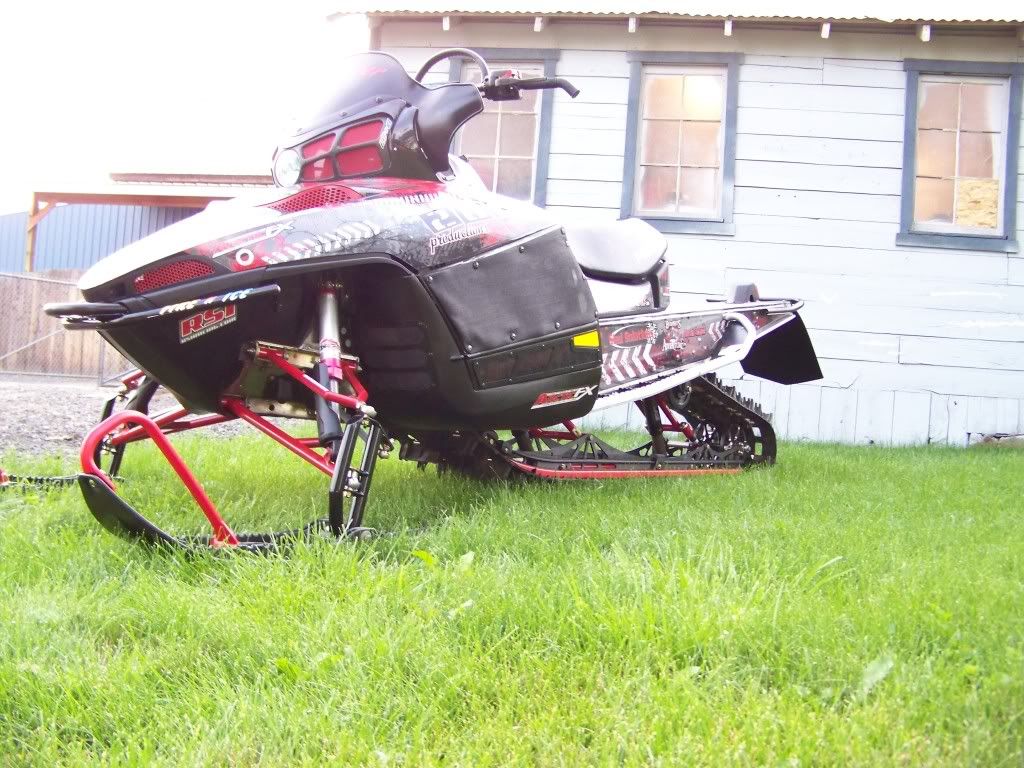
made the trip up to allens yesterday just outside of sandpoint. Got the new 2010 barkbuster and timber sled suspensions installed. i must start off by saying allen has the shop of all shops! and his personaly project this year is a real head turner.. the attn to detail on that thing is unreal! if its not powder coated or painted its chromed, about the only stock thing left on the sled is the console. With that said, allen is a great stand up no bull chit kind of guy, it was nice to finally meet him and get to chat while we did the installs. the new 2010 mtn tamer is the real deal! the ammount of adjustability is a little much at first but once allen explained it all and how it worked in reference to your sled when your actually riding it, it made a lot of sense and was pretty simple to follow. the big changes over last years suspension is the dual limiter straps over the single, and the duals have about 15 adjustment holes for the limiter strap position so you can go from mild to wild pretty easy. also the shock mounts got moved forward.. the old mount holes are still there in teh rails if you prefer them that way. but the new mounts make the suspension about 30% stiffer which will really help keep skis on the ground. after we finished up with the installs allen took us over to the timbersled facility and i must say that it is hands down the cleanest shop i have been in, the next closest being his shop at his house. i was really impressed to see that they make everything in house, from the bending and cutting, to the machine work, to the welding..the even machine all the delrin bushings in house, you name it they do it. i cant wait to get this baby on the snow! here's a few pics


J
WOW...all i can say..love it..
Similar threads
B
- Replies
- 6
- Views
- 2K
F
H
- Replies
- 16
- Views
- 2K
C
- Replies
- 34
- Views
- 8K
D
M
- Replies
- 6
- Views
- 3K
S


