• Don't miss out on all the fun! Register on our forums to post and have added features! Membership levels include a FREE membership tier.

Used Burandt boards. Needed hardware?

X

xc6rider

Well-known member
Jan 12, 2009
1,484
484
83
Iowa
Got a set of used burandt boards i plan to install on my '12.

Any known specifics on what hardware ill need to pick up? Assuming this should be fairly straight forward without having the templates etc, just a little added time looking at pix and finding my cut lines.

Thanks guys!
 

LoudHandle

Well-known member
Lifetime Membership
Apr 21, 2011
3,900
2,775
113
Valdez, AK
If you'd have posted this a day or two sooner I could have sent a couple install kits with the head. Anyway PM me if you want the instructions,template, rivets, and bolts that come with them new.
 

tuneman

Well-known member
Lifetime Membership
Jan 16, 2013
1,167
1,205
113
Minnesota
www.everettsports.net
Here's what you need, or at least what I can think of at the moment:


  1. 3/16" x 1/4" long stainless steel rivets (enough for all the holes)
  2. 3/16" x 1/2" long, wide flange aluminum rivets (you need 4 for the front holes)
  3. 3/16" x 12" long aircraft drill bit (readily available at Home Depot or any hardware store)
  4. Air saw or angle grinder
  5. black marker
  6. Masking tape(to prevent scratching anything you don't want)
  7. A quality 3/16" drill bit (for the rivets)


  • Drill out the rivets of the outer tube, unbolt it front and back and remove.
  • Rough cut the existing board in half (so that you can bend down the edges sticking up for the next step)
burandt_boards.JPG


  • Lay your new board on top and lightly bolt the front and back. Bend down any metal that sticks up and interferes.
  • Trace the outline of the new board on the existing metal. This is your cut line
  • Trim the existing metal with your air saw, or whatever tool you have
  • Carefully trim around the drop brackets
  • The front most tunnel side rivet hole requires you to reshape the aluminum a bit to make it fit
burandt_boards_2.JPG


  • Bolt on new board
  • Trim away plastic at front that sticks out from front most large hole
  • Use your aircraft bit and drill out the rivet holes.
  • Install rivets from underneath. Use the long, large flange rivets for the front 2 holes on each board that go thru the plastic. (Aluminum rivets can be used here, since it's not that structural. Large flanged stainless are hard to find.)
  • Go ride.
 
Last edited:

ullose272

Well-known member
Premium Member
Aug 18, 2009
3,372
963
113
boise idaho
Here's what you need, or at least what I can think of at the moment:


  1. 5/16" x 1/4" long stainless steel rivets (enough for all the holes)
  2. 5/16" x 1/2" long, wide flange aluminum rivets (you need 4 for the front holes)
  3. 5/16" x 12" long aircraft drill bit (readily available at Home Depot or any hardware store)
  4. Air saw or angle grinder
  5. black marker
  6. Masking tape(to prevent scratching anything you don't want)
  7. A quality 5/6" drill bit (for the rivets)


  • Drill out the rivets of the outer tube, unbolt it front and back and remove.
  • Rough cut the existing board in half (so that you can bend down the edges sticking up for the next step)
burandt_boards.JPG


  • Lay your new board on top and lightly bolt the front and back. Bend down any metal that sticks up and interferes.
  • Trace the outline of the new board on the existing metal. This is your cut line
  • Trim the existing metal with your air saw, or whatever tool you have
  • Carefully trim around the drop brackets
  • The front most tunnel side rivet hole requires you to reshape the aluminum a bit to make it fit
burandt_boards_2.JPG


  • Bolt on new board
  • Trim away plastic at front that sticks out from front most large hole
  • Use your aircraft bit and drill out the rivet holes.
  • Install rivets from underneath. Use the long, large flange rivets for the front 2 holes on each board that go thru the plastic. (Aluminum rivets can be used here, since it's not that structural. Large flanged stainless are hard to find.)
  • Go ride.
everything is 3/16 not 5/16
 
X

xc6rider

Well-known member
Jan 12, 2009
1,484
484
83
Iowa
Awesome guys, thanks!

Loudhandle, ill let ya know if i'd decide to use that stuff. Ill be waiting to get my engine back together before i start this. Had just remembered i have them sitting in the garage.
 
X

xc6rider

Well-known member
Jan 12, 2009
1,484
484
83
Iowa
Thank you Tuneman!

Been a LONG season of $hit for me... I've had these used boards laying around since spring, and finally installed them.

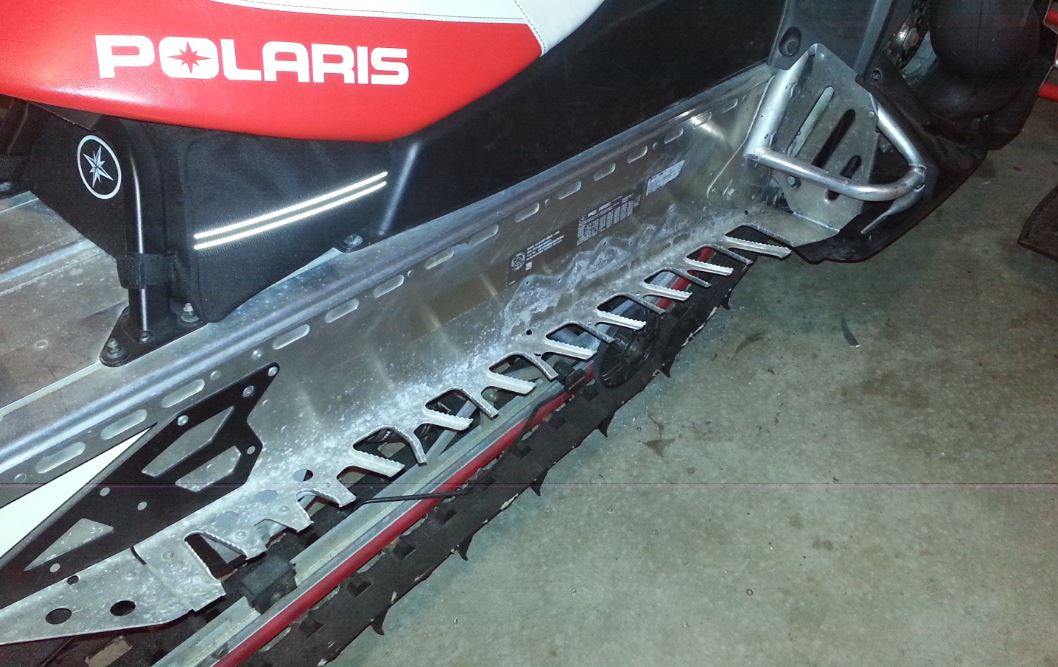
I went and bought the 3/16" rivets mentioned above, and basically followed Tunemans instructions to a T. Got a few new 3/16"drill bits, as well as the 12" aircraft bit (essential!). No template etc...

I used a 24t blade on a cordless sawzall for the big cuts (first take of half the stock boards). Also used a pneumatic air saw for a lot of fine tuning cuts. And a die grinder with a small carbide I have, for smoothing, cleaning up edges. Also, used a super duty rivet gun, regular handheld pop-rivet gun will prob work,but you'll feel like you rubbed one out for a month solid!


It's a pain in the @ss. Especially when it's your own sled ;)


I wasted all night doing this, but went very slow and continually checked things. First cutting, essentially destroying a perfectly good tunnel, swirls in your mind!

Take the time, lay things out, look it over, repeat. Keep doing it until you know you're good, and eventually it'll start to look like what you expect.

I did run into a couple holes that look as though they are worthless, regardless of how careful I was cutting. Freaked me out, but it was unavoidable it appears.

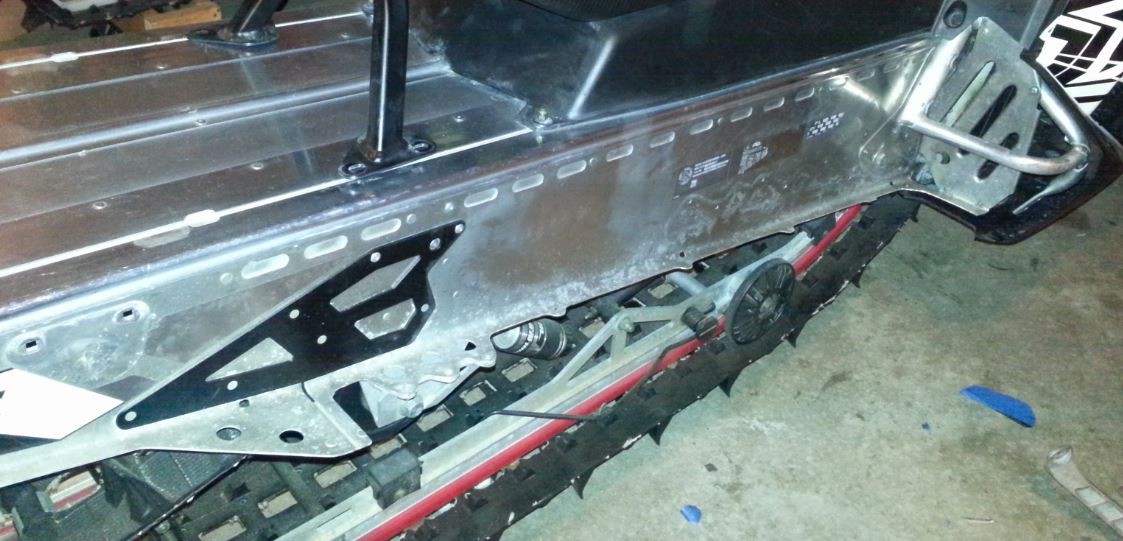
I still have a little cleaning up I'll do with my grinder, but overall I'm very happy. These are gonna be a great upgrade.


Don't attempt this if you don't have a good supply of tools and understanding, it's fairly simple, but pretty crucial!

image.jpg
 
Premium Features