• Don't miss out on all the fun! Register on our forums to post and have added features! Membership levels include a FREE membership tier.

Pro 800 top end rebuild

Thread Rating
5.00 star(s)
D

Danbot

Well-known member
Nov 29, 2007
1,696
967
113
Alberta, Canada
I am just starting to install a MTNTK fix kit in my 13 Pro. Since I could not easily find a "how to" thread on this, I have a few questions.

What is your preferred place to disconnect the fuel rails, and hoses for cylinder removal?
It looks like I can leave the rail, and injectors attached to the cyl's, any reason to do otherwise?
Can I leave the fuel lines attached to the rail, and disconnect at the tank?

Thanks in advance!
1900 miles PTO-101 MAG-102 at 4100'
 

gmustangt

Well-known member
Lifetime Membership
Aug 10, 2009
1,443
495
83
Two bolts holding the fuel rail to the cylinder just undo those then unplug the injectors from the wiring harness. The fuel rail with hoses will come off as a unit.
Note thre will be a little green rubber washer in the injector bore.
 
S

SU27

Well-known member
May 4, 2013
206
70
28
Edmonton
I am just starting to install a MTNTK fix kit in my 13 Pro. Since I could not easily find a "how to" thread on this, I have a few questions.

What is your preferred place to disconnect the fuel rails, and hoses for cylinder removal?
It looks like I can leave the rail, and injectors attached to the cyl's, any reason to do otherwise?
Can I leave the fuel lines attached to the rail, and disconnect at the tank?

Thanks in advance!
1900 miles PTO-101 MAG-102 at 4100'

Just pull out whole injectors bar, making sure you get green injector rings out of cylinders. Do not leave injectors in cylinders - you will need to hone cylinders (mandatory). So, you do not want metal dust in injectors. As well, make sure you cover/wrap injectors right after pulling out of cylinders - they`re super gentle.
 
G

garett87

Member
Aug 26, 2009
41
11
8
Saskatchewan
Also, check your reeds while you have everything apart. Just tore mine down and found my reeds are garabage. Lots of worn edges and even some chunks missing. 2500 miles on them
 
D

Danbot

Well-known member
Nov 29, 2007
1,696
967
113
Alberta, Canada
Thanks guys, I removed the rail first like you suggested. Everything went smooth, and my engine is back together.
I did check my reeds, they were in great condition.

I'll finish burping the coolant, and heat cycling the engine tomorrow. Then I'll get an "after" compression test.
 
R

rmscustom

Well-known member
Jun 8, 2010
2,181
1,801
113
Do not drop the green injector washer into your crankcase when removing the cylinders:face-icon-small-win... A lot of fishing with some solder may occur if you do:face-icon-small-hap
 

gmustangt

Well-known member
Lifetime Membership
Aug 10, 2009
1,443
495
83
Do not drop the green injector washer into your crankcase when removing the cylinders:face-icon-small-win... A lot of fishing with some solder may occur if you do:face-icon-small-hap

Better yet keep an eye on those cylinder dowels, one of those slips in bye bye motor!

Glad it went smoothly!
 
D

Danbot

Well-known member
Nov 29, 2007
1,696
967
113
Alberta, Canada
Someone definitely should do a How to thread on doing the top end, I would like to do mine before I turbo

For what it's worth, Ill throw out what I learned. I took a few pics along the way, and it's fresh in my mind.
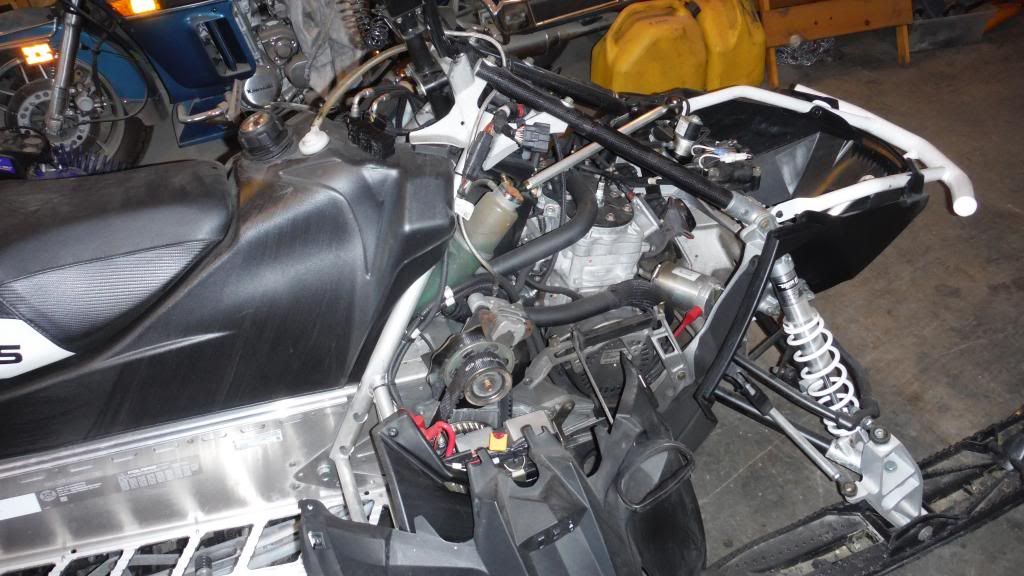
Start by removing:
-side panels
-hood
-console
-over-structure
-oil bottle/clutch cover
-upper air intake duct
DSCF0266_zpsdf1efaa8.jpg


I left the coils, and VES solenoid attached to the over-structure, just cut some zip ties and disconnect the wiring.
DSCF0272_zps12f4e91c.jpg

DSCF0274_zps8dee684e.jpg


Have a bolt ready to plug the oil hose when you disconnect it from the bottle, almost zero mess if you are quick.
DSCF0273_zpsbe06869b.jpg


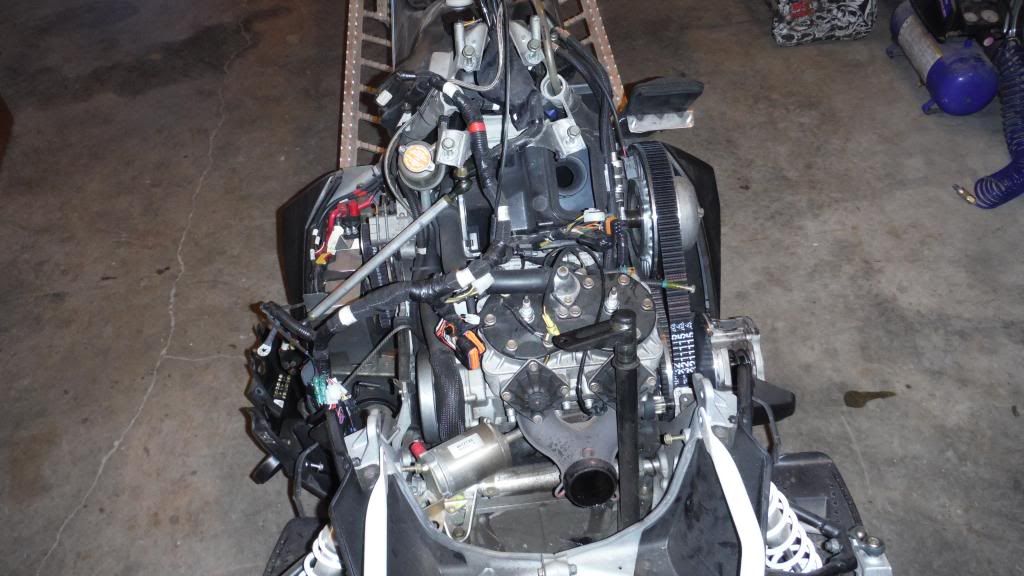
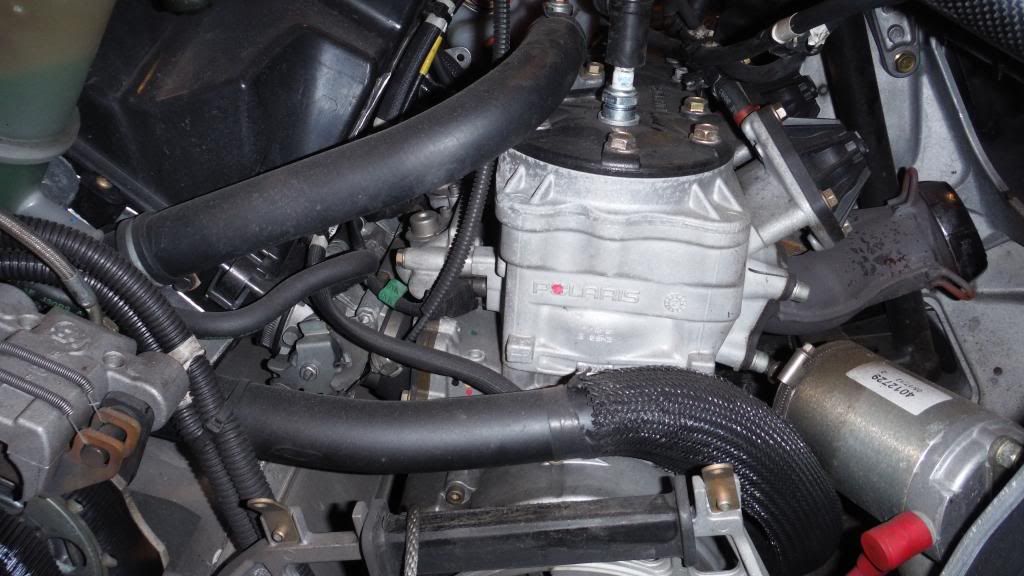
Next I dealt with the fuel system.
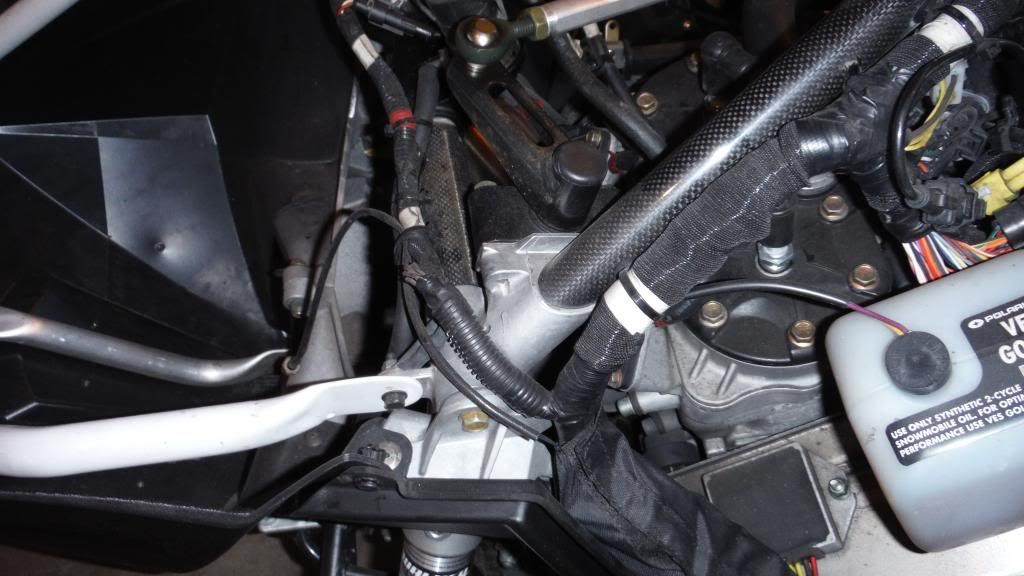
Disconnect the hoses at the tank, and removed the 2 bolts securing the fuel rail to the cylinder block. There are also 2 alen head bolts that hsecure the injector wiring to the throttle body to remove. The rail pulls out easily, but as mentioned above... keep a close check on the green o-rings that will likely stay in the cylinder ports but could easily get away from you. The TPS wiring is tangled up with the injector wiring so you will have to cut some more zip ties. In this pic below, you can see one of the 2 bolts that secure the fuel rail to the cylinder block.
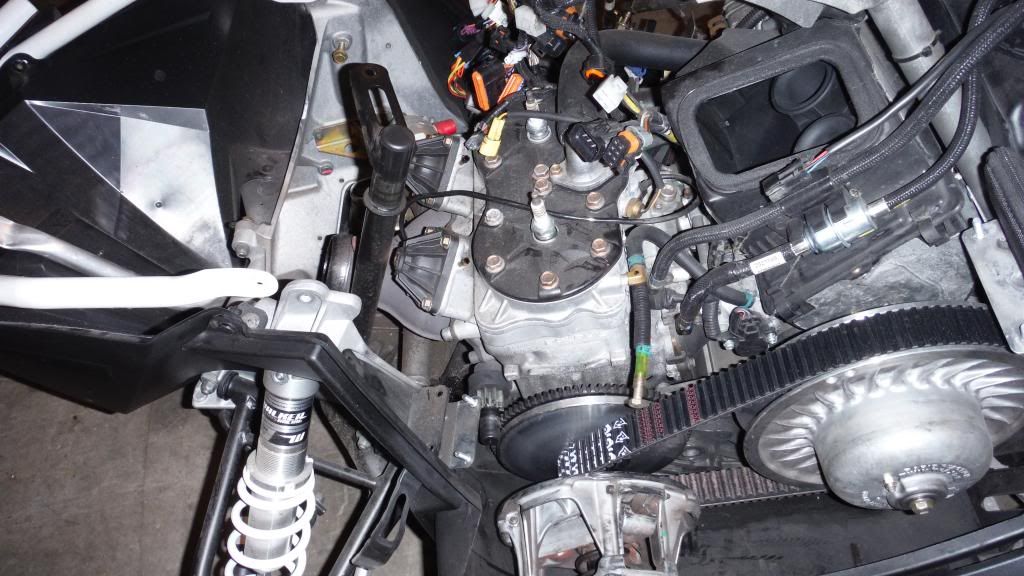
DSCF0270_zps2566ec73.jpg


Coolant draining.
This is best done with a wet/dry shop vac. I disconnected the upper hose from the thermostat housing first. I jam the end of the shop vac hose into the coolant hose, and then remove the thermostat housing, and the thermostat itself. The shop vac will suck out almost everything. There is also a small coolant hose from the throttle body to the head that must be disconnected.

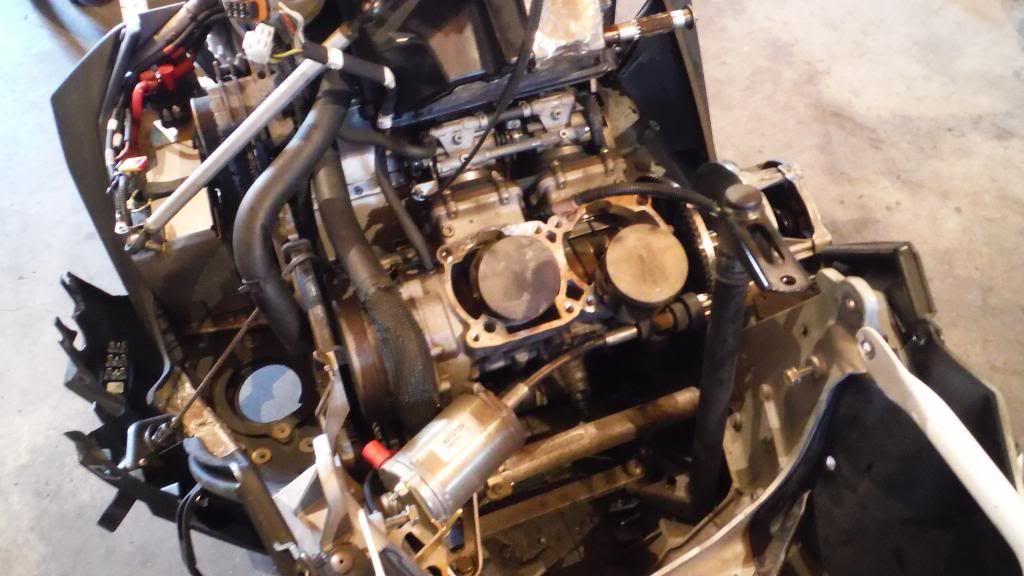
Now you are free to remove the head cover, head and cylinders. This is as straight forward as it gets. Use a rubber mallet to free the parts once the bolts are removed. There are 2 cylinder locating dowels at each rear outside corner.
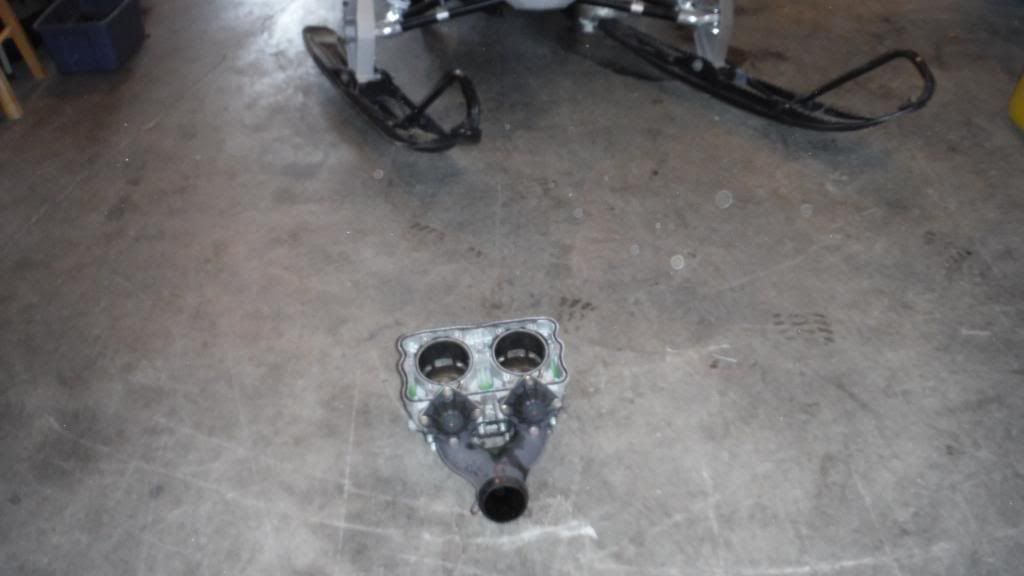
As you can see I chose to strip the y-pipe, VES and such on the bench. I wont go into detail here, it's the same parts polaris has been using for years, very basic to work on. It's obviously a good time to cean the VES system, and check the bellows. I did not have the proper hone, so I farmed it out to a buddy who does.
DSCF0275_zpse1b6e204.jpg

DSCF0276_zpsf1ff1ff3.jpg


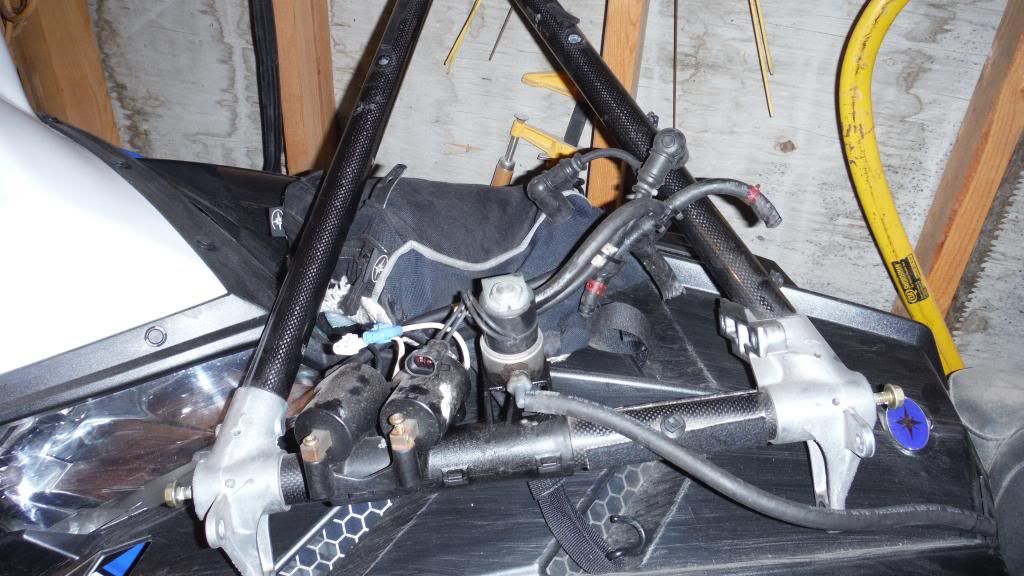
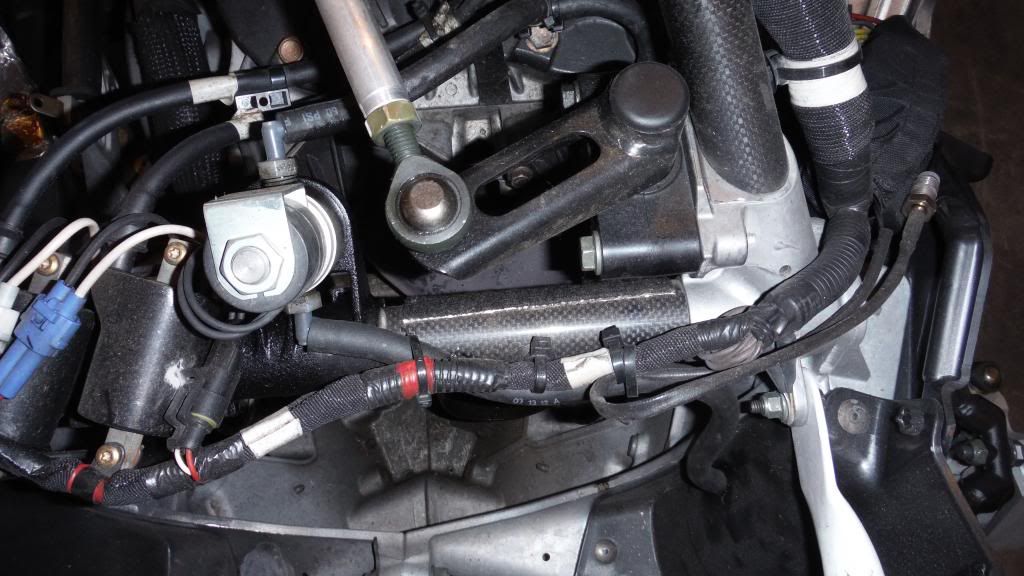
Here are some pics I took of wiring and hose routing "just in case"
DSCF0268_zps47dfaa4f.jpg

DSCF0267_zps748c9826.jpg

DSCF0269_zpsfb9b2a96.jpg

DSCF0270_zps2566ec73.jpg


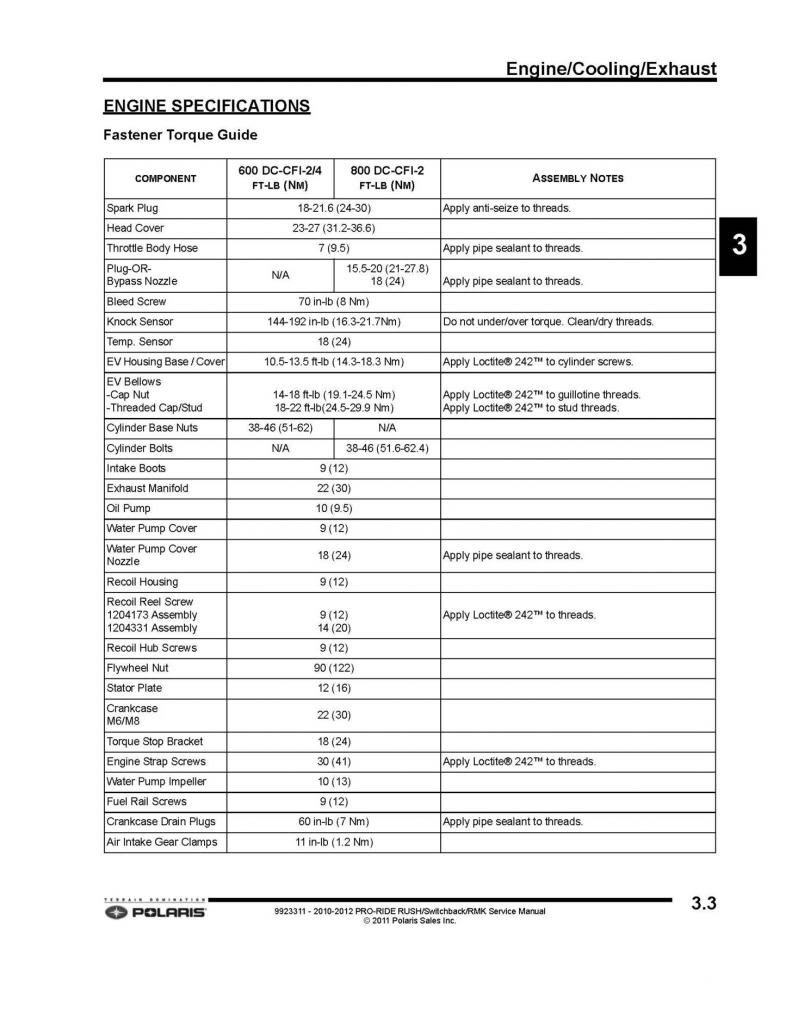
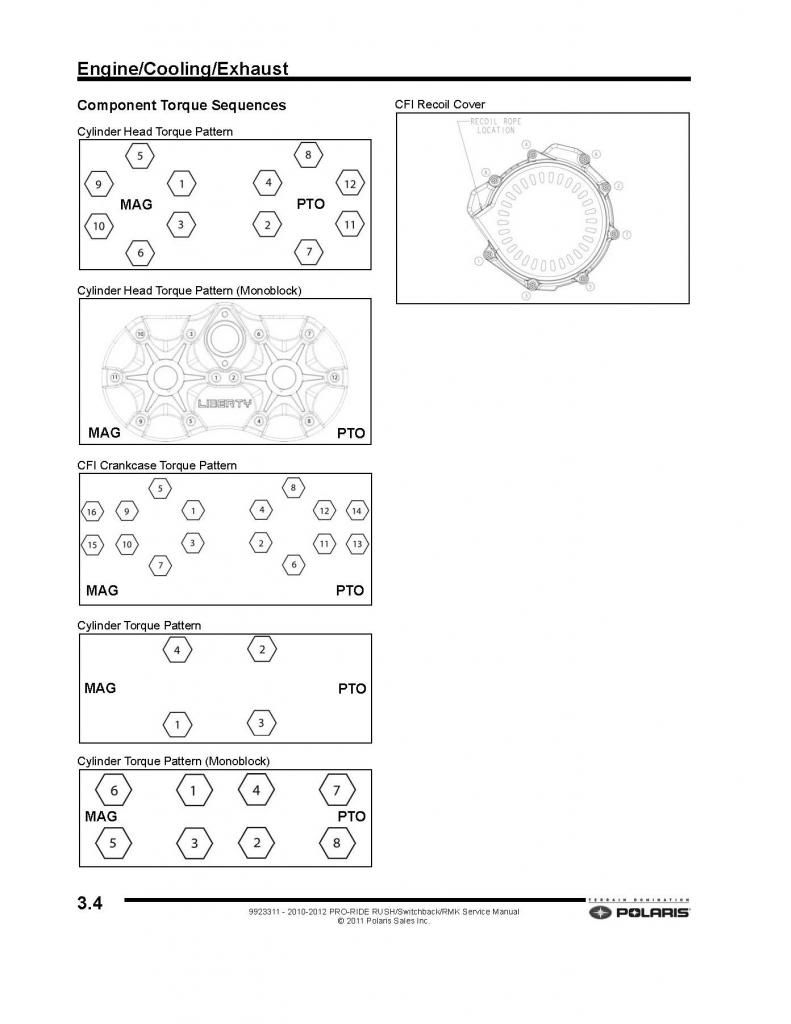
These are from an older manual, 2012 if I remember right:
Enginespecpagesfromserviceman_Page_1_zps2f6000f1.jpg

Enginespecpagesfromserviceman_Page_2_zps68d7c97d.jpg


I'm sure I left alot out, so feel free to add to this info, or correct me if I messed up on something.

Dan
 

skibreeze

Well-known member
Lifetime Membership
Dec 4, 2005
10,463
3,477
113
Colorado Springs
Just a note on the shop vac trick.

I stuff a long small hose down the coolant tank and then put the other end in an empty antifreeze jug. Then just put the vac on the jug long enough to get the siphoning going, then let gravity take it's course. Then take off the coolant hose from the bottle and repeat. This leaves the coolant clean and ready for reuse.
 
J
Mar 9, 2008
86
17
8
Haven't done this, but I did put an aftermarket head on. My question is, do you realy have to remove the over structure. If I'm remembering correctly, I thought there was probably enough clearance to slide the cylinders off under neath it.
 
D

Danbot

Well-known member
Nov 29, 2007
1,696
967
113
Alberta, Canada
Haven't done this, but I did put an aftermarket head on. My question is, do you realy have to remove the over structure. If I'm remembering correctly, I thought there was probably enough clearance to slide the cylinders off under neath it.

I wasn't 100% sure, but It's already a little tricky lining up 2 pistons / 4 rings in the mono block cylinder... I figured the more room the better. It's about 10 minutes work to remove the over-structure and I think it would save you at least that much time after with better access.
 
R

Rev Kev

Well-known member
Nov 27, 2007
377
145
43
Lapeer Michigan
I wasn't 100% sure, but It's already a little tricky lining up 2 pistons / 4 rings in the mono block cylinder... I figured the more room the better. It's about 10 minutes work to remove the over-structure and I think it would save you at least that much time after with better access.

I agree, I just finished up installing Bikeman's Reliability kit in My 11' Pro, and the time removing the over structure was well worth it, access is so much easier trying to fight 2 pistons and the mono cylinder.
 

beamslayer

Well-known member
Premium Member
Nov 29, 2007
944
314
63
65
I have a couple of ? did you check for cracked skirts , did you check bore and out of roundness , check ring end gap ,who honed your cylinders and what type of hone and what grit did you use and how did you clean up the cylinder when done.
Did you check bottom base gasket to make sure none of it stuck out into the ports same with exhaust gaskets?
 
R

Rev Kev

Well-known member
Nov 27, 2007
377
145
43
Lapeer Michigan
I have a couple of ? did you check for cracked skirts , did you check bore and out of roundness , check ring end gap ,who honed your cylinders and what type of hone and what grit did you use and how did you clean up the cylinder when done.
Did you check bottom base gasket to make sure none of it stuck out into the ports same with exhaust gaskets?

For Me, I sent took My Cylinder to the local Auto machine shop, they did a light hone, and checked Cylinder Skirts for cracks, I was good to go, No issues. I checked all measurements my self, cylinder taper, out of round, cylinder to piston clearance, and ring end gap. Only thing I had to adjust, was a light file to the rings, to get gap within specs, it was .002 too tight. The Cylinder took a trip in the Dishwasher before reassembly. I find it amazing how many guys rebuild an engine and simply toss parts at it without double checking any measurements.
 
Premium Features