
B
For quite some time I've been weary of messing with the clutching on my sled, the entire principle of a centrifugal clutch baffled me, as much as I wanted to learn clutching so I can make repairs and adjustments on my own I've always been a bit stand offish and not willing to make that leap (especially during the riding season). After watching Video, after video (Thanks Joe!) and harassing many of you here on snowest, (Thanks t-rev8, Winter Brew, and Team-Ind) I finally attempted it, and while I haven't been out on a ride with the newly updated clutch yet.(fingers crossed). I found all my worries and fears to be utterly unfounded, it really is as simple as Joe makes it look in the vids!
Please feel free to comment, or ad any tips and advice. I do have a couple questions I will pose at the end.
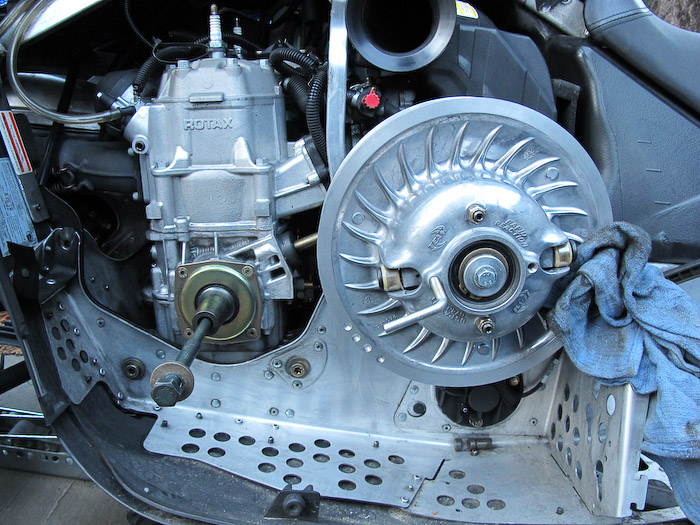
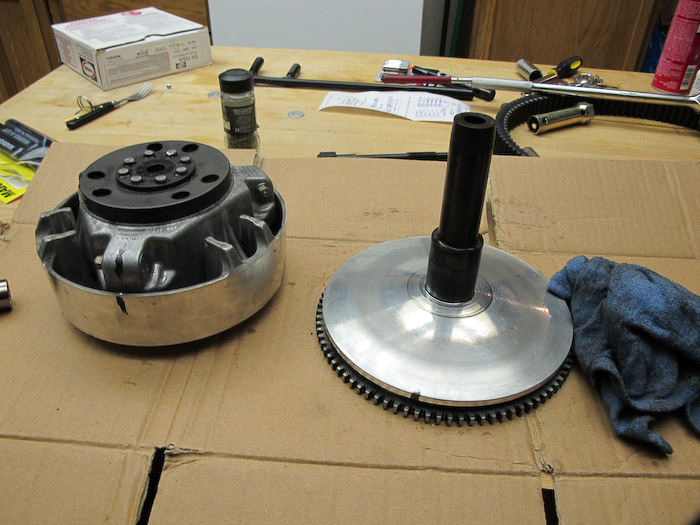
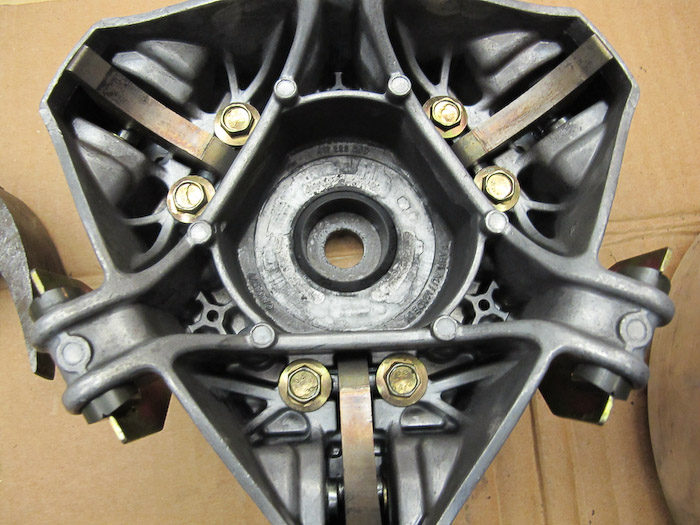
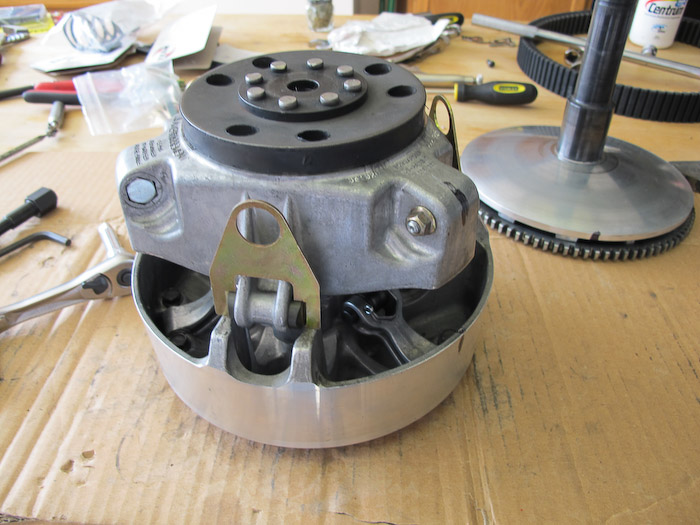
Getting started (removed the bevel and separated the secondary to remove the belt)

I wasn't unable to split the sheaves via the rubber mallet method, and ended up having to use a clutch puller, and clutch holder to pop off the primary. I also had to use a breaker bar to get it to pop it took quite a bit of force. Be careful when doing this as it popped off with such force it almost bounced off the trailer onto the floor (luckily I caught it!)
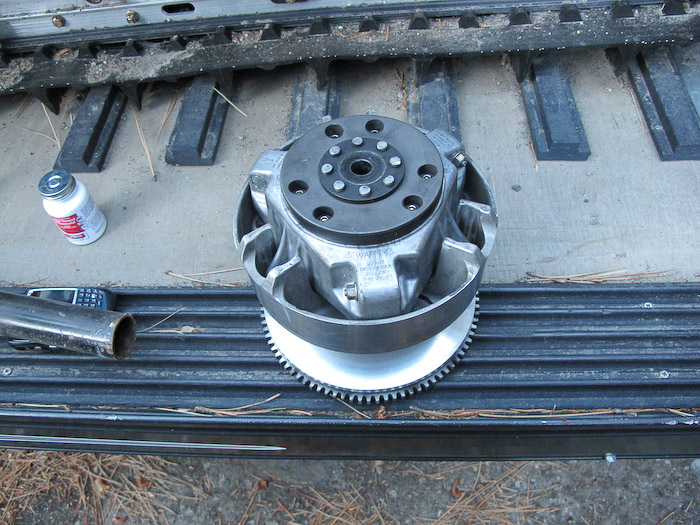
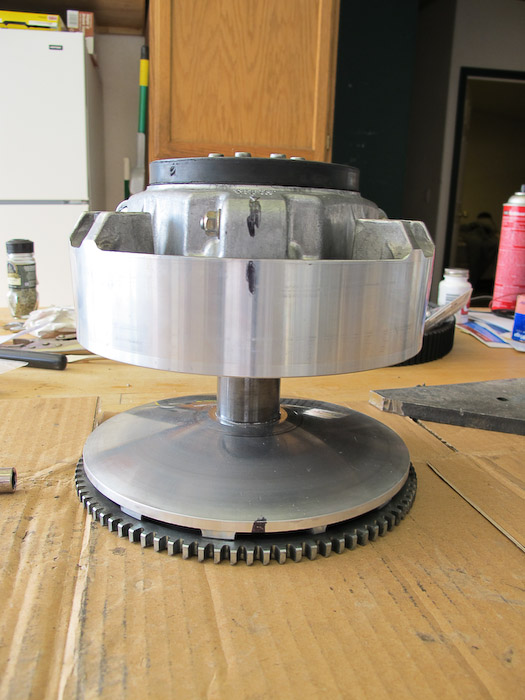
Here is the primary clutch removed as one piece & the breaker (roll bar tubing from the '69)
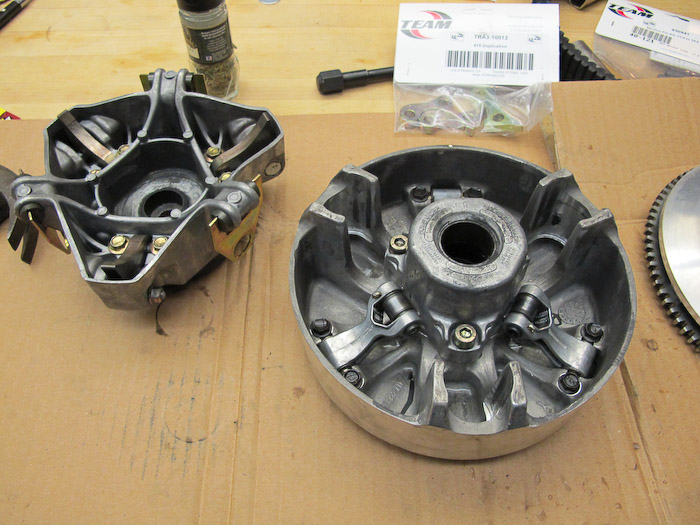
Before attempting to separate the sheaves I marked them all with a marksalot to make sure I realigned them correct on re-assembly.
Separating the sheaves wasn't coming along very easy I was whacking on the puller with a hammer but no dice. Thanks to a tip I heard from Joe (via his videos on youtube http://www.youtube.com/watch?v=92C7CZuHe2I) I soaked the clutch in hot water.
After heating it up, a couple wacks later with my trusty hammer and poof we were apart!
I purchased some button retainers from team. The first time separating the movable sheave thingy, it's a little tricky as it doesn't pull up even.. (luckily popping the buttons back on and locking them in place with the retainers is pretty simple if you accidentally pull one side higher then expected before you get the retainers on..
Here she is all apart
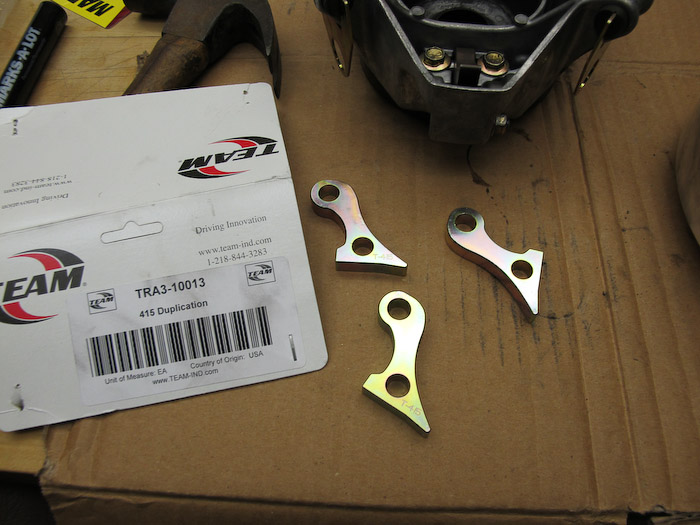
I had picked up a set of team ramps, 415's but I didn't realise until disambling my clutch that I already had 415's stock. I am unsure weather to swap them with the lighter team ramps or return them since they are both the same spec outside of being the team ramps being slightly lighter
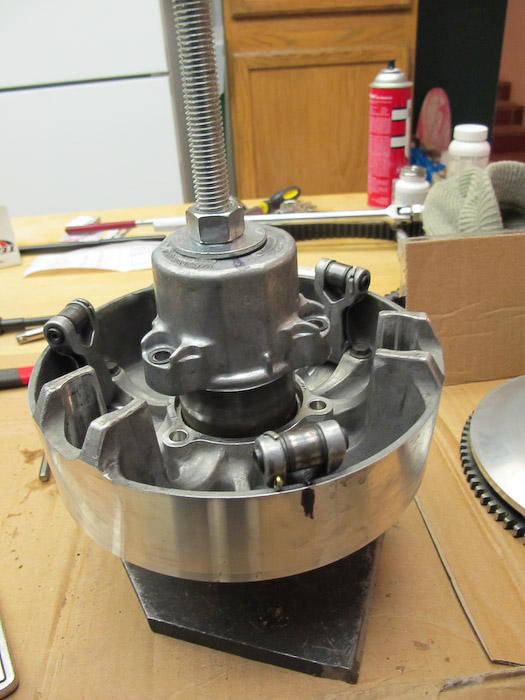
I then went a head and pulled the Cap for the main spring (I marked it to make sure it aligned correctly on re-assembly (sorry not shown). I used my homemade spring compressor to do this task.
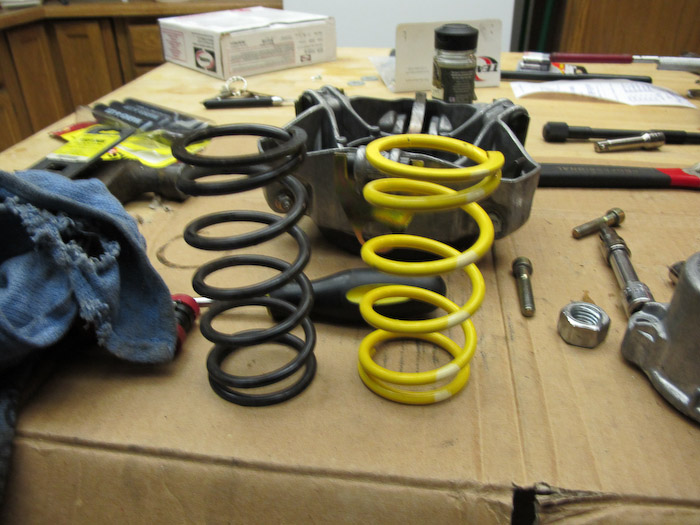
Here is the new spring (Yellow & Almond Team) compared to the stock. The new spring felt a fair bit stiffer.
After placing in the new spring, I used my compressor to clamp it all down and make sure the marks line up!
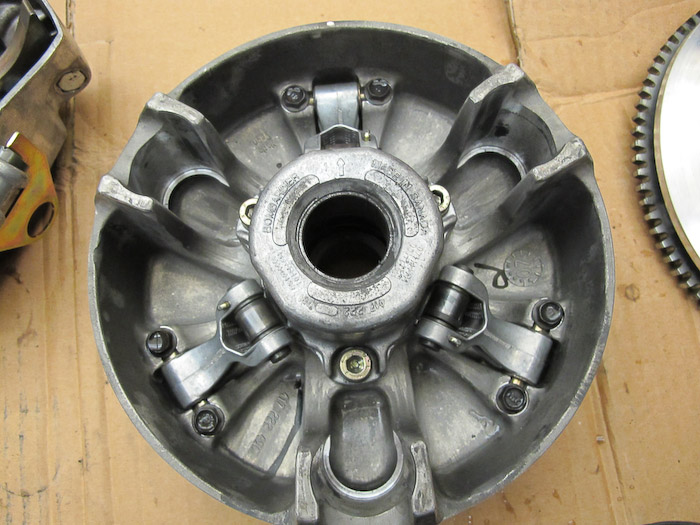
I then resembled the sheave.. the retainers pop off when you depress it. I made sure all the arms could swing freely after re-assembly by checking under with my fingers and popping them up and down to check for binding.
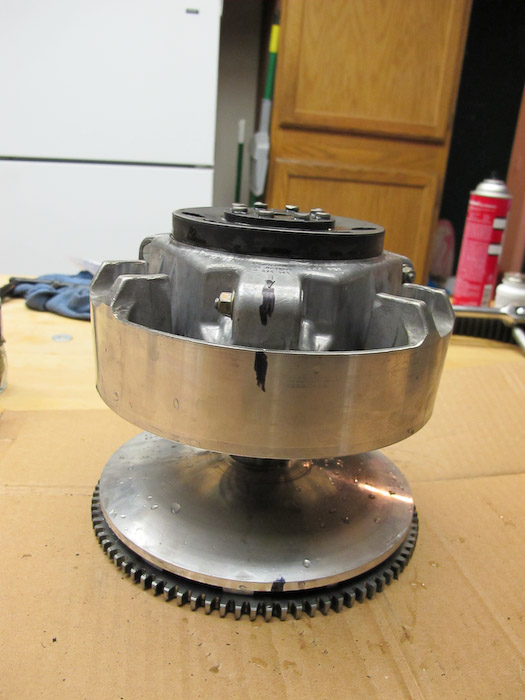
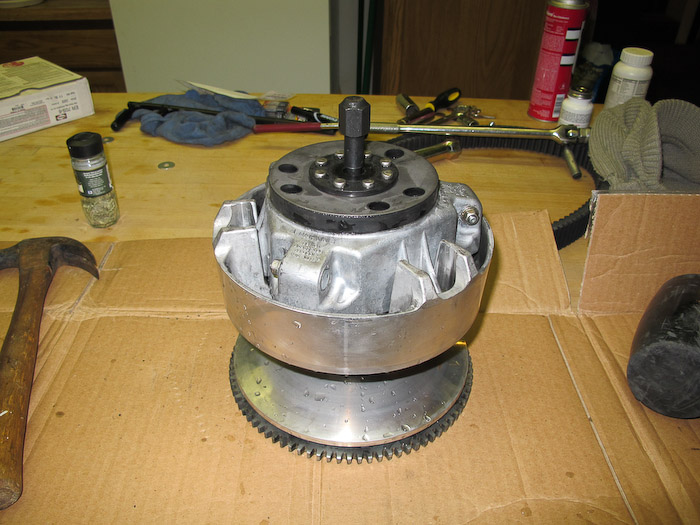
and here is the clutch all back together ready to be reinstalled on the crank. I will torque it to 70lbs
Other things I did that aren't shown was I removed the Pin weights I was going to do this with the stock parts to drop it down to 10.5 but one of the weights was jammed and stripped out, so instead I opt'd to empty a set of 13.8s I had from Team which felt lighter then the stock counter parts with the weights in place (my only other option at the time) I will be ordering up a set of the 10.5-16g adjustable pin weights and replacing the 13.8s with them set to around 11 or so as per joes suggestion hopefully later in the week.
on a side note if disassembling your clutch in the kitchen and you happen to drop something.. chances are it's under the stove!
Please feel free to comment, or ad any tips and advice. I do have a couple questions I will pose at the end.
Getting started (removed the bevel and separated the secondary to remove the belt)
I wasn't unable to split the sheaves via the rubber mallet method, and ended up having to use a clutch puller, and clutch holder to pop off the primary. I also had to use a breaker bar to get it to pop it took quite a bit of force. Be careful when doing this as it popped off with such force it almost bounced off the trailer onto the floor (luckily I caught it!)
Here is the primary clutch removed as one piece & the breaker (roll bar tubing from the '69)
Before attempting to separate the sheaves I marked them all with a marksalot to make sure I realigned them correct on re-assembly.
Separating the sheaves wasn't coming along very easy I was whacking on the puller with a hammer but no dice. Thanks to a tip I heard from Joe (via his videos on youtube http://www.youtube.com/watch?v=92C7CZuHe2I) I soaked the clutch in hot water.
After heating it up, a couple wacks later with my trusty hammer and poof we were apart!
I purchased some button retainers from team. The first time separating the movable sheave thingy, it's a little tricky as it doesn't pull up even.. (luckily popping the buttons back on and locking them in place with the retainers is pretty simple if you accidentally pull one side higher then expected before you get the retainers on..
Here she is all apart
I had picked up a set of team ramps, 415's but I didn't realise until disambling my clutch that I already had 415's stock. I am unsure weather to swap them with the lighter team ramps or return them since they are both the same spec outside of being the team ramps being slightly lighter
I then went a head and pulled the Cap for the main spring (I marked it to make sure it aligned correctly on re-assembly (sorry not shown). I used my homemade spring compressor to do this task.
Here is the new spring (Yellow & Almond Team) compared to the stock. The new spring felt a fair bit stiffer.
After placing in the new spring, I used my compressor to clamp it all down and make sure the marks line up!
I then resembled the sheave.. the retainers pop off when you depress it. I made sure all the arms could swing freely after re-assembly by checking under with my fingers and popping them up and down to check for binding.
and here is the clutch all back together ready to be reinstalled on the crank. I will torque it to 70lbs
Other things I did that aren't shown was I removed the Pin weights I was going to do this with the stock parts to drop it down to 10.5 but one of the weights was jammed and stripped out, so instead I opt'd to empty a set of 13.8s I had from Team which felt lighter then the stock counter parts with the weights in place (my only other option at the time) I will be ordering up a set of the 10.5-16g adjustable pin weights and replacing the 13.8s with them set to around 11 or so as per joes suggestion hopefully later in the week.
on a side note if disassembling your clutch in the kitchen and you happen to drop something.. chances are it's under the stove!
Last edited: