• Don't miss out on all the fun! Register on our forums to post and have added features! Membership levels include a FREE membership tier.

<<< SnoWest Arctic Cat FREE SLED Giveaway>>>

Status
Not open for further replies.

Meadow Muffin

Well-known member
Lifetime Membership
Jan 3, 2012
257
135
43
SE Iowa
Let's see:face-icon-small-dis All the 16 updates plus a 3" then boards, bumpers, skis, HCR post (forward if possible).... If they let you into the accessory catalog we just as well have the best! Then lets get this thing on a diet and do a belt drive and a BDX hood and of course a tether for safety. Now for the FUN because HORSEPOWER is ALWAYS FUN! Snowest can pick the hp but I vote supercharger. The stock black and green are classic and refined besides then it's a sleeper until it's fired up.
I would love to have it but mod it out and auction it off for a charity that supports our passion.
 

christopher

Well-known member
Staff member
Lifetime Membership
Nov 1, 2008
81,544
27,410
113
Rigby, Idaho
Project 2015/16 Arctic Cat M 8000 SnoPro Build - Part 2

Published online: Apr 01, 2015 Arctic Cat Steve Janes
Web Exclusive

(EDITOR’S NOTE: This is the second in a series of articles about converting a 2015 Arctic Cat M 8000 SnoPro into a SnoWest Forums 2016 Project Cat giveaway sled. Throughout the summer and fall we will be working with SnoWest Forum members to build the perfect snowmobile … and then we will give it away to a Forum member at the end of the build.)

For those just joining in, last week we upgraded our 2015 Arctic Cat M 8000 front suspension with 2016 parts. This week we’re tackling the rear skid and will also update it with 2016 parts.

Once both front and rear suspensions are updated, we only have some clutching and gearing changes to transform the sled into a 2016 snowmobile for all intents and purposes. Where the new front end greatly improves handling and sidehilling, the rear skid will improve how the sled gets up on the snow and also improves the ride through the bumps.

Although we will still be using a 153x2.6 Power Claw track, we still have the option of upgrading it to a three-inch track. But as of right now, we’re not totally sold on the change. There are those who will insist on a three-inch track just because it’s deeper than the 2.6 … but after riding both this spring (in not-so-good snow conditions) we’re still debating what works best in all-around riding. (We’ll leave that argument up to the SnoWest Forums for discussion.)

So back to the rear skid.

There have been significant changes to the rear which improves its characteristics in deep snow. First, the rail profile was changed giving the front part of the rails a bigger curve radius. Rather than a longer, gradual tip up, the curve radius stays flat longer and then rolls up more abruptly. This has created more travel and better ride control.

The front arm shock is 1.25-inches longer. The shock pull rod and the idler arm are also different to match the increased length of the shock.

All of these changes are designed to allow the backend to get up on top of the snow much faster. Combine this with Cat’s Power Claw track and you find the sled coming up out of the snow and floating on top much easier.

Installation Process
1) Pulling the rear skid isn’t complicated … although it can sometimes be a little frustrating. There are only four bolts that need to be removed that attach the skid to the tunnel—two in the front where your feet are usually located near the running board and two in the rear just below the running board. (The trick is to loosen a bolt without it spinning the entire shaft. By using an air ratchet, you usually can generate enough torque to loosen the bolt. But if one side is loose and the other side spins, you may need to re-tighten the one side and break the other side free.)

2) With the skid out, you are now going to remove parts from the old skid so you can use the bolts, bushings and stuff on the new skid. This means you will need to take apart the entire skid. We approached the process by breaking down the old and building up the new as we went along so it was a matter of parts off and then parts back on. This way we didn’t have a bunch of parts laying around trying to figure out where they went.

3) If you’re installing a 2016 rear kit, it will likely involve a rear arm, two slide rails, a pull rod and two new shocks (we used the Fox Evol shocks that come with the Limited Edition kit). You will also need to extend your limiter straps to accommodate the longer shocks.

4) There will be a couple of bushings on the front mount that will need to be pressed off the old rails and then pressed on the news rails. Other than that everything pretty much comes off with wrenches.
5) Once the new skid is rebuilt, then it’s just a matter of re-installing the skid back into the chassis, tightening the bolts and re-adjusting the track tension.


Once you remove the four bolts that attach the rear skid to the tunnel, it’s just a matter of wiggling the skid out from inside the track. We lifted the backend of the sled up so everything would just drop down and out of the way.


The rails of the new skid (the black one) will have a higher mounting position for the front arms than the 2015 rails (both the silver and the green). The green ones were actually the ones we removed from our project sled … but we pulled out some silver o

You can also see the difference in the tip angle of the rails. Again, the silver ones represent 2015 and the black ones are for 2016.

As you break down the 2015 skid, you will want to put many of those parts back on the 2016 skid unless they are being replaced by parts that will come in an upgrade kit from Arctic Cat.

Once you’ve re-assembled the rear skid, take the time to grease it. It’s easier to do this while the skid is still sitting on the work bench.

Now you can wiggle the rear skid back inside the track and in position in the tunnel.

Once the skid is in place, re-attach the four bolts that secured it to the tunnel.

Now it’s time to adjust the track to ensure the proper track tension.

 
M

minet

Well-known member
Nov 26, 2007
1,494
143
63
entered~!

cheetah print seat !

carbon fiber tunnel..both front and back with integrated fuel tank.
the fuel tank runs the length of the tunnel is baffled and adds to the rigidity of the tunnel and keeps the CG of the overall machine lower and less centralized.

cnc billet running boards with integrated drop brackets for continuity and less points of fastening

titanium skid arms


chromoly front suspension arms
HD kevlar type overrstructure tubes.

8 gallon gas tank 1 qt oil tank

enough room under the tunnel to run a track without scrubbing.. i did a mod for this reason ( untested ) to my 12.. it may still scrub but i ran the cooler lines ABOVE the tunnel. then dropped back under the tunnel past the turn up into the rear tunnel section. bought me .5 inch more clearance.

LED headlights

cnc bumper with tow hitch built in w/ appropriate rope. after i saw some one pull out one of these 10 dollar towropes i was like , il be darned . 2 hooks one on each end and a floating hook to tie to the middle and hook the hitch clevis..not towing the sled more than a length behind you.
yes a utility item

coil over shocks all around for reliability. progressive rate platinum single springs. no added resi's ,, if you need more oil capacity just use a larger volume main tube from the start

duel plane bulkhead, basically a just shy smaller version in carbon fiber. but keep all the extra *fix it kits and reinforcements

higher flow water pump with lower overall coolant capacity

replace all bearings external to the motor with SKF spec

replace all wheels in skid with rubber-less billet and 10 inch rear

1976 panther snowflap

outsource gauge to Garmin.. more utility and ability.. think 2012+ ipad technology.. yes it will record video and playback .. yes it will have poling location of my riding partners regardless of brand.. not my problem you figure out how , full topo maps by a map builder , not your hashed out attempt at making a map.. see 2004/5 chevy disc based gps maps. Topo integrated with NOAA current snowdepth and snowtel readings and google earth
PLB ability
5. hrz PTT radio com. myulti channel so you can smack talk about billy who cant stay unstuck in the other channel
full weather channel and warnings. by your location

outsource Tether ,, that doesnt suck. i like Gunner brand
4 spare sets of handwarmers and grips or one set that can last a season

refined TCL and motor mounts implement more ways to NOT F up parallelism and offset . double the mounts drop the mount duro by .75.. make it easy for the consumer to do the right thing , make it easy to make the product perform, make it east to make the product OUT perform

CVT system designed for a belt design of this decade ,, i know the OE hires the big companys to make the belts they slap their name on and sell us it as their own but GFD . put a belt on that any outside vendor would be PROUD to say they supply it for you.. 1 belt 1 season.. and thats a backcountry deep snow season,, not touring
 
Last edited:

mountain_tamer

Well-known member
Lifetime Membership
Nov 26, 2007
723
105
43
41
Rimbey, Alberta
I would like to see a Dave McLure or Rod Kincaid replica sled that is exactly like what they drive supercharger and all not just some stickers
 

tdbaugha

Well-known member
Lifetime Membership
Apr 18, 2009
1,402
1,335
113
USA
Probably been said before but do a lift kit like the new Polaris or skinz stuff for the Pro. Those spindles would be monstrous!
 

Quinlan

Well-known member
Lifetime Membership
Nov 28, 2007
512
170
43
ND
So the first thing we acquired for our 2015 Cat was the new front suspension. The handling between the ‘15s and ‘16s are like night and day. And everything starts with the new spindle design.

I witnessed the new spindles on a '16 YamaCat yesterday (Sneak Peak Event). I had to do a double take while thinking, 'Dafuq is that?' Definitely a unique design...
 

christopher

Well-known member
Staff member
Lifetime Membership
Nov 1, 2008
81,544
27,410
113
Rigby, Idaho
Project 2015/16 Arctic Cat M 8000 SnoPro Build – Part 2: Gears, Clutches

Published online: Apr 08, 2015 Arctic Cat Steve Janes Viewed 424 time(s)
Web Exclusive

(EDITOR’S NOTE: This is third in a series of articles about converting a 2015 Arctic Cat M8000 SnoPro into a SnoWest Forums 2016 Project Cat giveaway sled. Throughout the summer and fall we will be working with SnoWest Forum members to build the perfect snowmobile … and then we will give it away to a Forum member at the end of the build.)
http://www.snowest.com/2015/04/project-2015-16-arctic-cat-m

For most snowmobilers, the bulk of the transition between 2015 and 2016 Arctic Cat snowmobiles will focus on the front and rear suspensions. However, what we really noticed was the effect the change in clutching and gears had to do with how the snowmobile operated in the trees.

True, the front suspension changed how the 2016 SnoPro carved through the snow and sidehilled. And the rear suspension changed how it got up on top of the snow. But it’s the clutching change that made the 2016 more user-friendly.

To upgrade the 2015 drive system to Team Rapid Response/Reaction clutches, you had to start by replacing the jackshaft. And since we’re going through the bother of pulling the jackshaft, it made perfect sense to change to Borg Warner gears and chain (used by the Team Arctic racing crews).

The main reason we wanted to make the change to Team clutches was to lower and broaden the engagement range to allow the clutches to work better in tight and technical situations. Cat clutches always had a tendency of slamming in on engagement. For aggressive riders, that’s perfect. But for those of us who like to ease into certain situations (like crawling up a trailer ramp), this all-or-nothing sensation was a bit unsettling.

Arctic Cat made the change for its stock mountain sleds and for 2016 the clutches will engage about 500 rpm lower and offer more of a smooth transition on engagement. It will also deliver a broader powerband to allow the clutch to work better and pull harder.

Another bonus with the Team clutches is that they run cooler, which improves performance, increases roller life and increases belt life.

As for the Borg Warner chain, it will be stronger, more durable and feature less stretch. It’s the same chain Cat has used on its race sleds since 2004.


Here is what we did for our latest install.

1) Remove the hood and then the pipes to open up access to the chaincase. Also remove the drive belt and the primary and secondary clutches.

2) Remove the torque plate. It consists of four bolts behind the drive clutch and six bolts behind the secondary. (On the bottom bolt behind the drive clutch, be aware of a concaved washer that is located behind the plate. You will want to catch it when you remove the plate and know what direction it goes so you replace it properly when you put things back together.)

3) Moving to the chaincase, first put a catch-pan under your sled so when you crack open the chaincase you don’t have a mess.


4) Disconnect your oil pressure sensor and odometer cable and move them out of your way.


5) Remove the 10 black bolts that hold the oil reservoir on. Once the bolts are loose, allow the oil to puddle up in the bottom of the belly pan and find its way out to the catch-pan.


6) Remove the chain tensioner by pulling it straight off.


7) Remove the top gear. This involves two C-clips that hold the gear in place, and then another C-clip that holds the washer that attaches to the jackshaft. Now you can remove the jackshaft.


8) Remove the bottom gear by removing the C-clip that holds it in place.


9) Now we’re ready to install the Borg Warner gears and chain. First install the bottom gear, then install the chain. (Locate the black link on the chain and make certain it is on the outside.)


10) Now install the jackshaft. Be sure to put in the washer before you attach the C-clip. (The washer serves as a spacer to eliminate vibration. If there’s still a little play in the jackshaft, you may want to add another washer before proceeding further.)


11) Install the top gear with the chain. There should be a little play in the chain … that’s what the self-aligning tensioner is for.


12) Install the chain tensioner. The spring will press against the case and you can then preload the tensioner. (You want to start with the chain a little loose as you put things back together because it will always tighten up. If you start with it too tight, there is no way for it to loosen up.)


13) Install the torque plate (remembering to include the concaved washer that is located on the inside of the torque plate). You want to start every bolt on the torque plate first before tightening them up. They require 14-ft-lbs of torque on the six bolts behind the secondary and 30-ft-lbs of torque on the four bolts behind the primary.


14) Install the chaincase. Again, it’s best to start all bolts first and then tighten them up to 25-ft-lbs of torque.


15) Add 12 ounces of oil to the chaincase. Reattach the oil pressure sensor and the odometer cable.


16) Install the clutches. The secondary clutch comes in two pieces with washers and spacers. Torque the primary and secondary clutches to 51-ft-lbs. Install the belt.


17) Install the pipes. (Put the long portion of the springs toward the engine.)


18) Attach the hood.

We didn’t do any clutch work at this point. Once we’re ready for the snowmobile to get on the snow, and after we’ve made whatever modifications we end up doing with this project Cat, then we’ll be able to fine-tune our clutching.
 

christopher

Well-known member
Staff member
Lifetime Membership
Nov 1, 2008
81,544
27,410
113
Rigby, Idaho
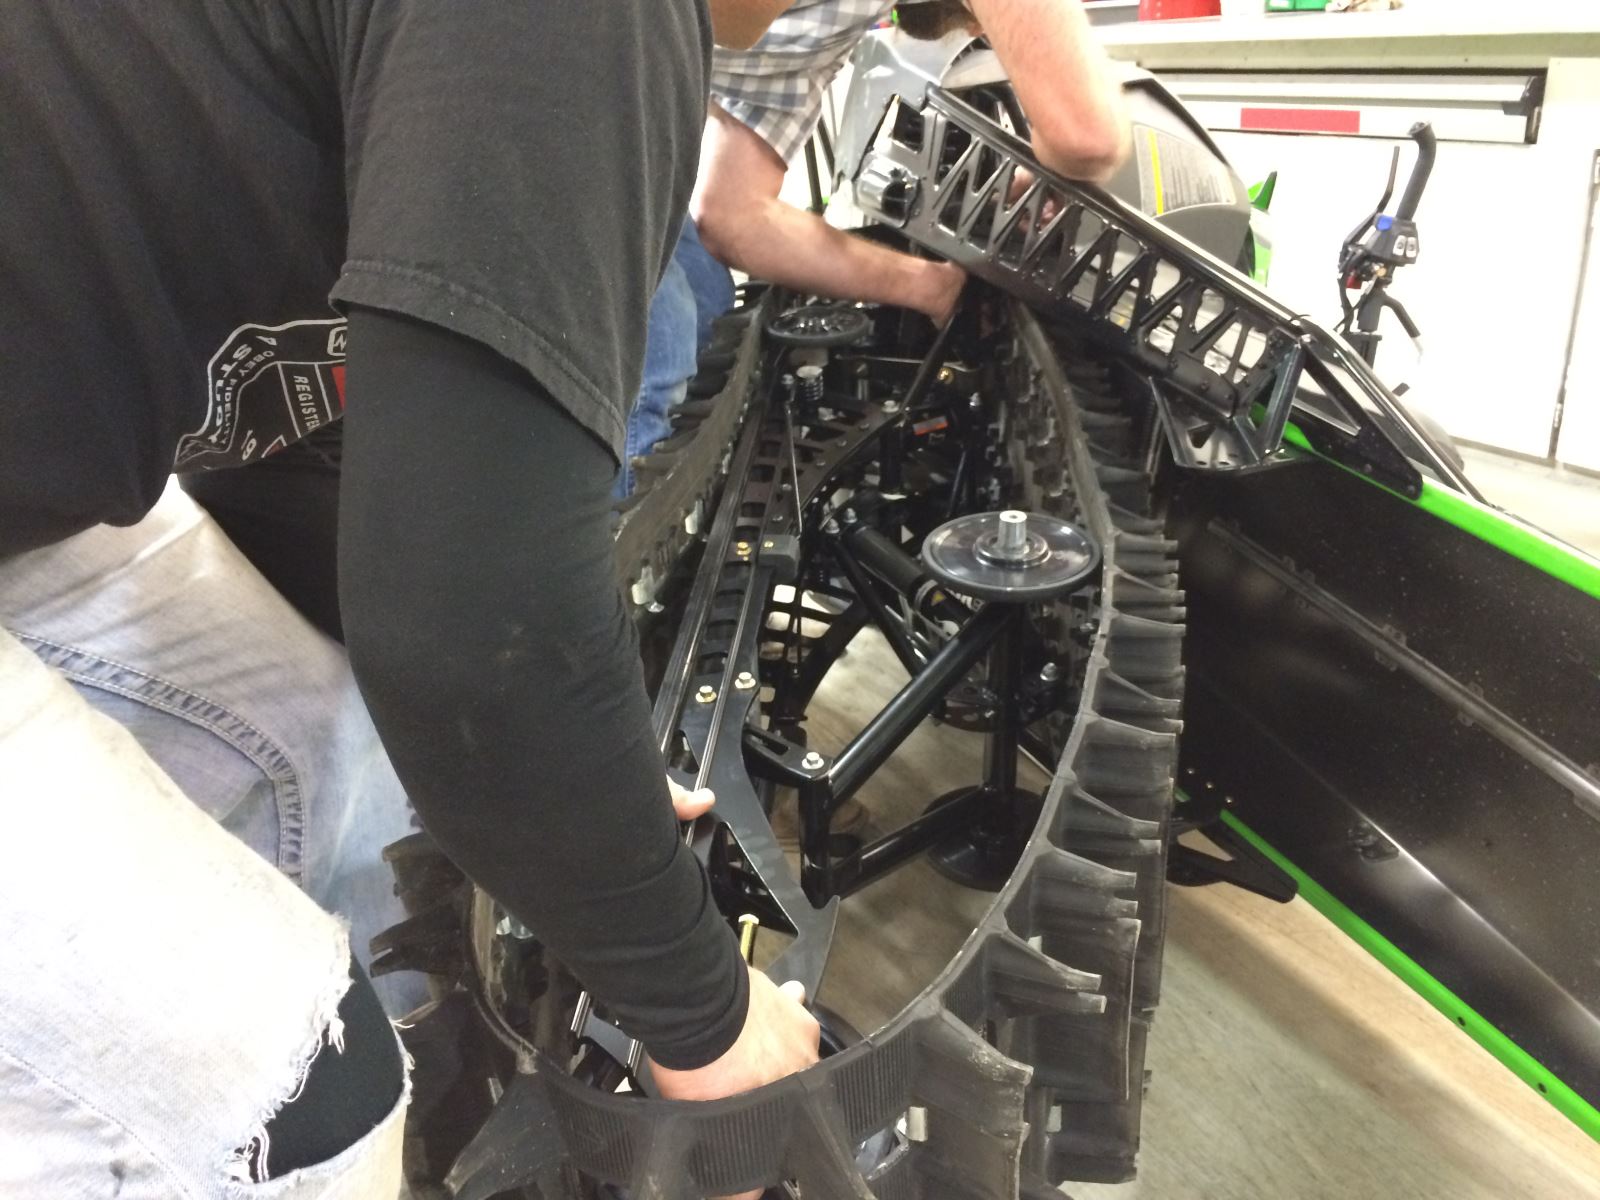
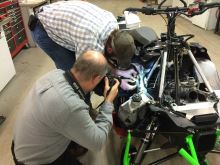
  • Although Forum Moderator Christopher Parrett was technically “helping” on this project … I think this is about as close as he got to getting his hands dirty—holding a camera while he shot a close-up of Shay Smith doing all the work.
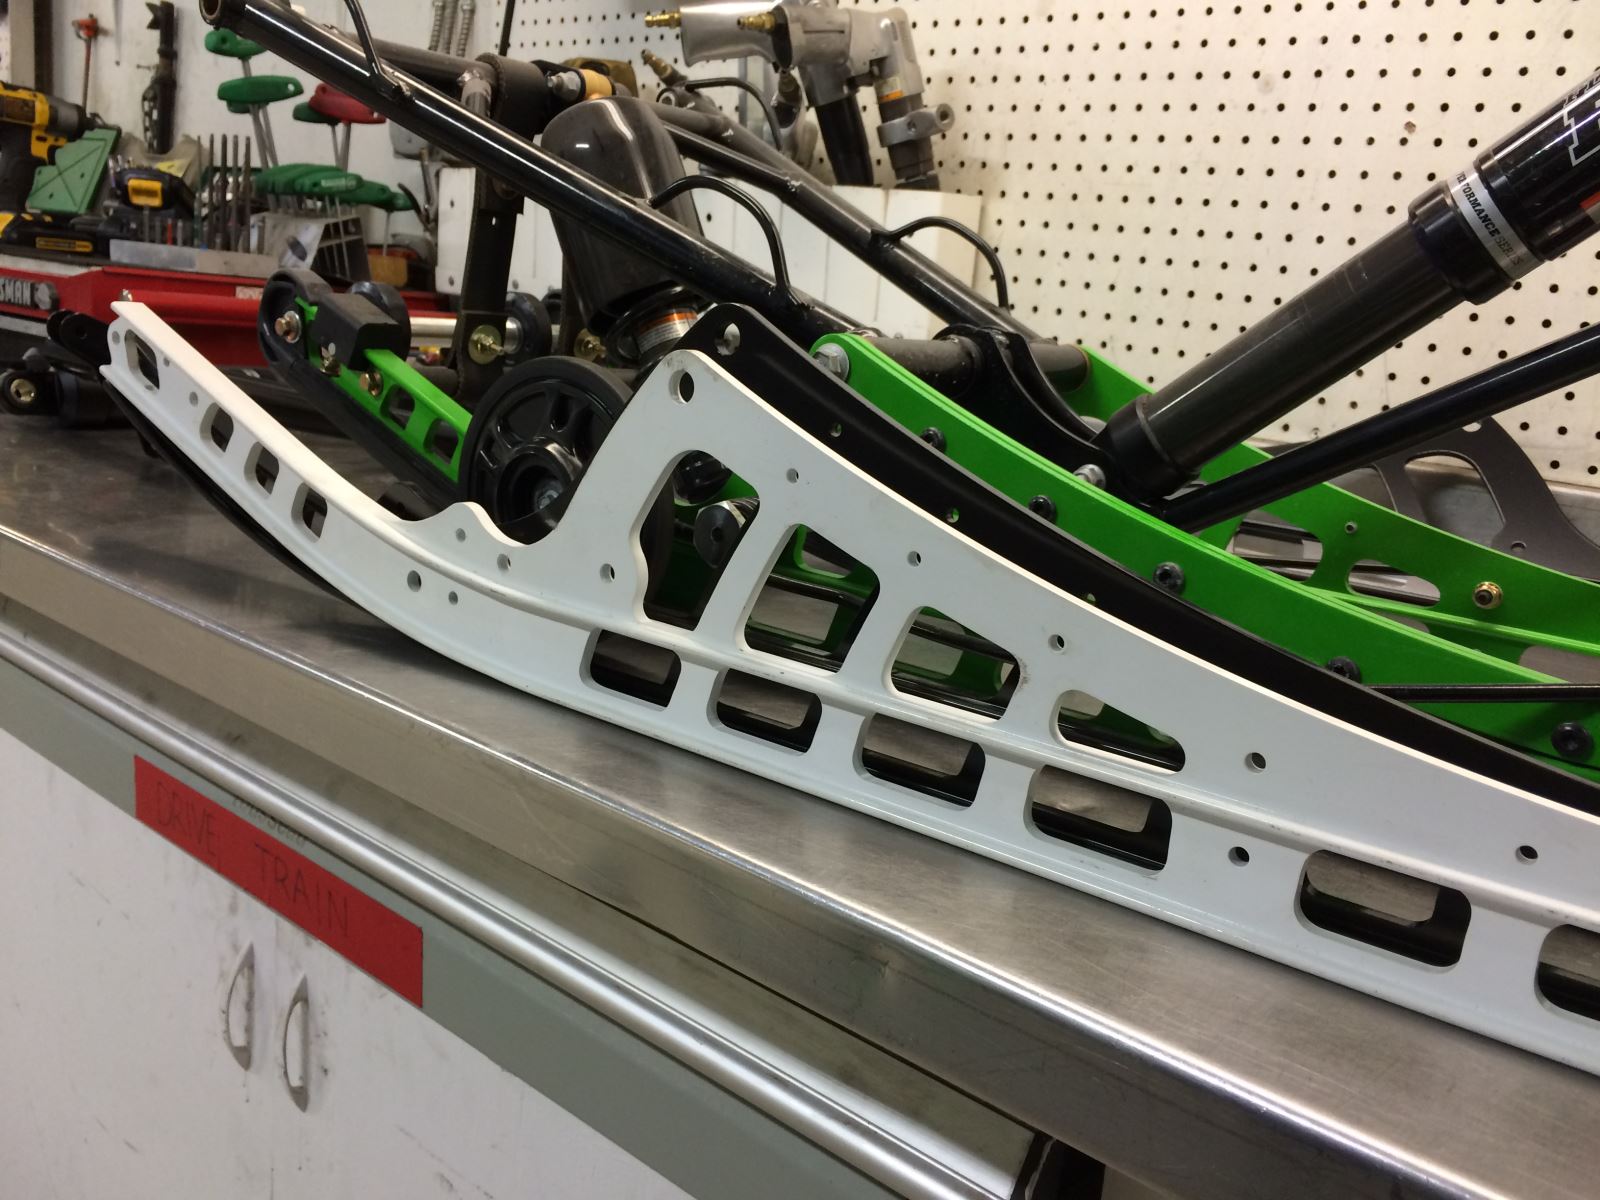
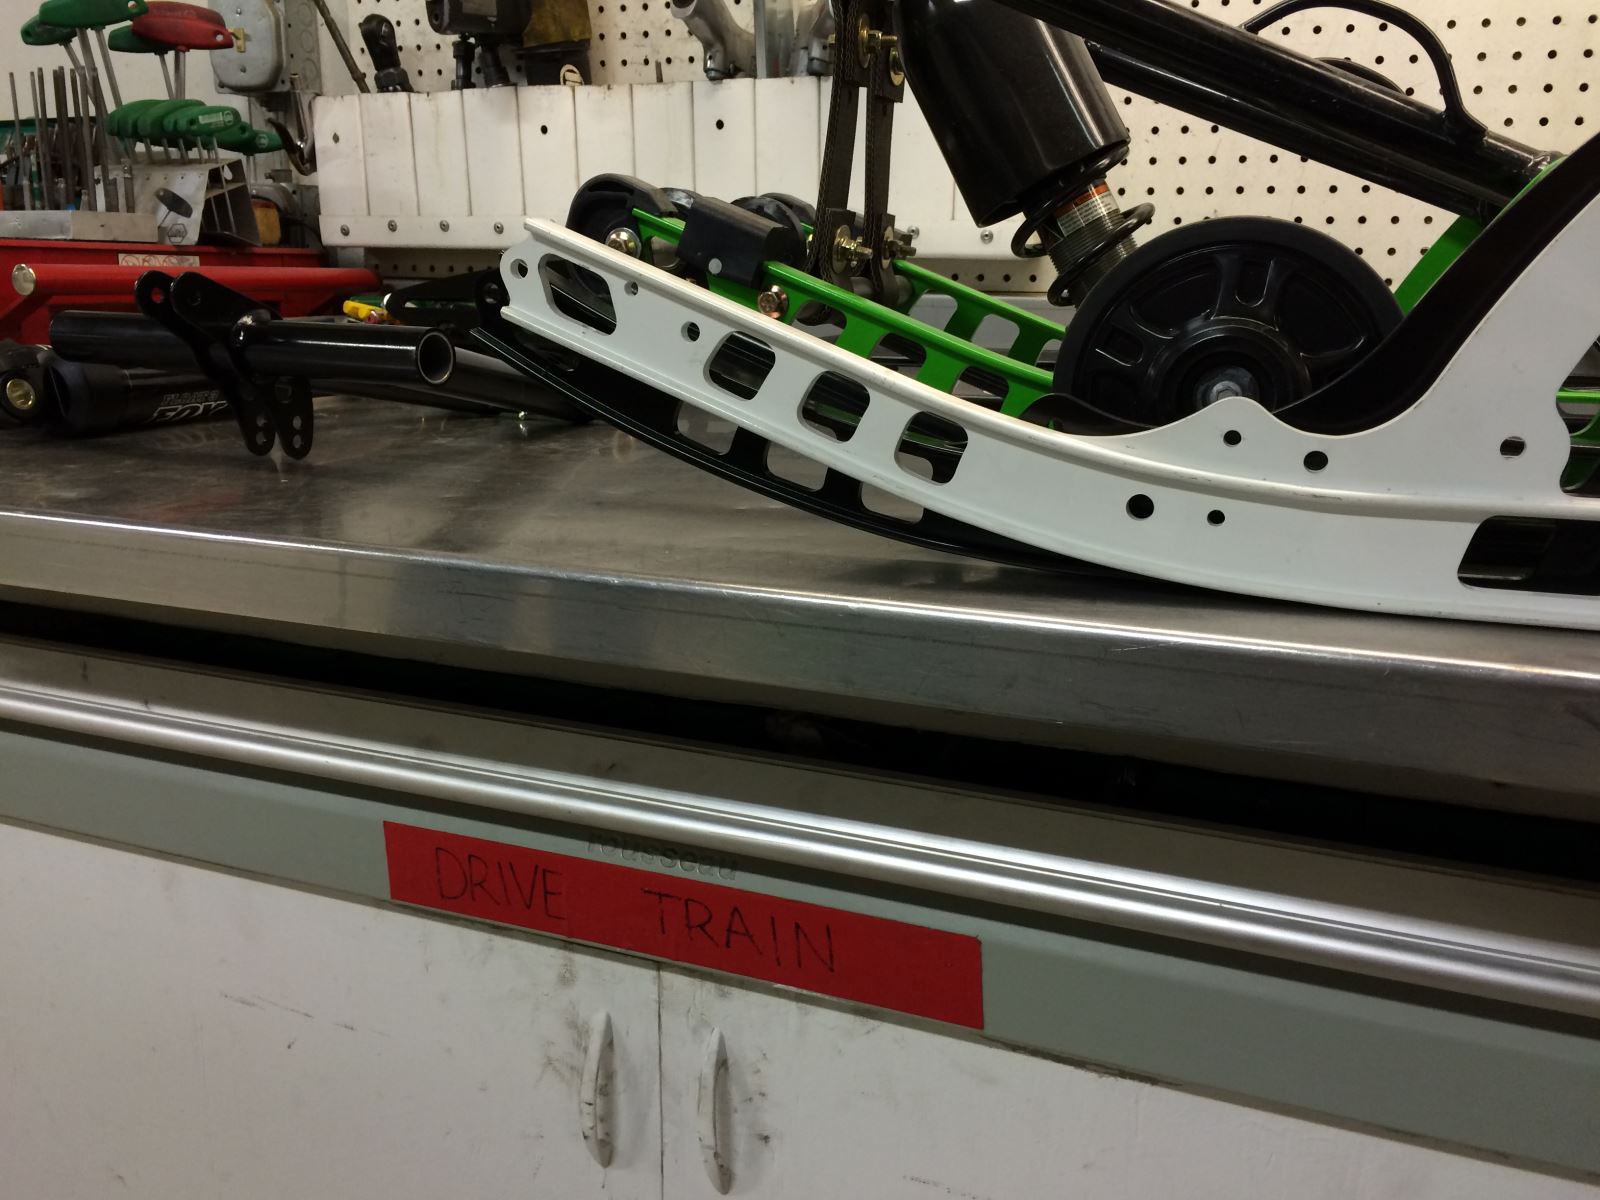
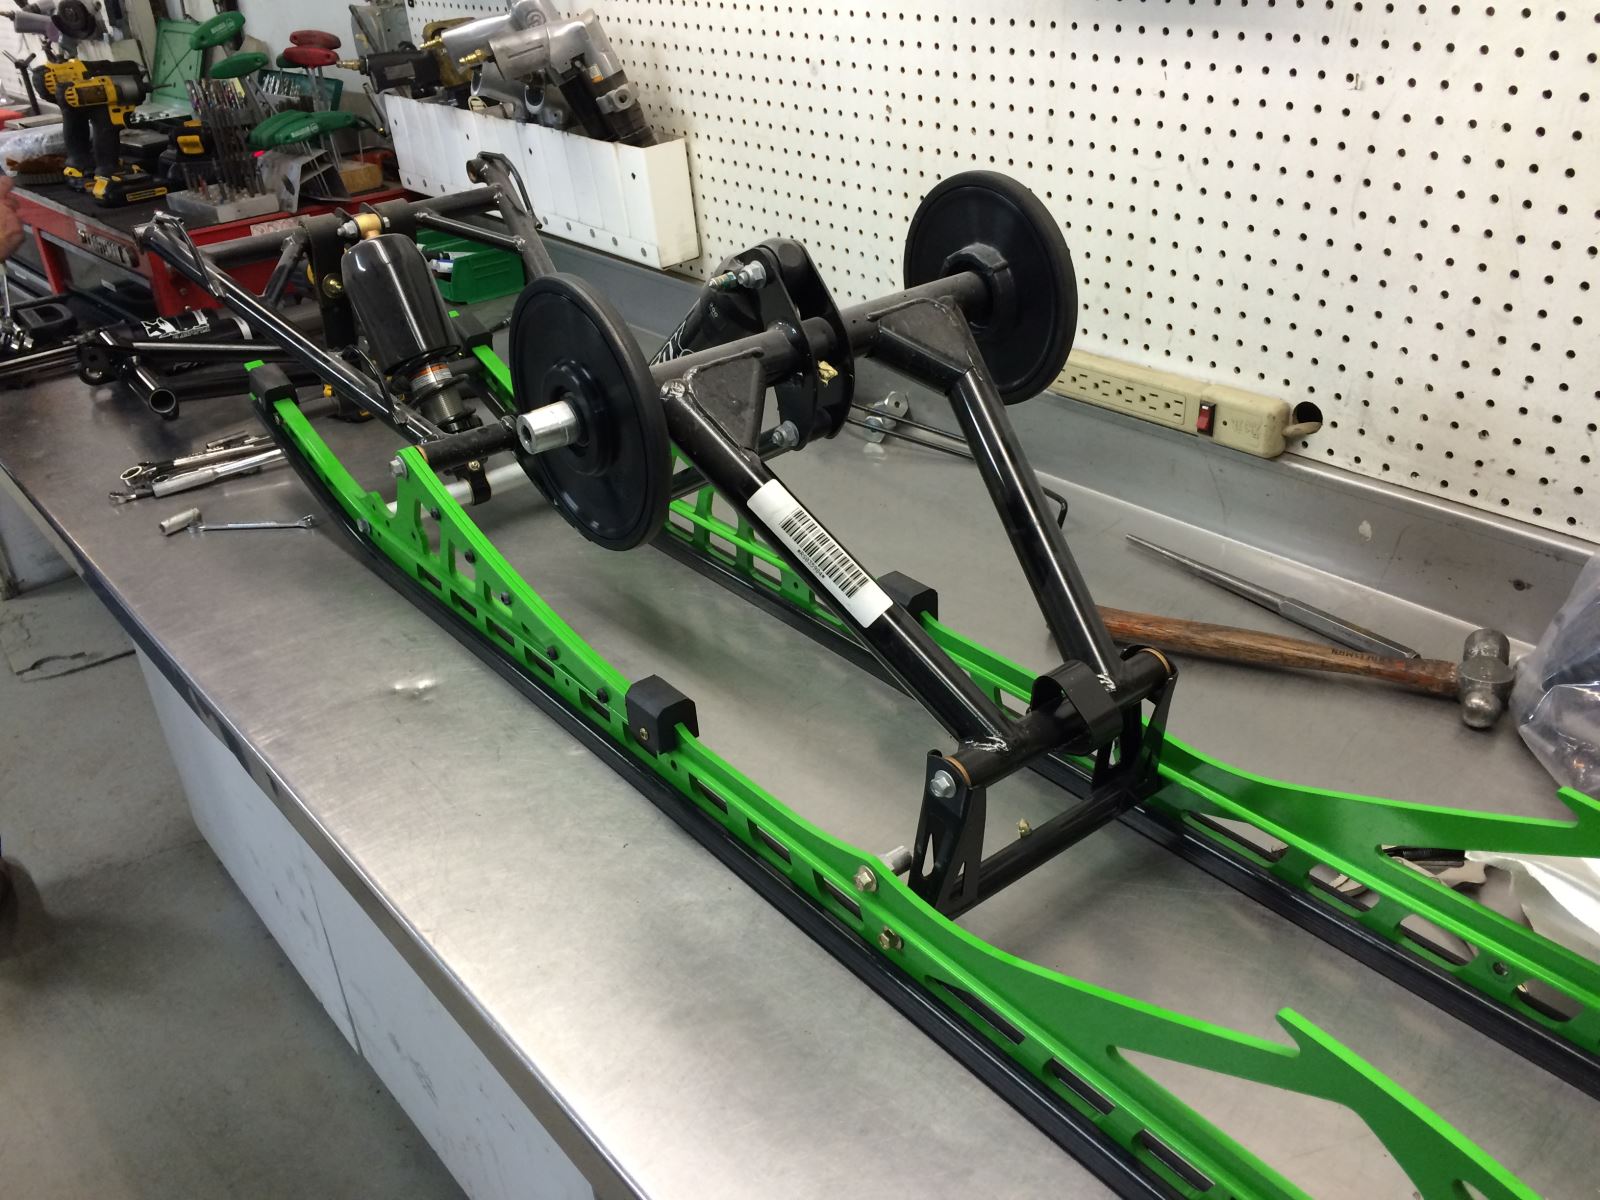
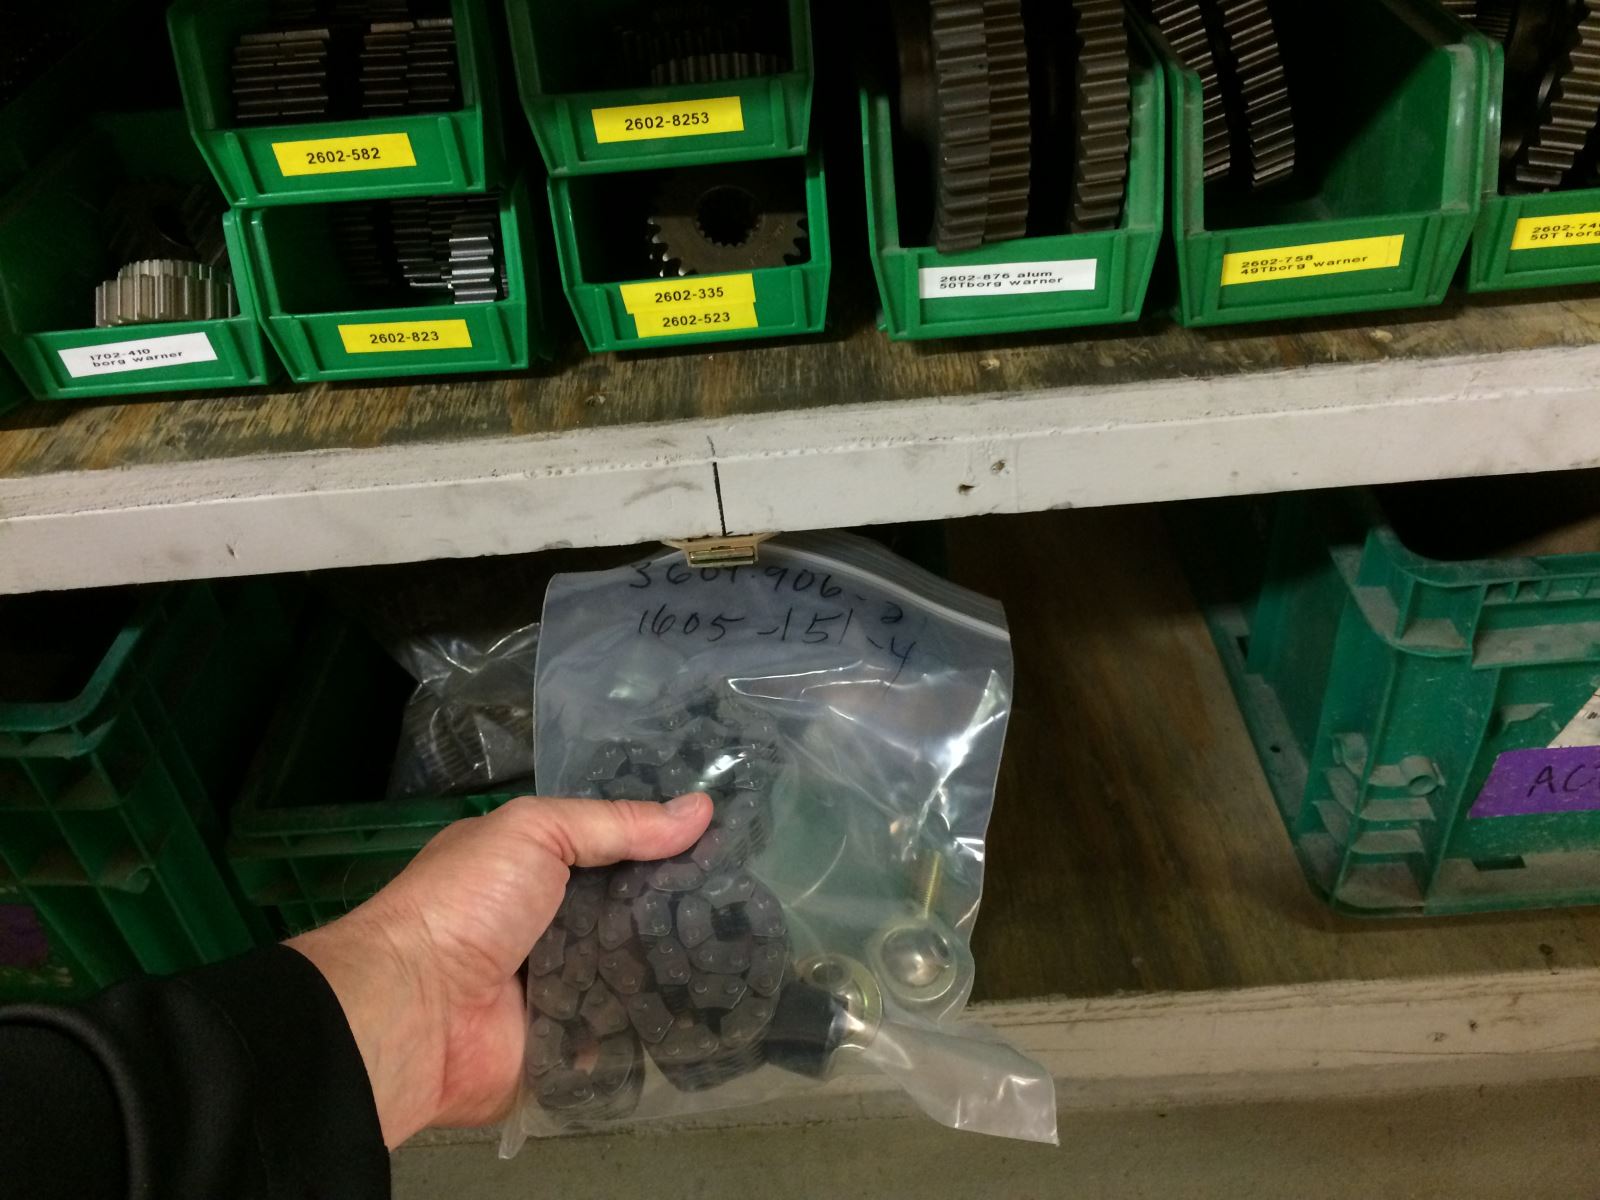
f you’re going to steal parts, at least steal the good stuff. Although there’s been a lot of Forum discussion about going to a belt drive, we thought that given the opportunity to acquire Borg Warner chains and gears, we better make the most of it.

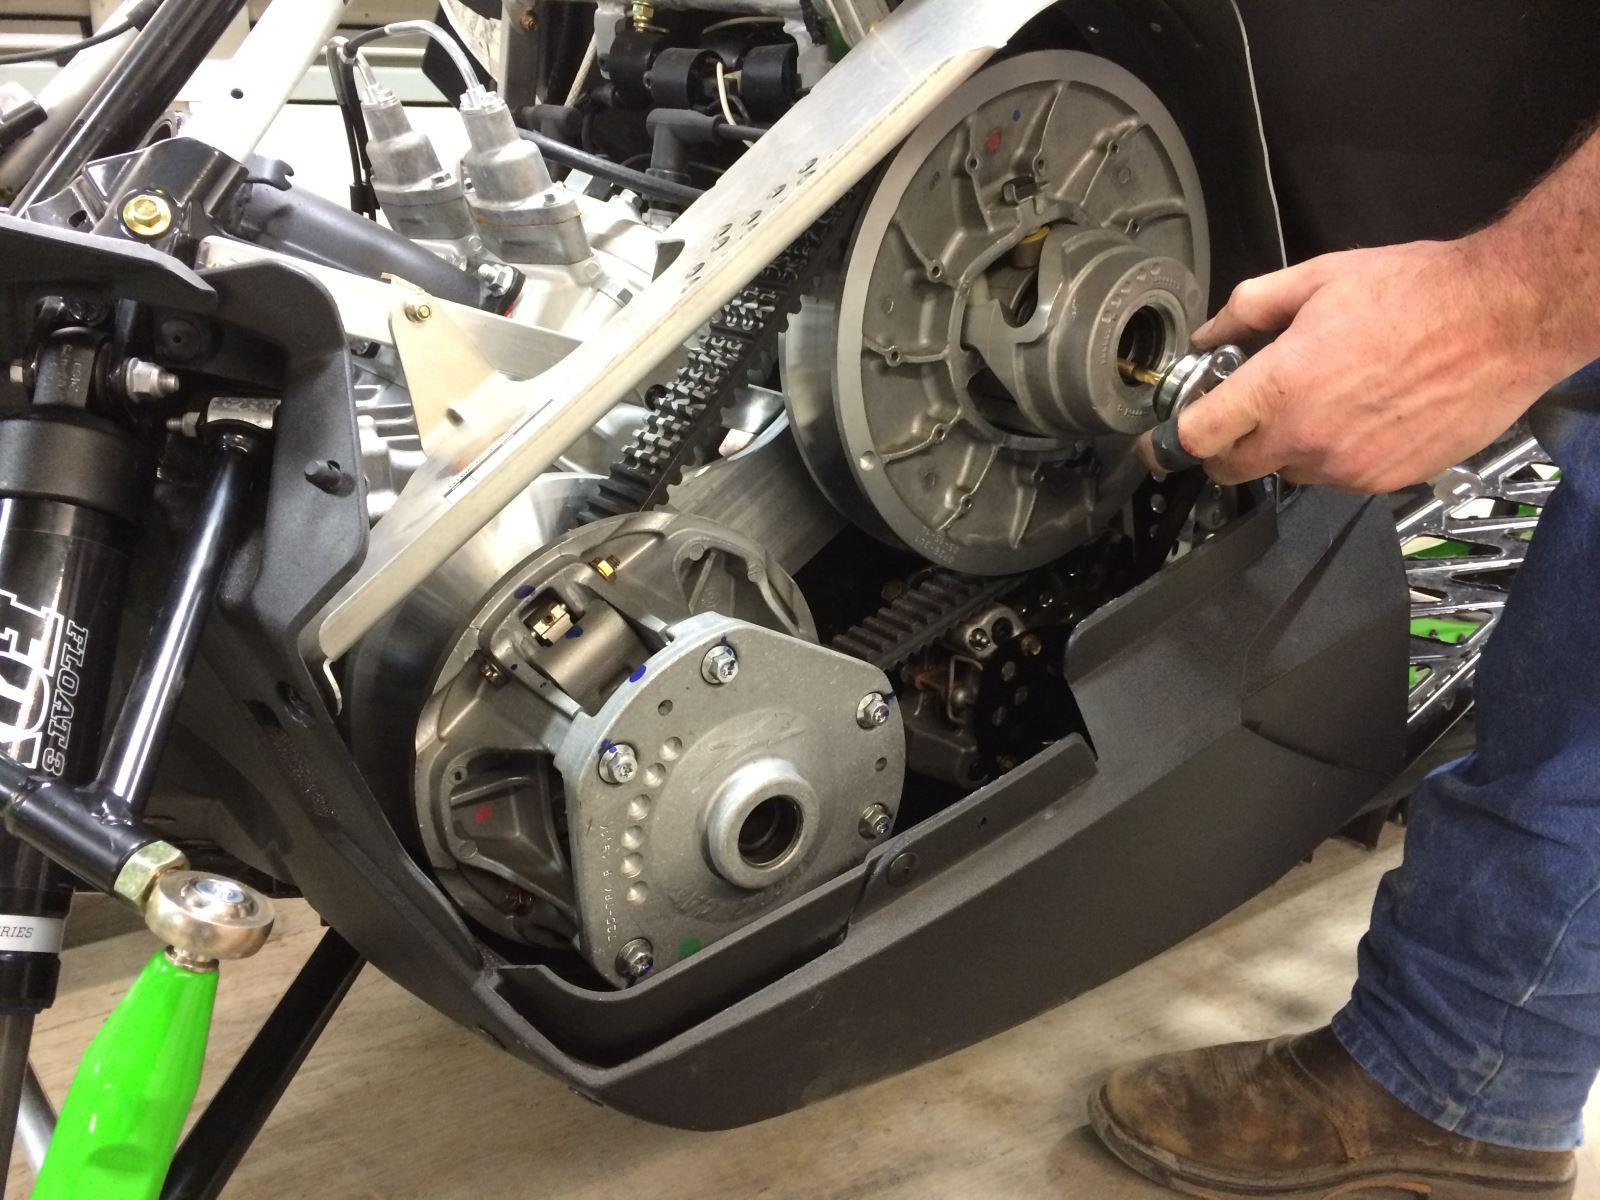
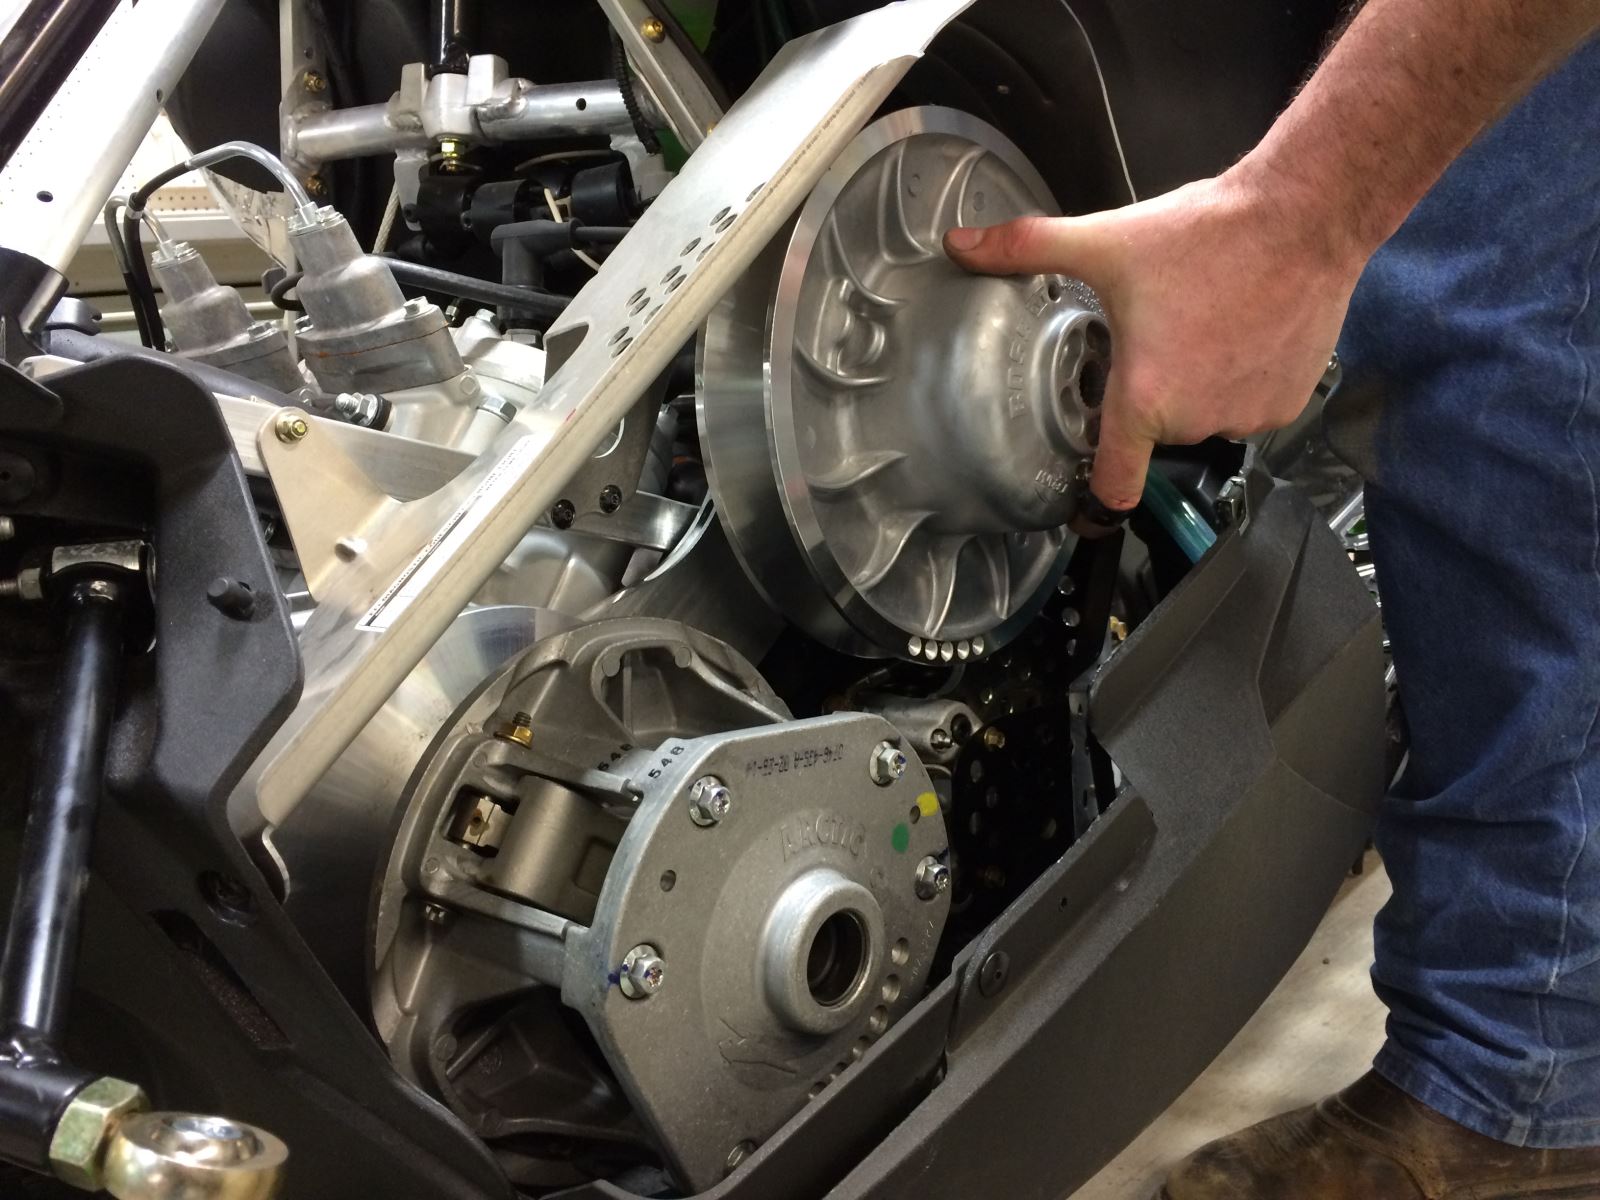
And when it comes to clutching, the Team Rapid Reaction secondary clutch is definitely the way to go.

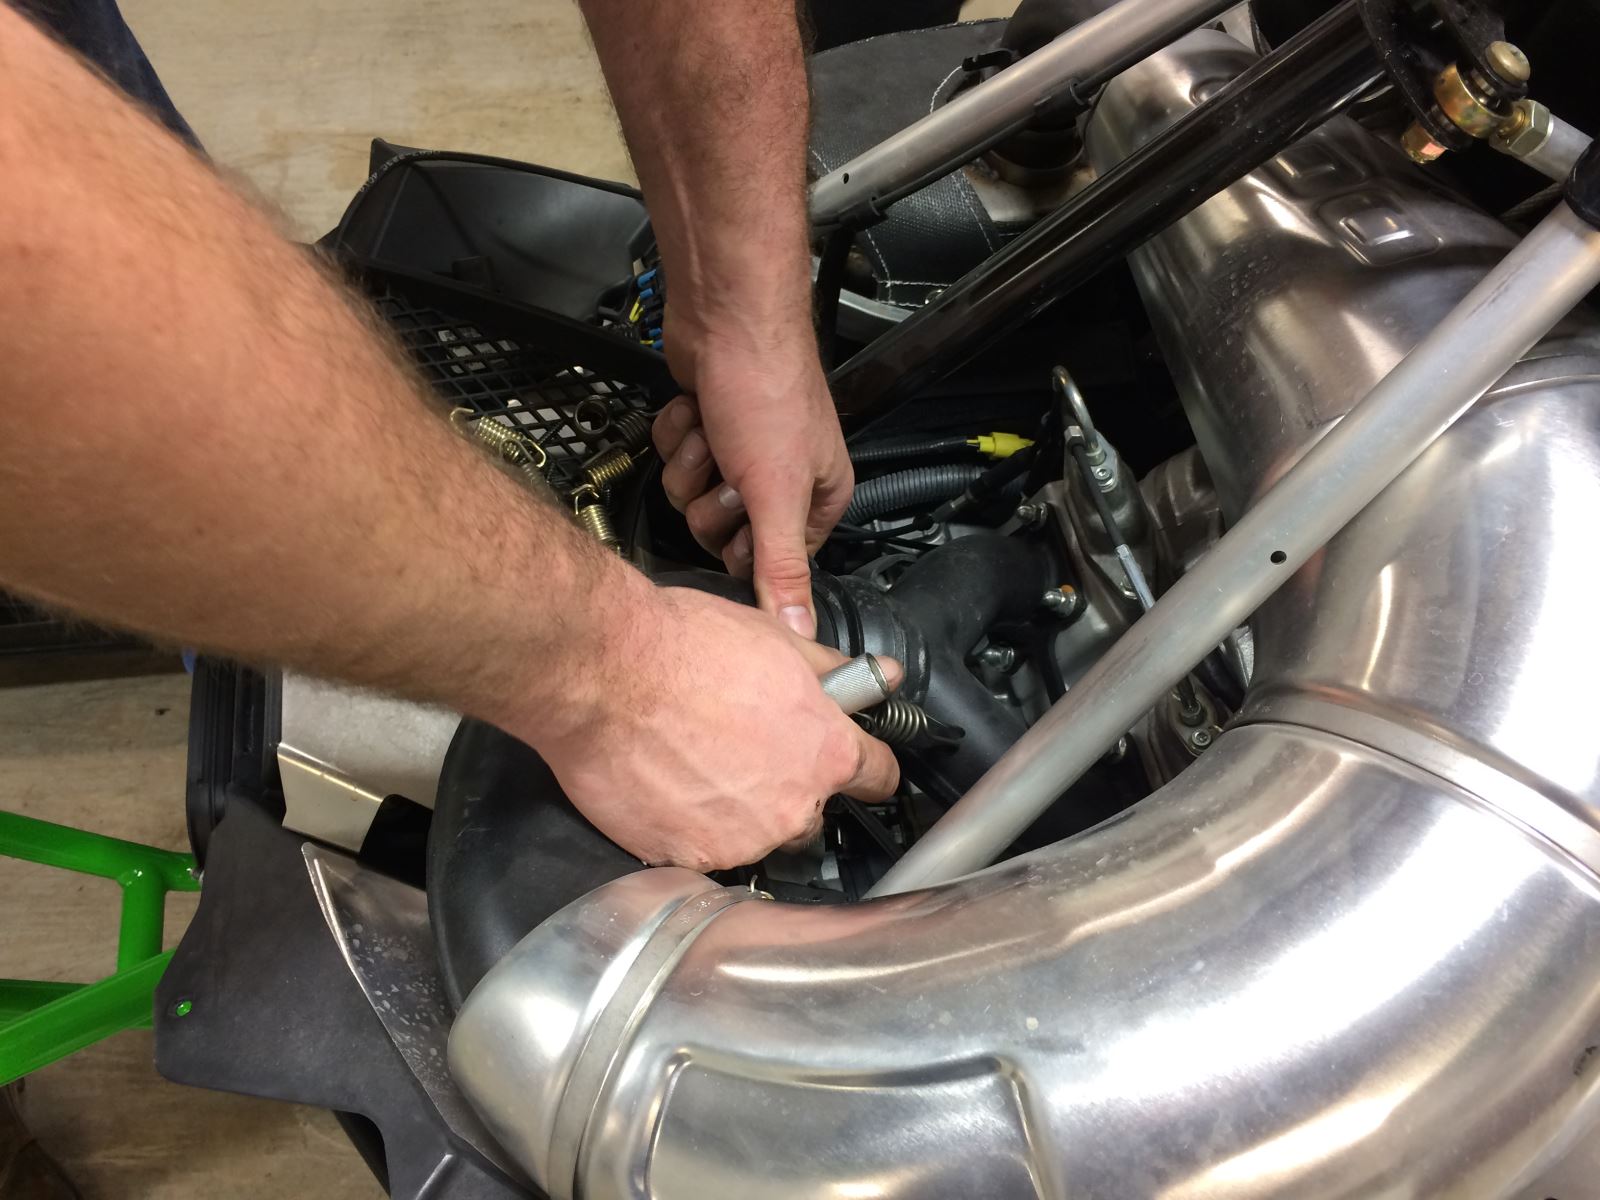
To remove the hood, the first thing you need to do is pull the cable housing attached to the instrument gauge. For the hood itself, there will be six torque screws to remove. Four are the same length and the two under the nose are longer.

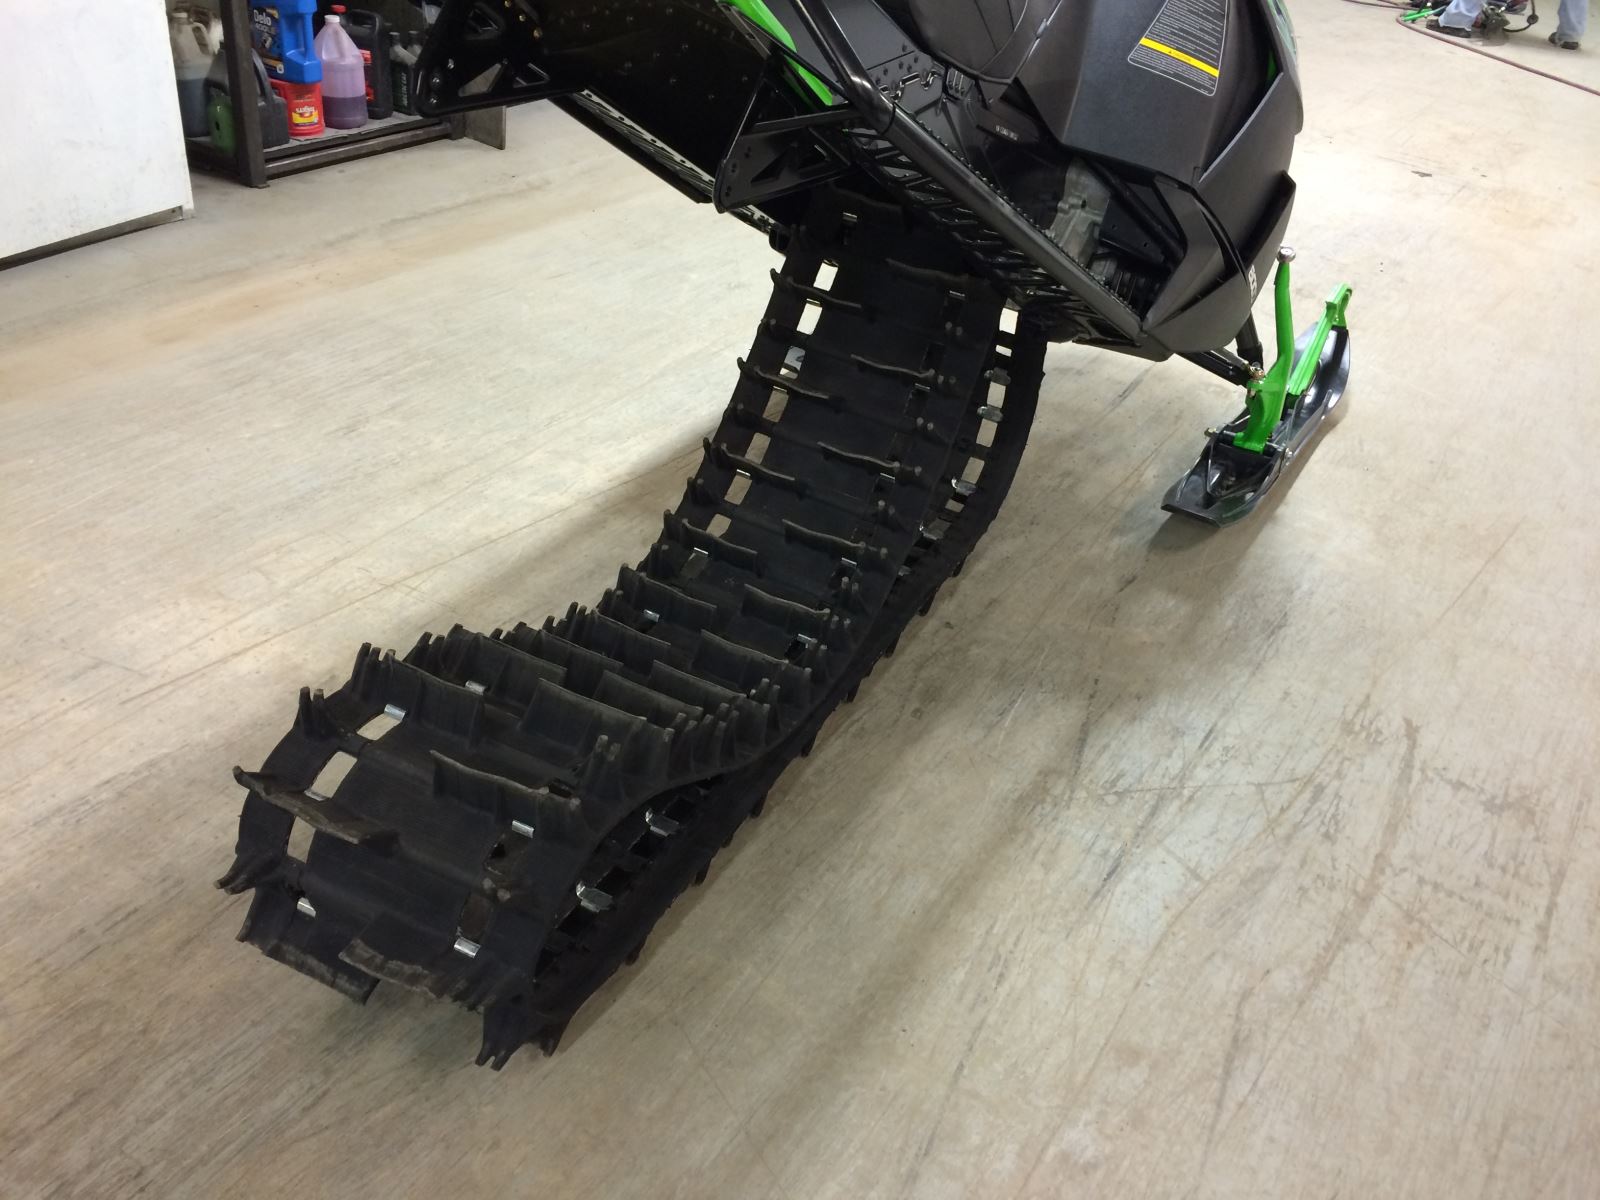
Once the hood is removed it will be easier to remove the pipes, clutches and chaincase.

To remove the belt, you need to take out the bolt that holds on the secondary clutch, reverse the silver metal spacer and then put the bolt back in and tighten it to spread the sheaves.

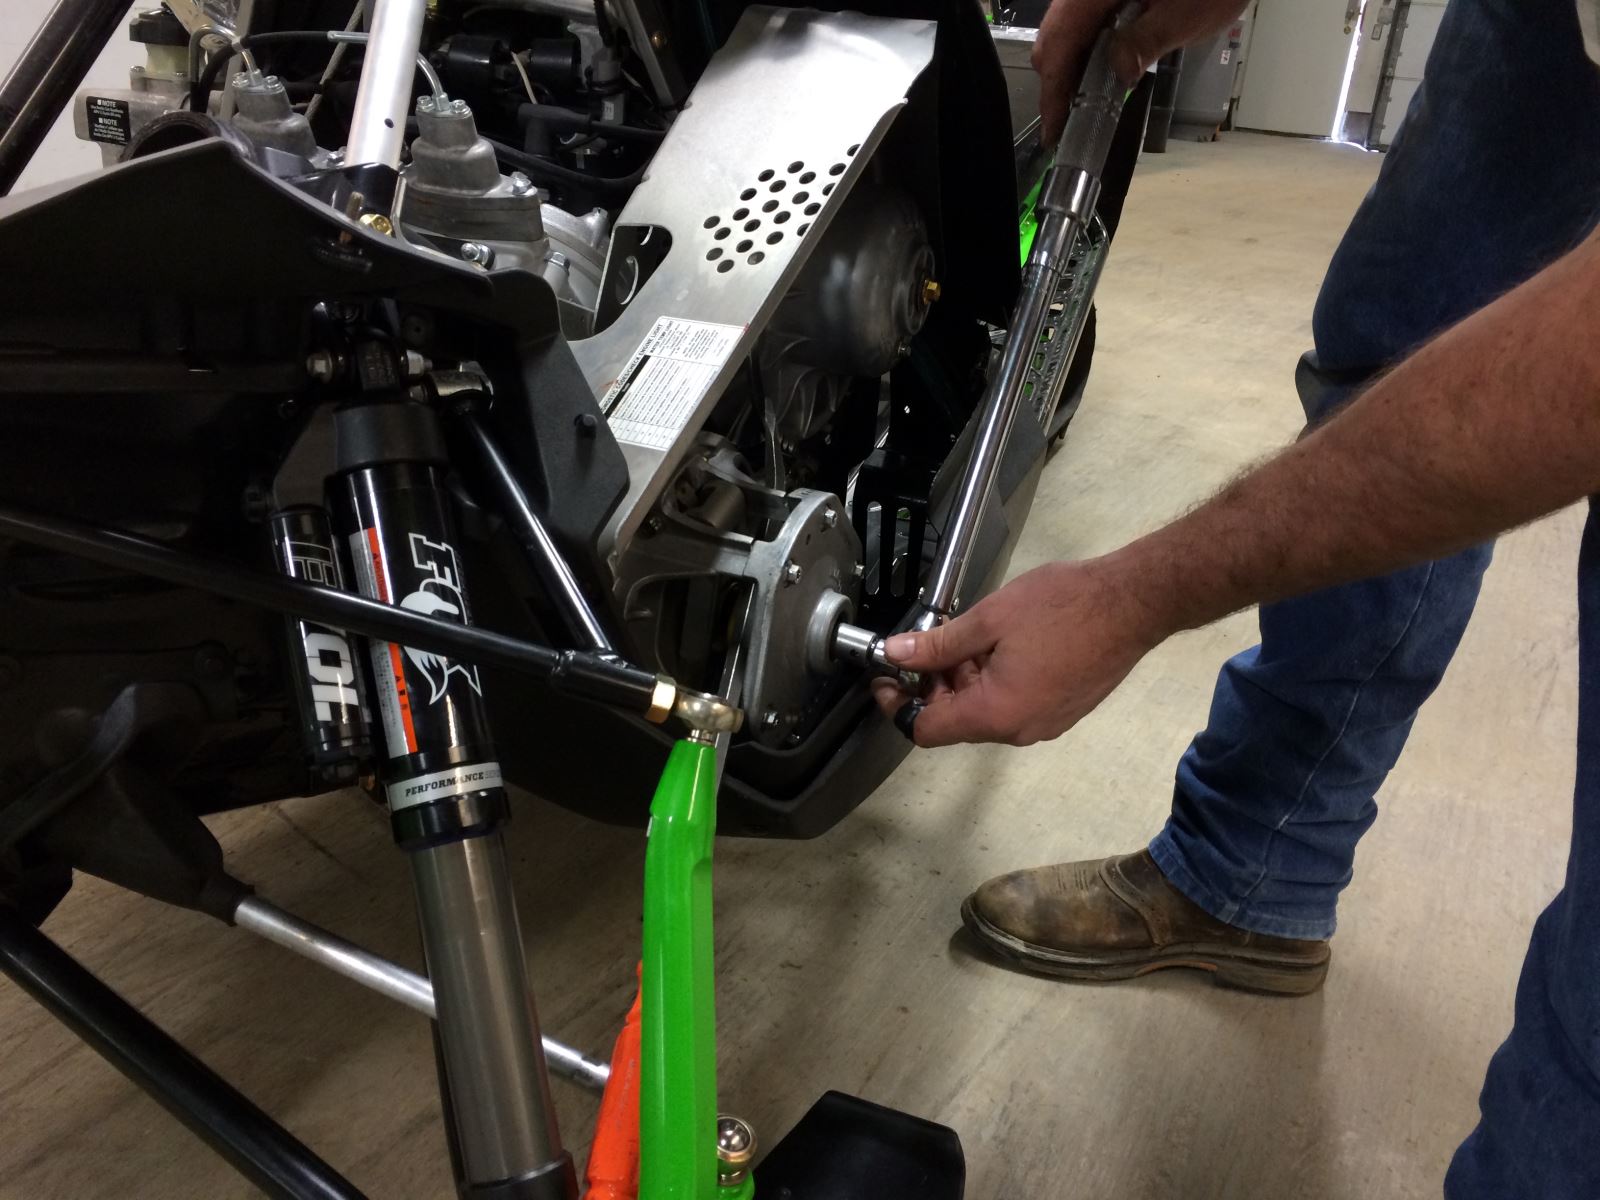
On the chaincase, remember to remove the oil pressure sensor and the odometer cable and move them out of your way.

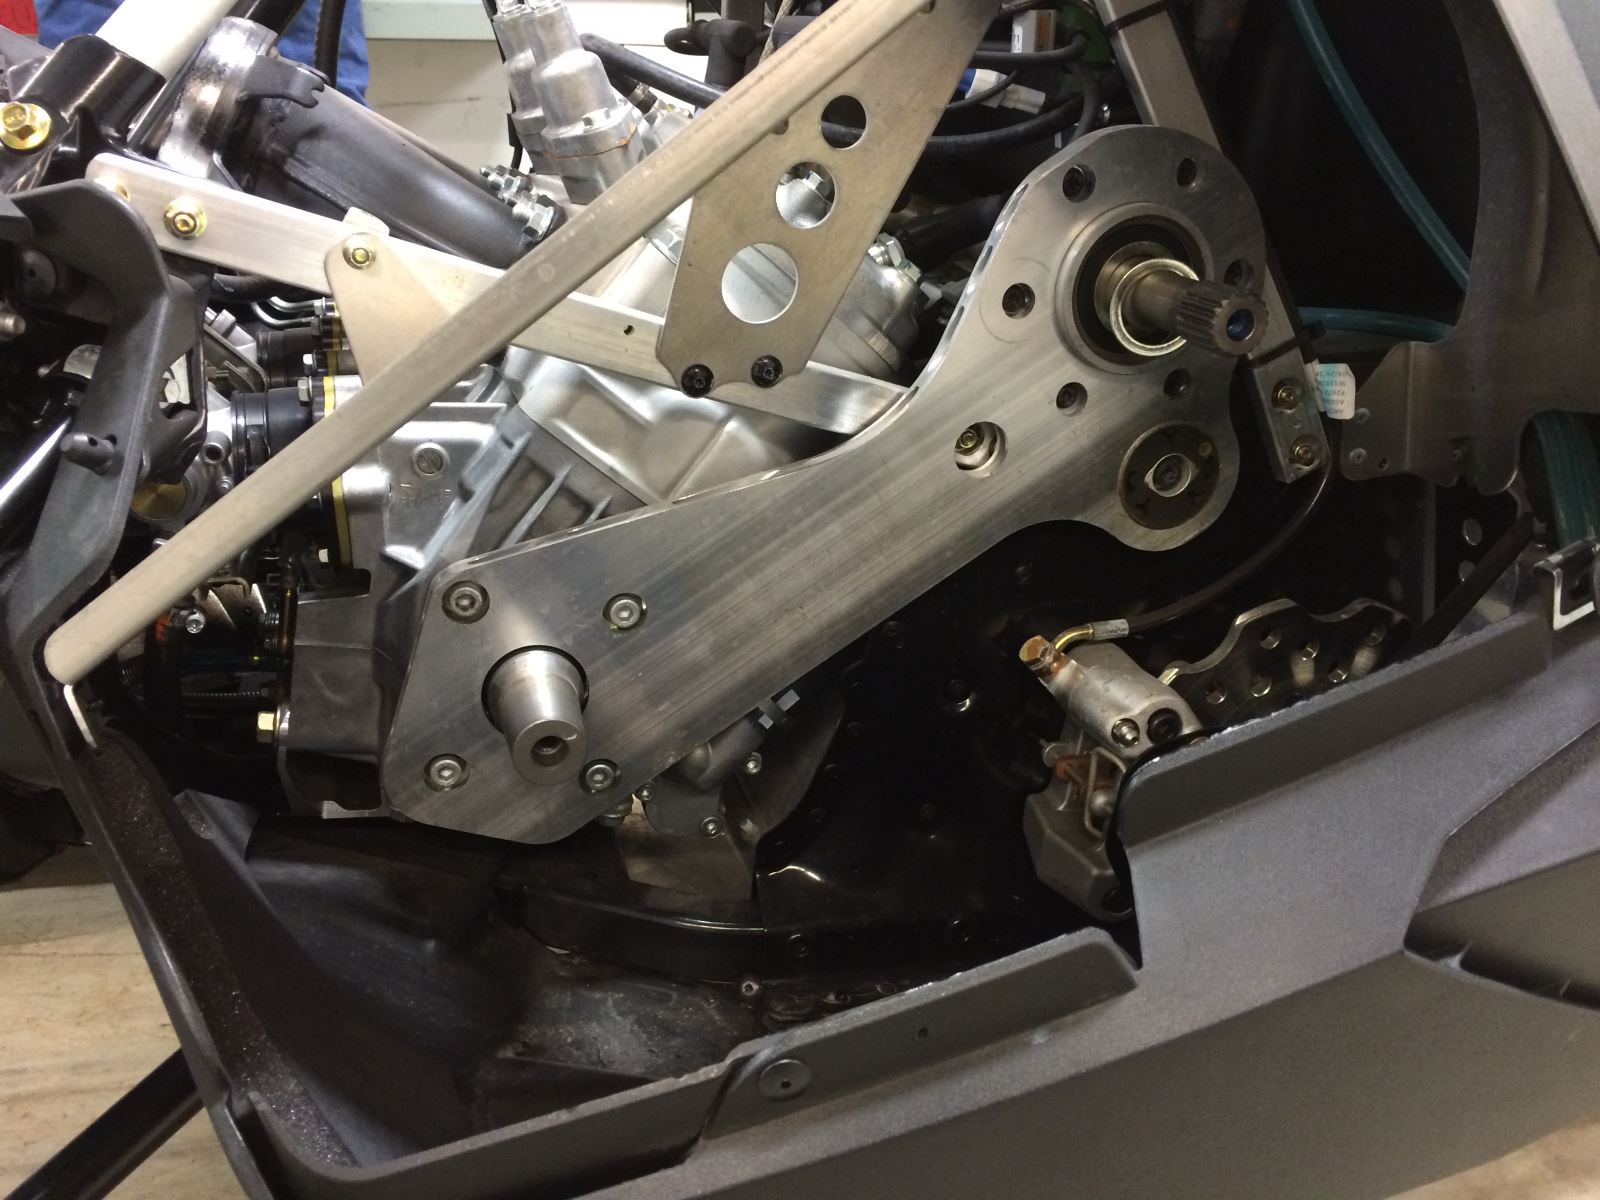
With the clutches removed, you can now get at the torque plate.

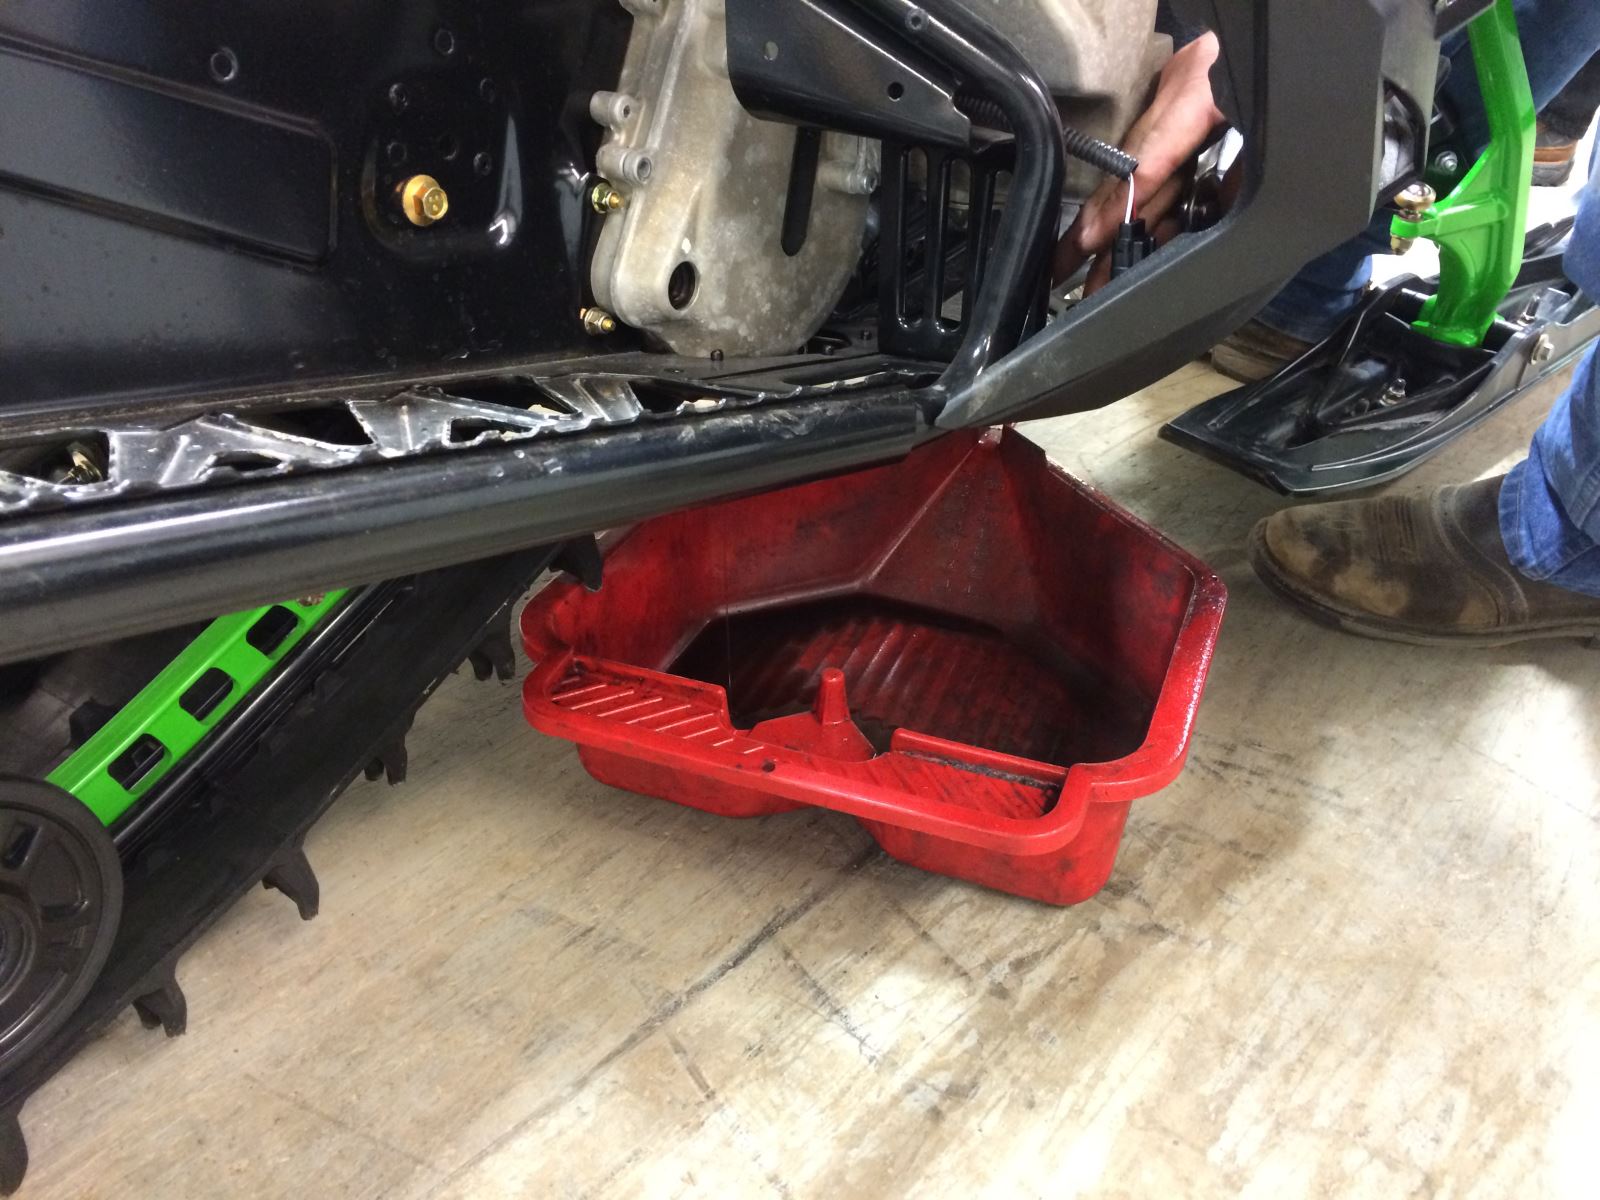
Before you crack open the chaincase, make certain you have a catch-pan to collect the gear oil. There are few things worse than having gear oil on the floor of your shop.

With the chaincase cover removed, you can get at the chain tensioner and gears.

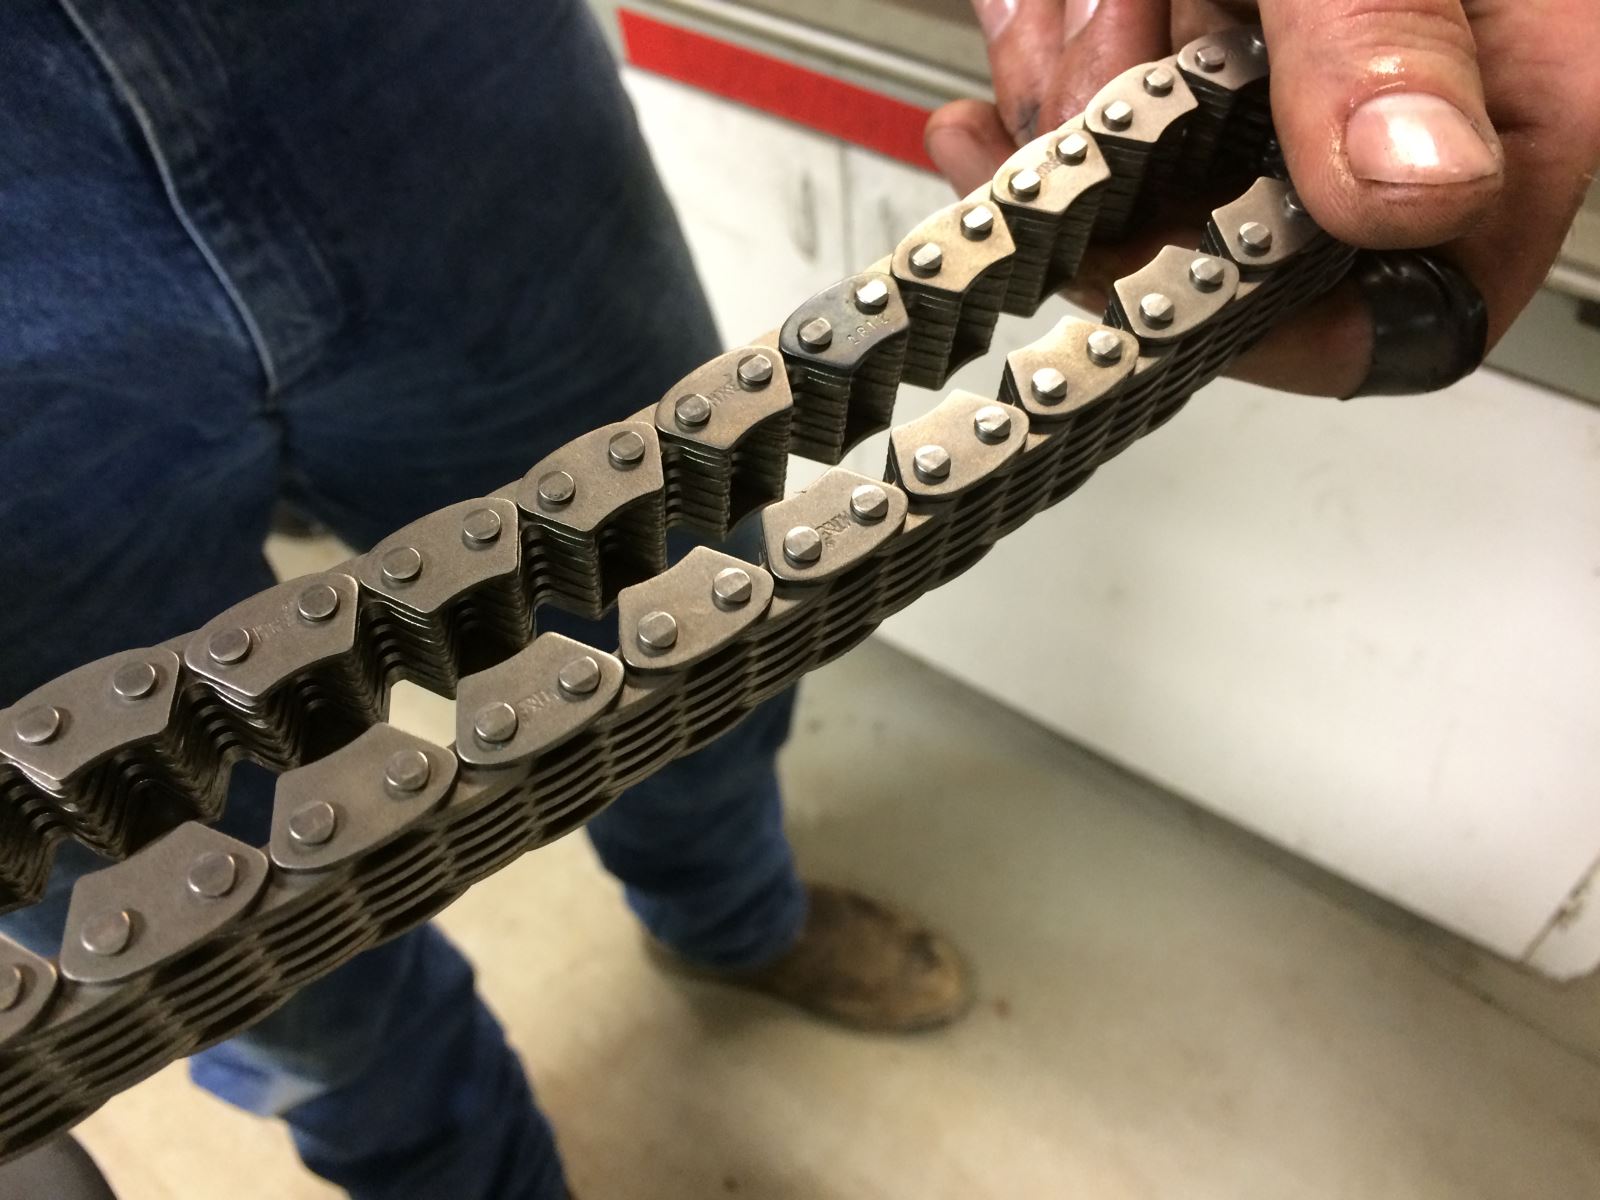
If you look closely on the upper right side of the chain you will notice the darker link (about fourth from the end). Remember to have this link facing out when your replace the chain.

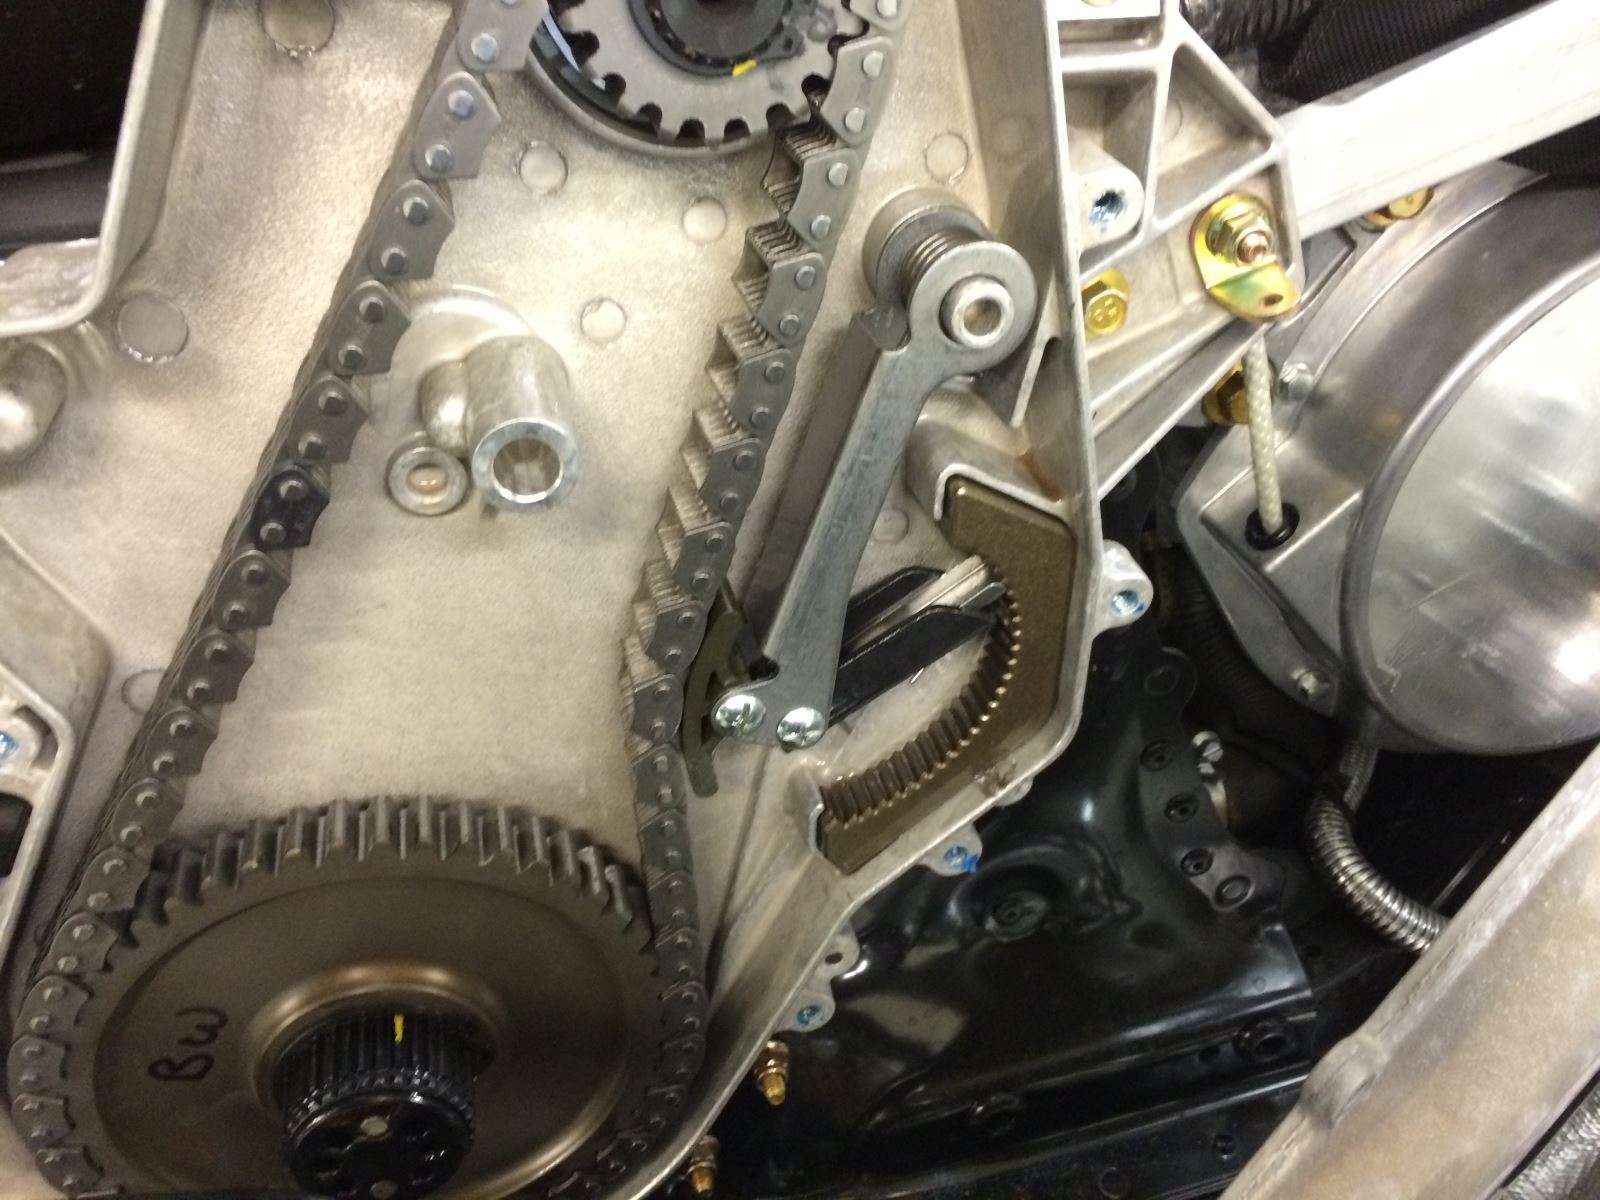
With the chain in place (notice the darker link in the middle of the chain) it’s time to replace the chain tensioner. Don’t get your chain too tight at this stage … it will automatically increase the tension as needed.

Although many mechanics will tighten bolts up to where they think they should be, you really ought to invest in a torque wrench and set bolts to manufacturer’s specs.

Once you’re ready to replace the clutches, remember the secondary will go on in two stages.

This is the second stage of the secondary.

Use a torque wrench on your clutches to meet manufacturer’s specs.

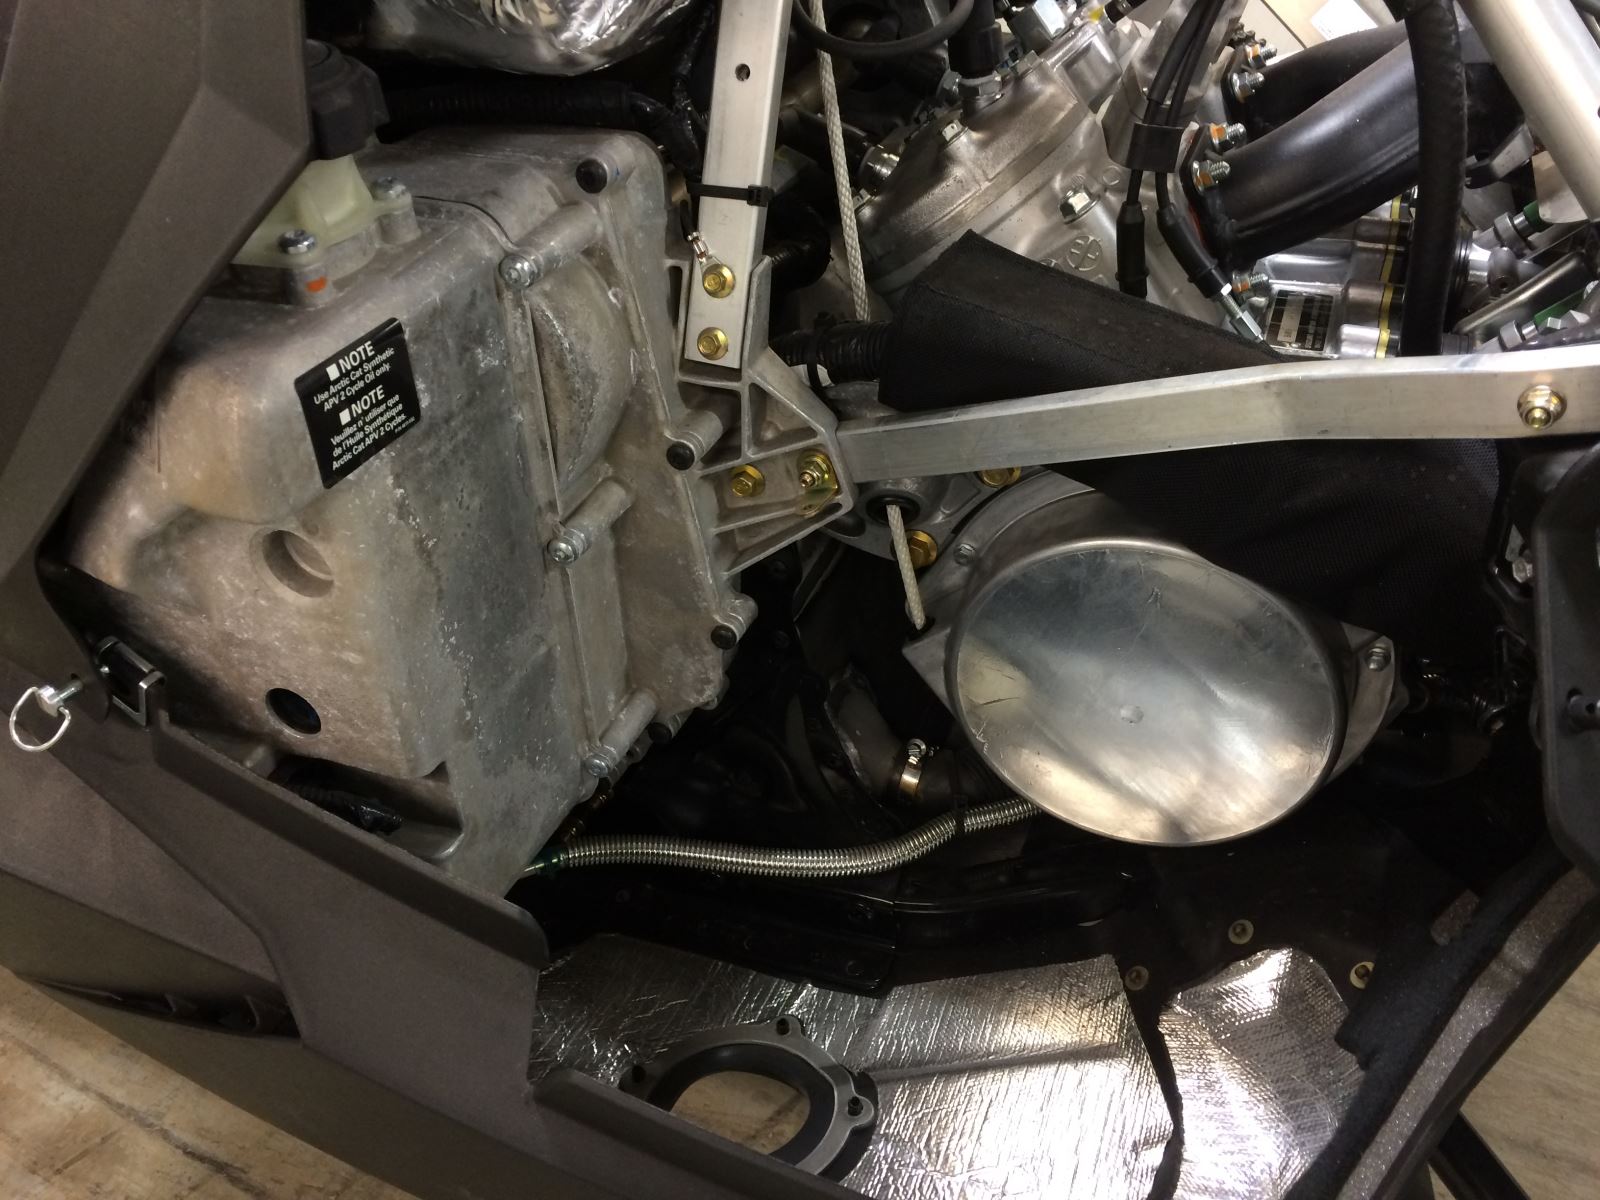
When installing the springs that hold on the pipes, be sure to have the long part of the spring facing the engine.


Hardass

Well-known member
Lifetime Membership
Nov 26, 2007
4,013
514
113
Troy Montana
To me the 2.6 is the best all around track. hurry up and some one can get that thing on the snow. Oh and i wouldnt mind being the one hahaha.
 

MT Backcountry

Well-known member
Lifetime Membership
Aug 29, 2008
553
111
43
Montana
Love the Sled

Great to see the Cat and Snowest get together on this, Look like it's ready to ride with all the goodies. Current sled is the old 2007 M1000 so I would ride the hell out of her!!
:face-icon-small-win
 
D

daldera

Member
Mar 13, 2015
59
22
8
While the 2.6 is probably a better "all around track", you are building a mountain sled to give away. Make it the best, most fun deep powder sled you can. I vote put the 3" track on it!
 

bholmlate

Well-known member
Premium Member
Dec 3, 2009
1,400
778
113
Reno, Nevada
So to recap the progress SW started with a
2015 Arctic Cat M8000 SnoPro

  1. Upgraded Front Suspension with 2016 components
  2. Upgraded Rear Suspension with 2016 components
  3. Upgraded stock drive system components with a Team Rapid Response/Reaction clutches,
  4. Replace the jackshaft.
  5. Change out the OEM gears with Borg Warner gears and chain
 
I
Apr 12, 2015
3
0
1
Haven't ridden a modded cat in a long time. Be interesting to see what a new one has to offer. Doesn't matter to me what u all do to it I'm sure it will be sick an one of a kind when it's done.

One request thou.......CUSTOM AIRBRUSHING.
 

boondocker97

Well-known member
Lifetime Membership
Oct 30, 2008
4,080
2,801
113
Billings MT
Probably been said before but do a lift kit like the new Polaris or skinz stuff for the Pro. Those spindles would be monstrous!

I think the ride height in the front end of the cat was already taller than the stock Polaris Pro or the pre-T3 skidoo.

After seeing some of the things you guys have done, I would say these items are next:
Try some type of coupling kit for the revamped rear skid to help control the ski lift - Zbroz, OVS, or ARC. I was thinking go stock motor and lightweight drive system with belt drive, light trackshaft, carbon and Ti clutch parts, but since you went with the hyvo drive chain might as well go big bore now! Lighten the hood, exhaust, and oil injection delete. Tube running boards of some variety. Upgrade the stock 16 Evols with Kashima coated sleeves. And lastly, how about a '90s Cat themed wrap with the old orange, purple, and green color scheme!
 

smokindave

Canada Moderator
Staff member
Lifetime Membership
Nov 26, 2007
4,146
1,950
113
Calgary Alberta
Lots of great suggestions here but am I the only one that would like to see a return to the diamond drive.
The secondary down lower would make it a side hill monster...
Just a thought,maybe Black Diamond would help out.


Sent from my iPhone using Tapatalk
 
Status
Not open for further replies.
Premium Features