• Don't miss out on all the fun! Register on our forums to post and have added features! Membership levels include a FREE membership tier.

Tkuss's 2015 Summit T-3 Mods/Ride Log

hobbes

Well-known member
Lifetime Membership
Nov 26, 2007
809
656
93
e4f6af6e781d27d382452cff3271935b.jpg


Just picked up my 174 T3 today, keep the updates comin!
 
2

2fun4u

Well-known member
Feb 20, 2002
418
111
43
Mountain Home, ID
www.2coolairvents.com
Yea, when youre the one who designs and hand makes the vents, does all the bookwork, answers phones, does snow shows, does the website AND has a full time job, something gets neglected. Unfortunately this year its the website. Ill try to update the XM stuff.
 
T

tkuss

Well-known member
Dec 12, 2007
446
297
63
Fort Collins, CO
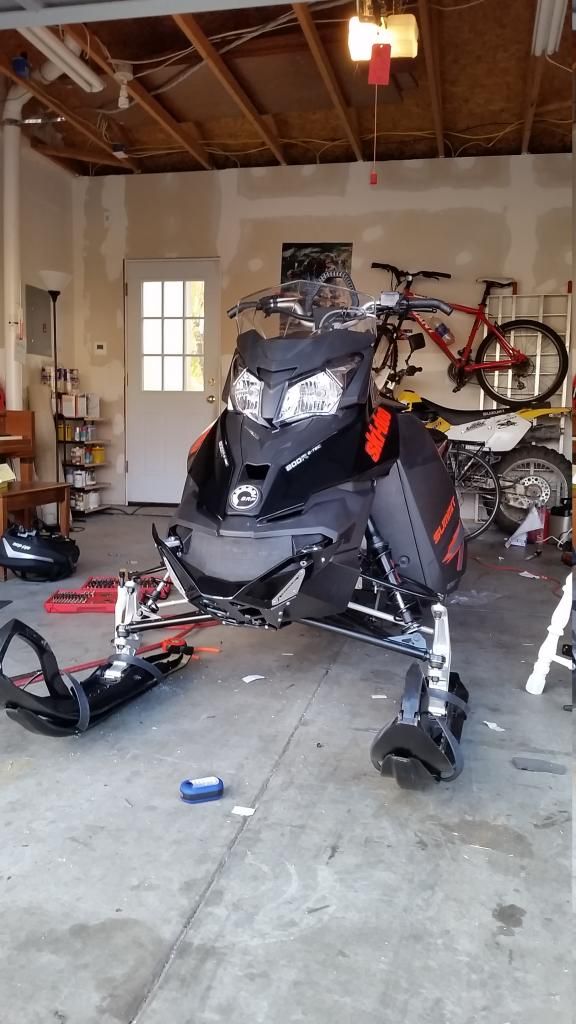
Worked on the sled this weekend and got most of the heavy lifting done as far as the mods I have planned go.

First I installed the Ski-Doo Ambient Air & Engine Temp Module
http://store.ski-doo.com/product/846724/860201021/_/Ambient_Air_&_Engine_Temperature_Module


This module shows the outside temperature on the stock gauge cluster. By the description I was also hoping it would show an actual # for the engines water temp vs just the gauge bars. However I have yet to find out how to get a # for the water temp on the gauge, so maybe this module doesnt do that?

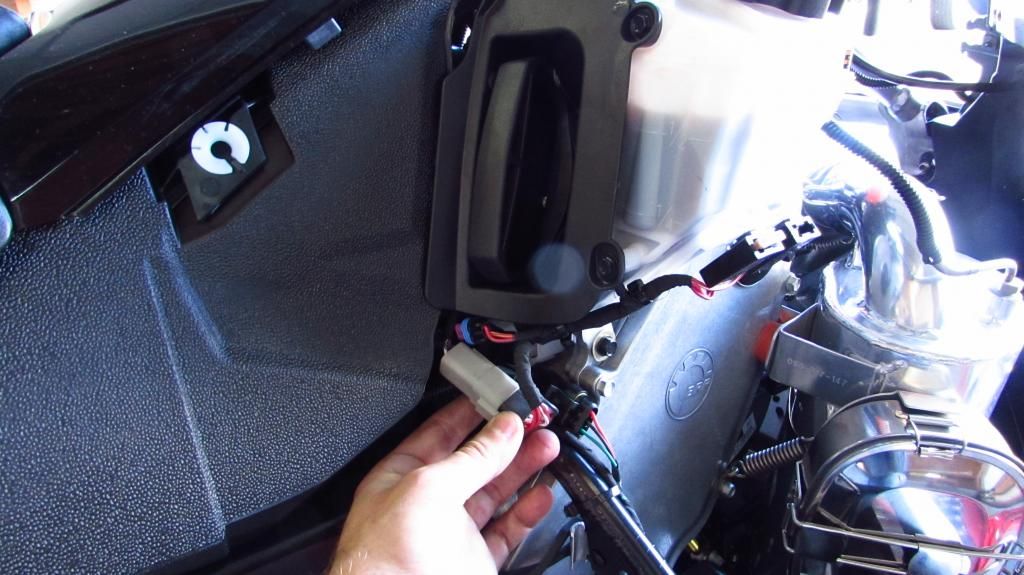
The Doo directions for how to install this are terrible in my opinion. It took me 2 or 3 hours to install this and 90% of that time was spent sitting trying to figure out where to plug this thing in.

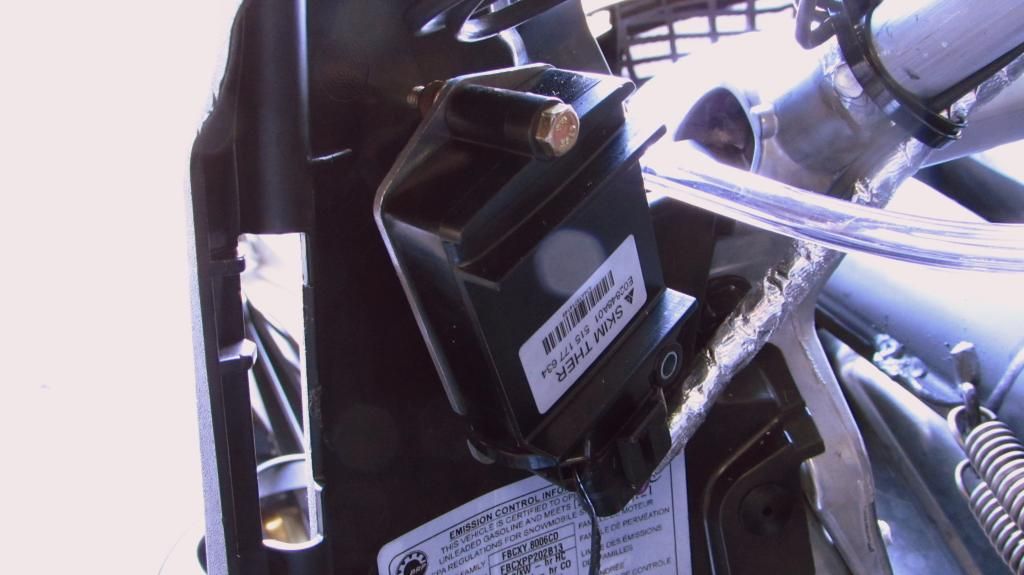
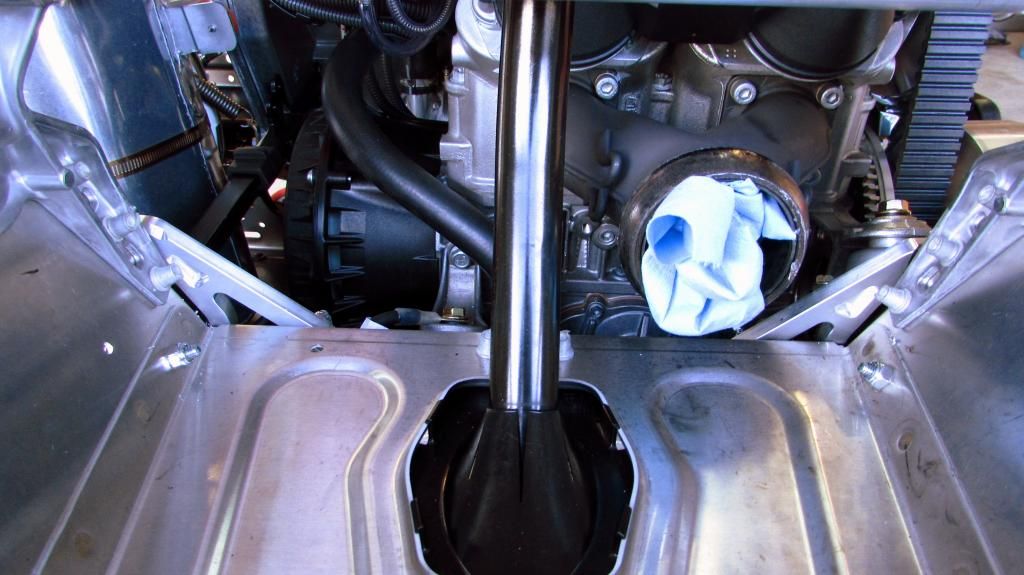
The module above gets installed on the inside of the panels near the top of the shock mounts, and it gets plugged into a factory accessory plug on the other side of the sled near the back of the oil tank.


The above accessory plug is plugged into the oil tank from the factory, just to give it some place to sit without wobbling around. I did not know that, which was the reason it took me so long to find it and this was the main cause of this taking so long to install.

Finally doo's directions were very unclear to me on where they wanted me to install the temperature sensor, I know the directions called for using a template and doing some drilling. Since I could not make sense of the directions, I did not want to go blindly cutting holes in my brand new sled. Therefore instead I just snuck the sensor outside the left side panel, where I think it will work just fine, and I did not have to cut any holes in my sled.

Here is a pic of the sensor


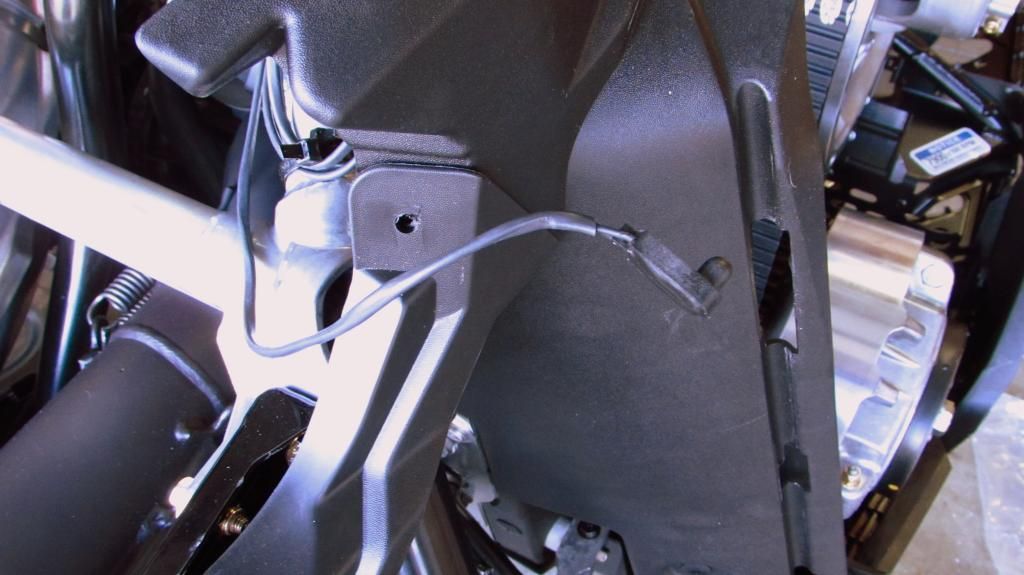
And below is a pic of how it looks with the sled all put together


And for those who are curious, here is what the outside temp looks like on the gauge display.


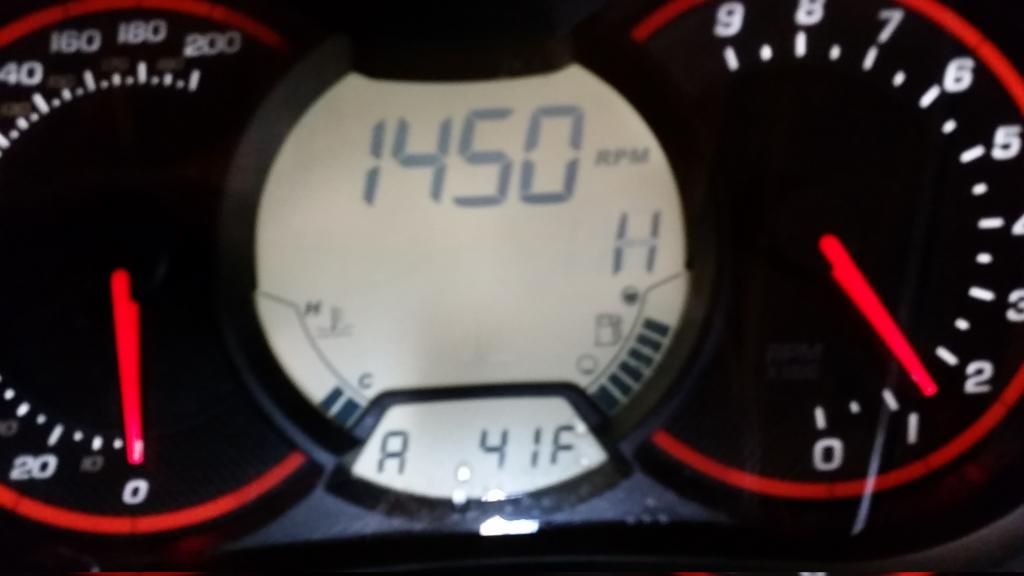
For 140$ this thing is definitely a waste of money. But I think its kinda cool having the actual outside temp available on your sled, hence the reason I bought it.


Onto the Racwerx bumper. The directions that come with the bumper are pretty good so instead of going into any sort of the depth on the install, I will just show some pics of the install process below. I also cut of the front of the doo extreme skid plate, and put it over the all the bumper braces on the bottom for even more protection. I got that idea from backcountryislife


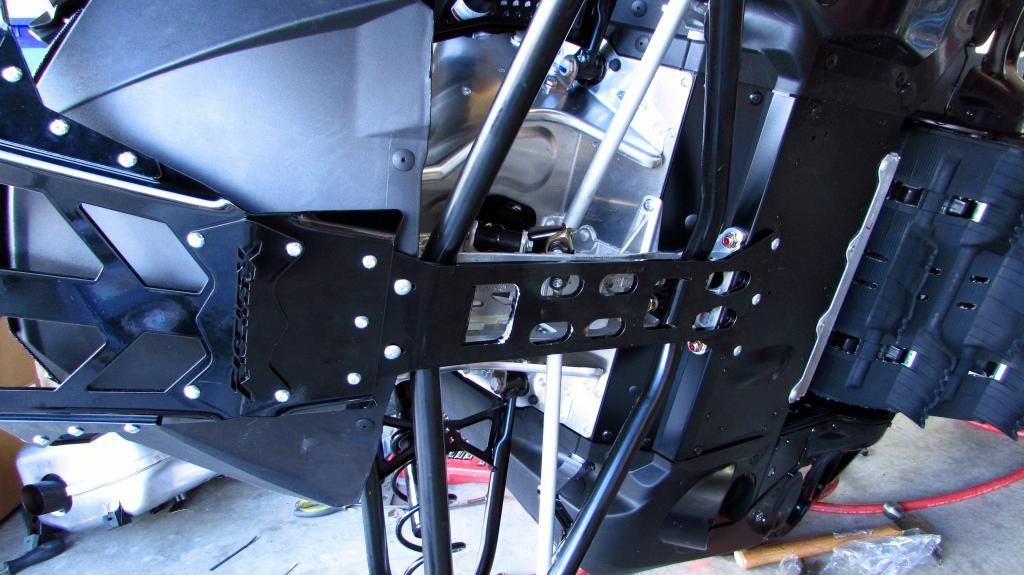
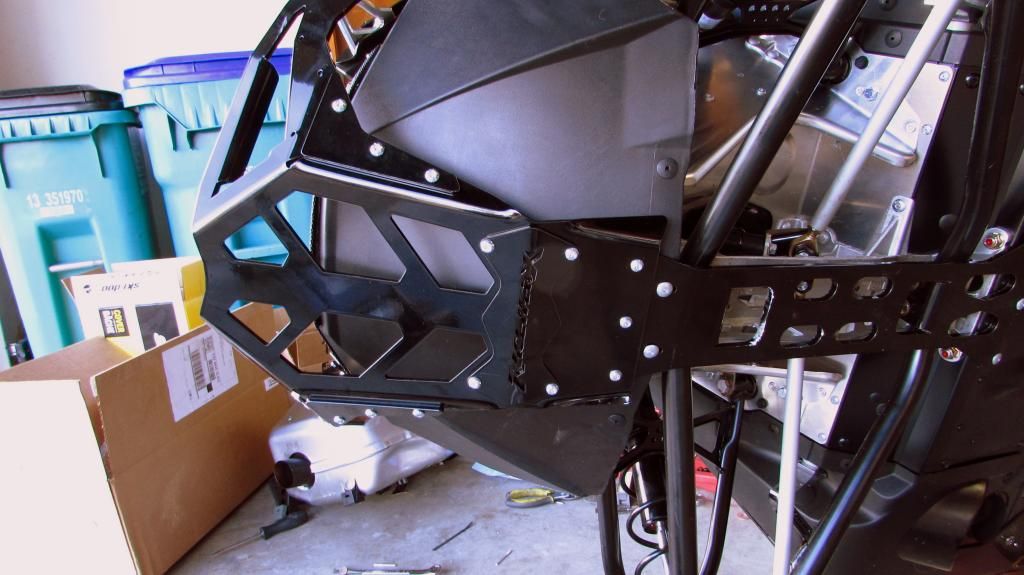
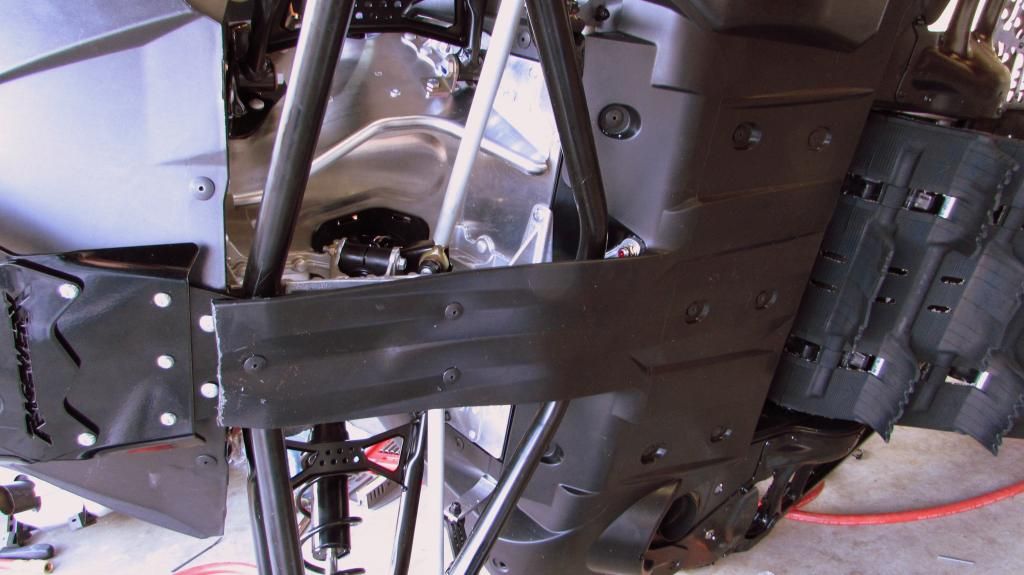
Overall, the bumper install went well, until I had to put in the last two bolts and the holes were not lining up at all. Without going into much detail, I made it work by just cutting two holes, and bolting it in. But I think a certain part was cut the wrong way, as if I followed the directions to a T, I woulda had to screw the bolts into a hole that was pointed 45 degrees off from where it was suppose too. So I flipped that part around which made the angels match, and drilled new holes so I could get the bolt in and made it work. I coulda just installed something wrong, but I feel there is only one way for this bumper to go together. Either way I made it work and I think it looks great.

As I was installing the bumper, I thought to myself a few times about how well thought out the design of this bumper is. I really like how it also uses the upper shock mount as a mounting point, this combined with it also being mounted to the bottom of the sled I think should make it much much stronger than stock.


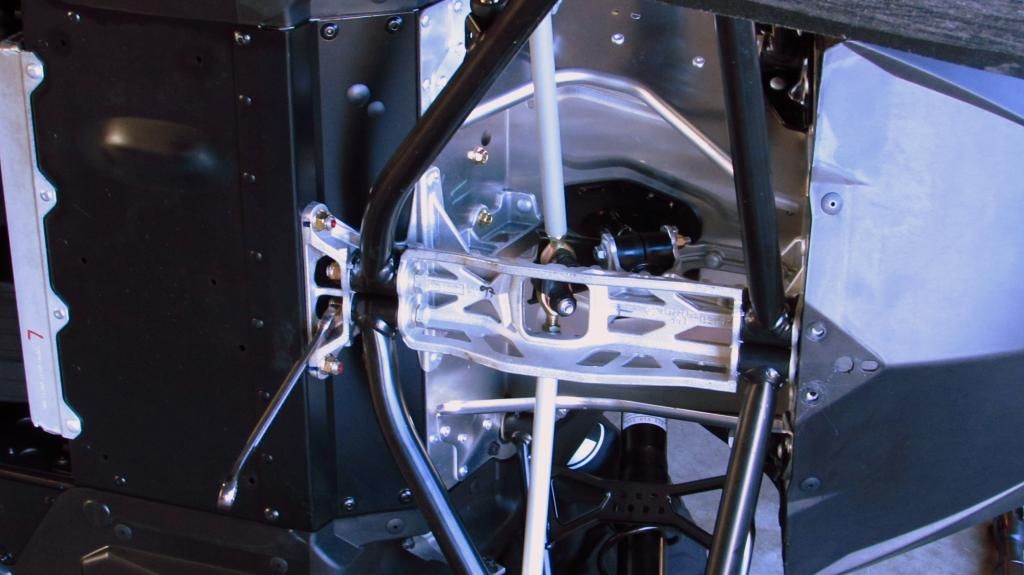
I also installed the upper a-arm GNR brace. I am new to doo so I dont know all the terms yet, but I believe in the pic below you can see these helping support the engine module? They are the billet triangle pieces on the left and right side of the pic


So what else did I do to the sled this past weekend?

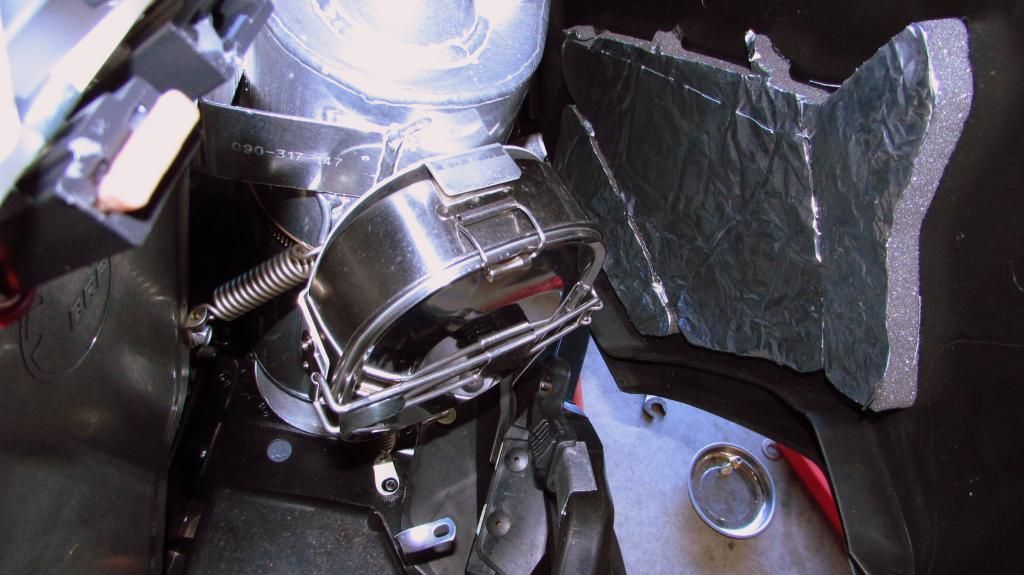
I defoamed all the panels


However I decided to leave on some of the foam with the foil on the exhaust side of the sled near the muff pot.


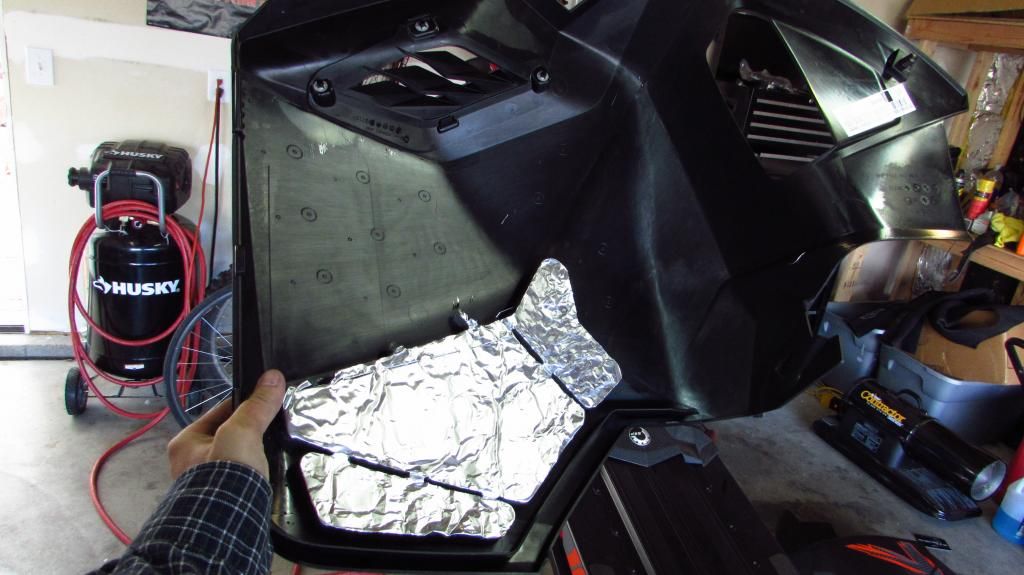
This way if the muff pot start rubbing into the side panel for some reason, it will first have to make its way through the foil covered foam, giving it some protection.


Finally something I think is very cool about the doo's is there clutch cover design.


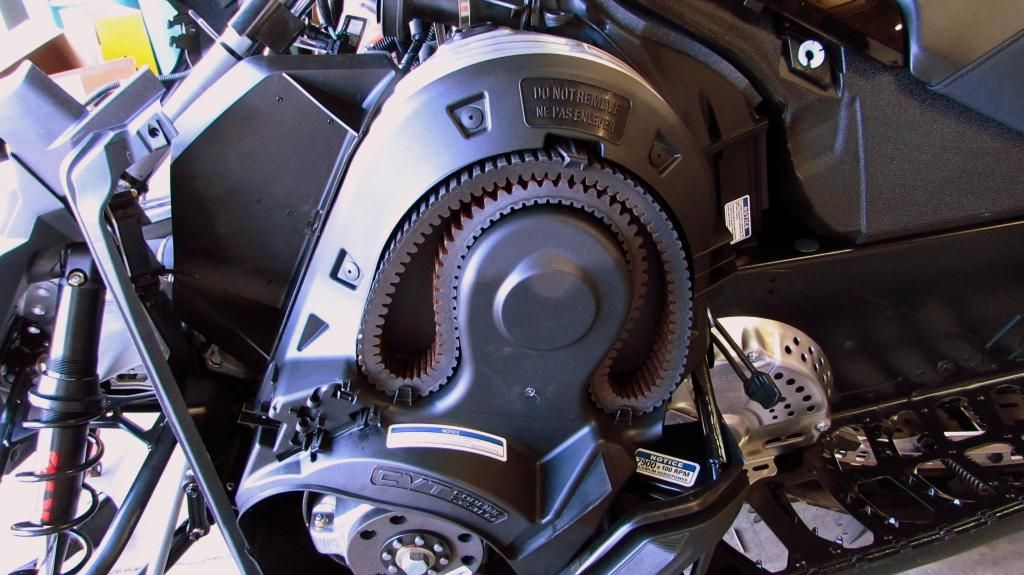
Seeing as how this is the xm forum, I assume most people know this already, but like I said earlier this is my first doo so I am learning about the sled every day. But basically, the whole cover system is designed to use the air movement from the clutches spinning and suck in cold air from the foot well to help cool the clutches. Doo claims it reduces clutch temps by up to 30 degrees. Here is a quick old article about the cover for those interested.
http://mountainblog.ski-doo.com/new-clutch-cover-for-2012-sleds/


Almost forgot, I also installed the 2 cool vent that covers the front grill


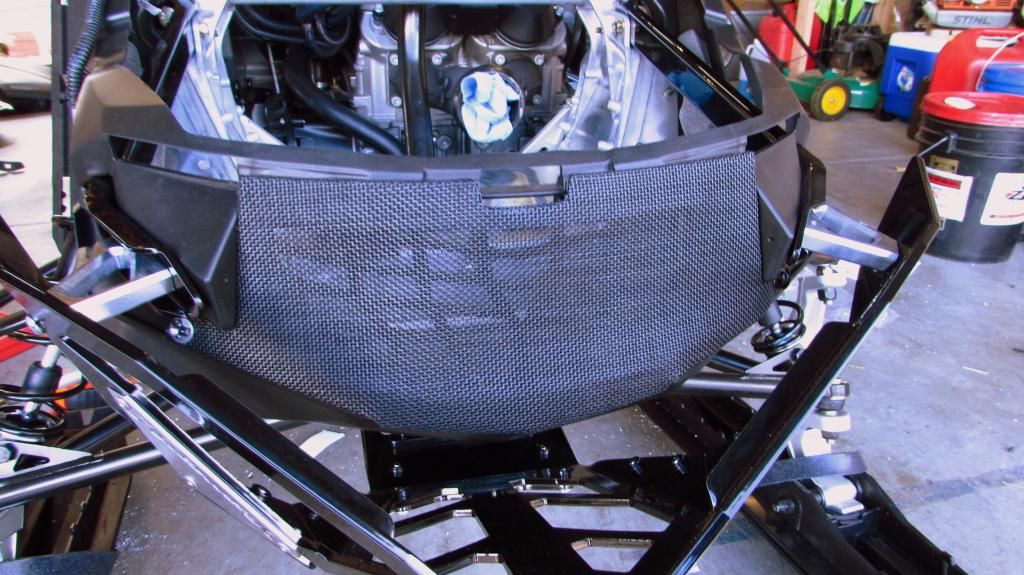
Install took about 2 mins and the vent seems nice and should hold up well and most importantly keep snow outta the engine bay.

Future mods, which have yet to arrive at my door step. Roosterbuilt clutch kit and BM Fab boards.


Snow in the forecast this week!!! If it hold true I should get some more road miles, later this week or this next weekend!
 
K
I have the same bumper on my 14, like that idea with the extreme skid plate. I have thought about trying that but was gonna try and leave it a little longer. Probably have to heat and form it a bit, any thoughts? Also went with the extreme air vents for the nose vent, they make vents for the intakes also that are pretty stout. The stock ones are weak. Enjoyed the thread Thx
 
R
Oct 10, 2014
306
73
28
58
Awesome post and thank you very much for updating it! I checked at new Freeride, but wished I would of done the T3. Next time for sure. That is one bad azz looking sled for sure. Little bit of overkill here in Maine, but damn, its a nice looking ride. Like to see them do the T3 pkg in the 154"er and that would be the ticket for what I need. Sled looks awesome man. Good job on the mods.

The 174" picture is nice too. That sled looks longer than a night in jail!!!!!!!!
 
T

tkuss

Well-known member
Dec 12, 2007
446
297
63
Fort Collins, CO
The front grill vent is held on by two rivets on bottom of either side.


And yes my sled has a bar graph of the water temp too, I was under the impression the module would give an actual # displayed on the gauge.
 
I

i'llDooit

Well-known member
Nov 27, 2007
2,486
812
113
Duvall washington
Fyi, the 1ST Service on the sled at about 300 miles they change the chain case oil. ... So if your rooster built kit changes the top gear, you could install it after the service and save the oil. Only about 20 bucks but ?
 

Bocephus

Well-known member
Lifetime Membership
Dec 27, 2010
1,638
765
113
If you tip the sled over on the left side and balance it you do not have to drain the chain case oil to change gears. i dont know if anything is different on a T3 with that drop and roll chain case.........but i have done this on an XP and non T3 XM. i put a short level on the chaincase cover and found "close to level". use whatever you have laying around to prop under the left handlebar and the floor to level the sled out. you will not loose any oil.
 
Last edited:
T

tkuss

Well-known member
Dec 12, 2007
446
297
63
Fort Collins, CO
Day 2 - Got 15 more road miles on in the morning.


Day 3 - Appears most all of CO and WY got some decent snow over this past weekend. I drove up sunday morning to check it out.


Once I got into the woods, it was deeeep


I made it to tree line and it was beautiful out


I did get in a couple small easy sidehills and full throttle climbs which was a blast but was playing it as safe as I could to avoid hidden rocks. So I cant say this was the first real ride yet, but I definitly got a quick snap shot of what to expect from this sled, and I loved it!


As I said before, the trail ride up was deep and the trail was narrow, curvy and even a bit steep in areas. I did not get stuck once, but getting up this trail really showed that I was rusty at riding, and still need to adjust to how this sled handles different from my old M.

I think the track got me outta few situations that I probably woulda ended up as a stuck for me last year. Cant wait for more seat time and more snow to really see what this thing can do.

Ive only been able to get out riding by myself so far this year, I am extremely cautious when I do this and dont wander to far from the truck so I still only have 50 miles or less on the sled, and the breakin gauge currently reads 83% I believe. I should be getting out with some riding buddies soon and be able to ride more than 10-15 miles in a day...


Below are some pics of the snowbuildup after I loaded it back up on the truck for those interested....


Snow forecast is still looking good, with a bit of luck it will keep piling up as quick as it has been. And every weekend the riding will get better and better.
 
S
Nov 5, 2014
26
4
3
39
Denver, CO
Awesome pictures, took my sled up to Vail Pass this weekend for some break in time. this sled is awesome. there was about 3-5 feet depending on where. broke some new trail and it was about 3 feet deep. initial impressions are this sled is awesome, plenty of power. attached a couple of pictures of the trip.

vail-pass11-15B.jpg vail-pass11-15A.jpg vail-pass11-15D.jpg
 
S

snengineer

Well-known member
Nov 26, 2007
1,721
708
113
South Jordan, Utah
Day 2 - Got 15 more road miles on in the morning.


Day 3 - Appears most all of CO and WY got some decent snow over this past weekend. I drove up sunday morning to check it out.


Once I got into the woods, it was deeeep


I made it to tree line and it was beautiful out


I did get in a couple small easy sidehills and full throttle climbs which was a blast but was playing it as safe as I could to avoid hidden rocks. So I cant say this was the first real ride yet, but I definitly got a quick snap shot of what to expect from this sled, and I loved it!


As I said before, the trail ride up was deep and the trail was narrow, curvy and even a bit steep in areas. I did not get stuck once, but getting up this trail really showed that I was rusty at riding, and still need to adjust to how this sled handles different from my old M.

I think the track got me outta few situations that I probably woulda ended up as a stuck for me last year. Cant wait for more seat time and more snow to really see what this thing can do.

Ive only been able to get out riding by myself so far this year, I am extremely cautious when I do this and dont wander to far from the truck so I still only have 50 miles or less on the sled, and the breakin gauge currently reads 83% I believe. I should be getting out with some riding buddies soon and be able to ride more than 10-15 miles in a day...


Below are some pics of the snowbuildup after I loaded it back up on the truck for those interested....


Snow forecast is still looking good, with a bit of luck it will keep piling up as quick as it has been. And every weekend the riding will get better and better.


Michigan River?
 
Premium Features