Here's an improvement on the confusing factory installation instructions for the Arctic Cat 5639-859 Kit, Tether '12+ 800
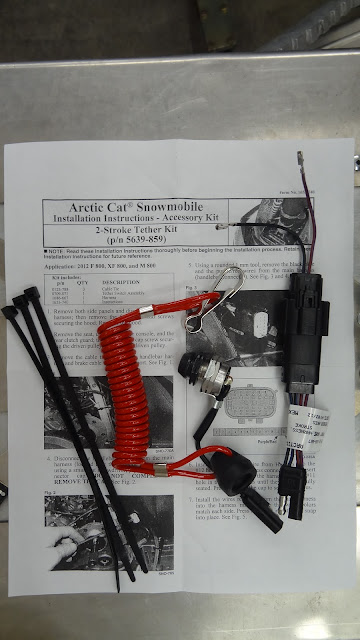
Package
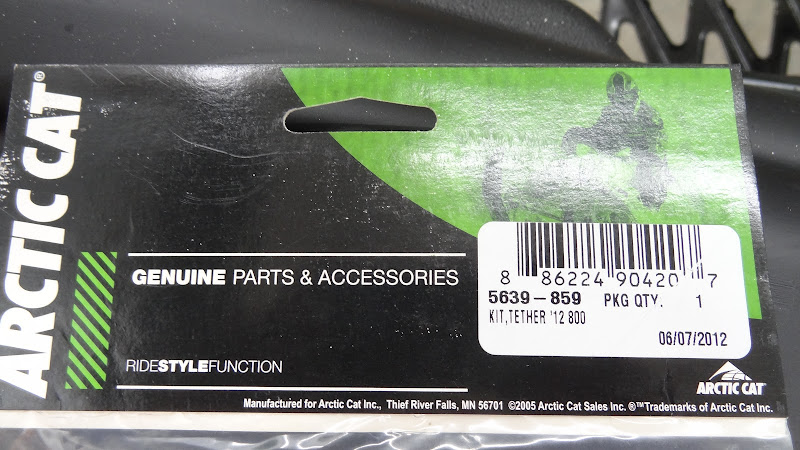

Contents
Step 1. Remove both side panels
Step 2. Disconnect the hood harness
Step 3. Remove the four torx screws holding the upper hood
Step 4. Remove the hood
Step 5. Remove the torx screw at the rear of the seat (toss it in the steel recycle bin)
Step 6. Remove the seat
Step 7. With the seat removed, turn the quarter-turn fasterner on either side of the cowl panel and remove it
Step 8. Remove the belt (either by hand turning the helix to open the sheaves or by threading in the secondary bolt with the big washer in the 2012 toolkit)
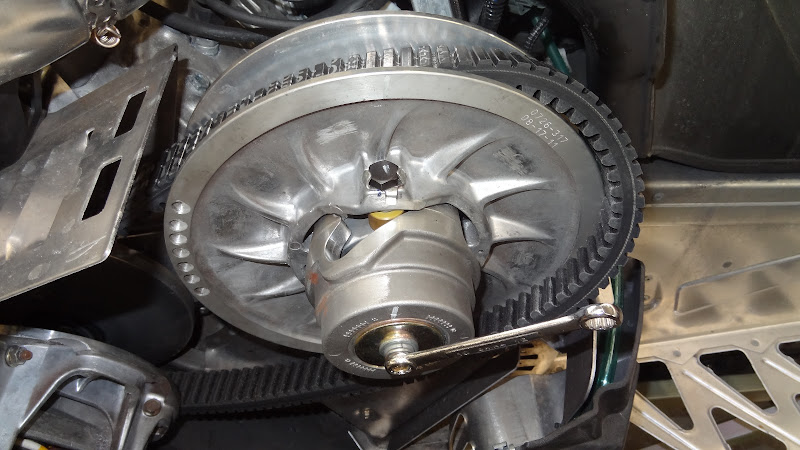
Step 9. With the belt removed, unthread the bolt on the secondary and remove the clutch.
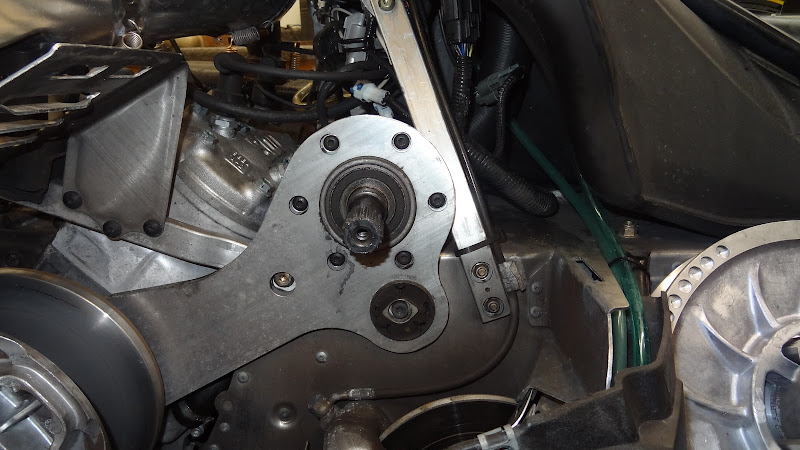
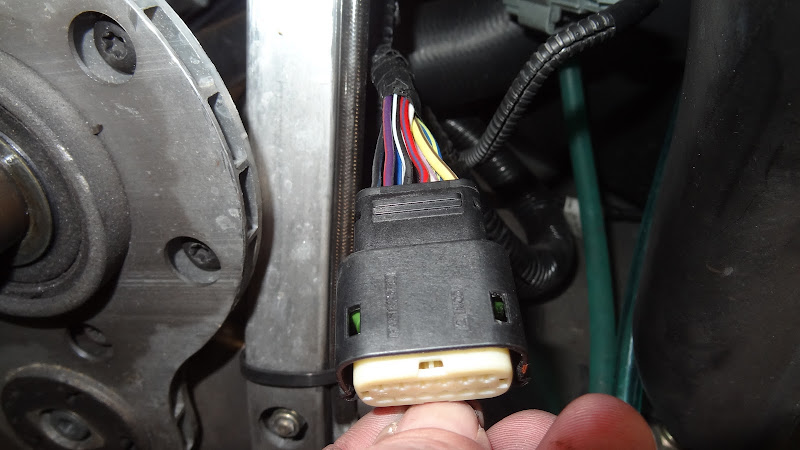
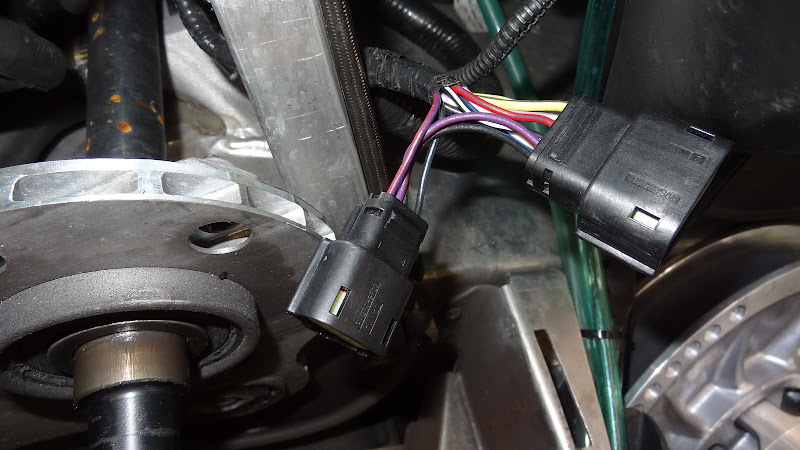
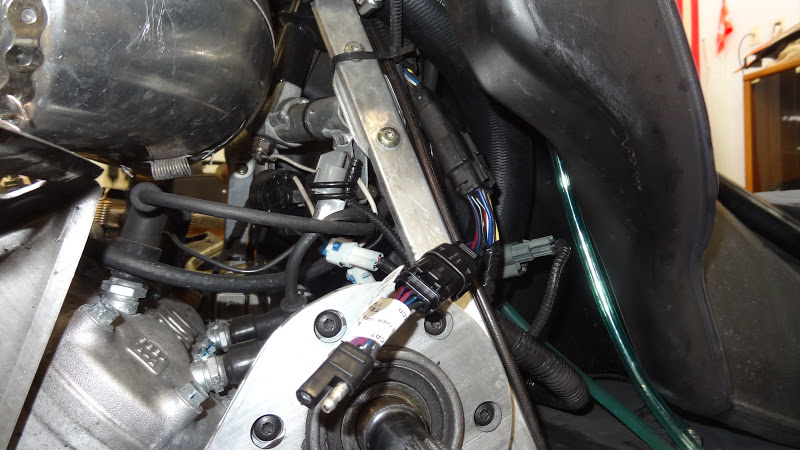
Step 10. This is the handlebar harness connector that we're after
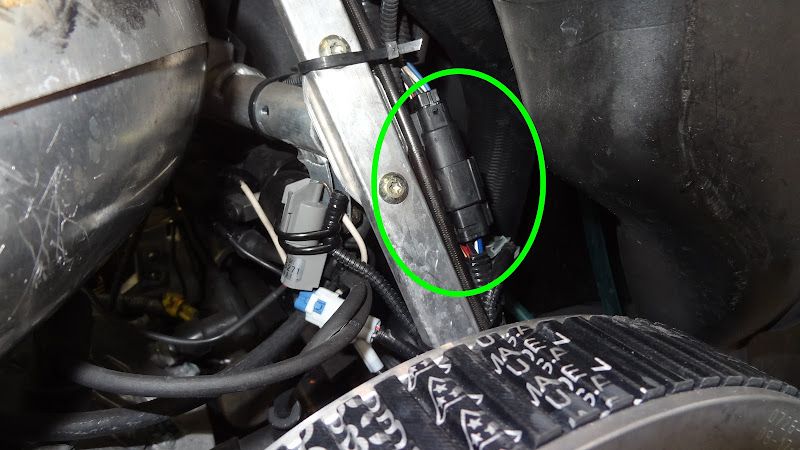
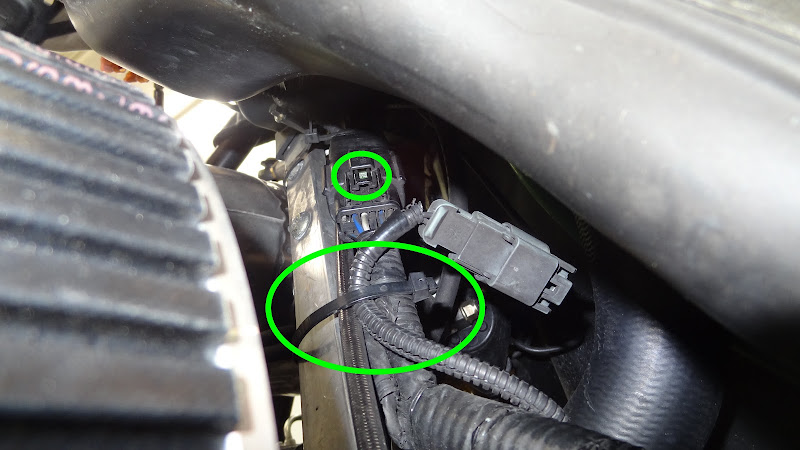
Step 11. Cut the two tie-wraps securing the harness to the aluminum tube and separate the connector by pressing on the tab (smaller circle in pic)
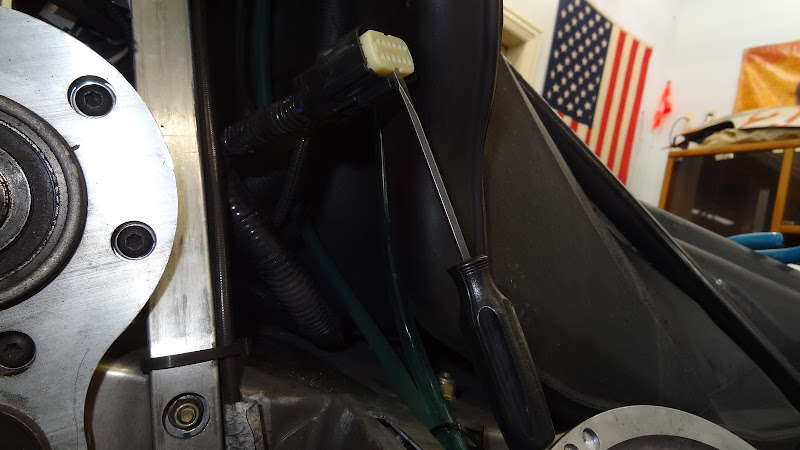
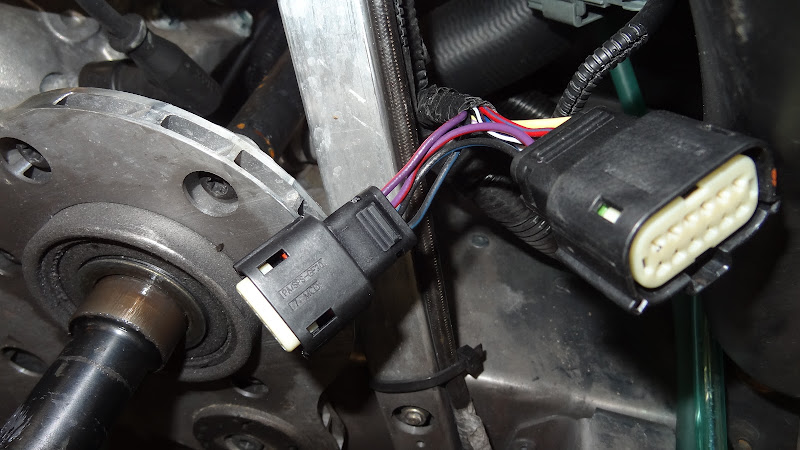
Step 12. Connector unplugged

Step 13. Using a small flatblade screwdriver, insert it into the small slot on the white part of the connector and gently pry the white portion out about an 1/8" (3-mm) past the outer black housing.
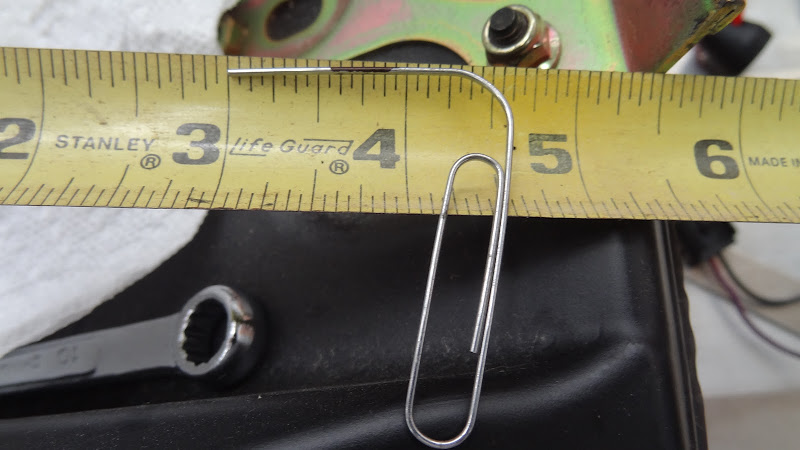
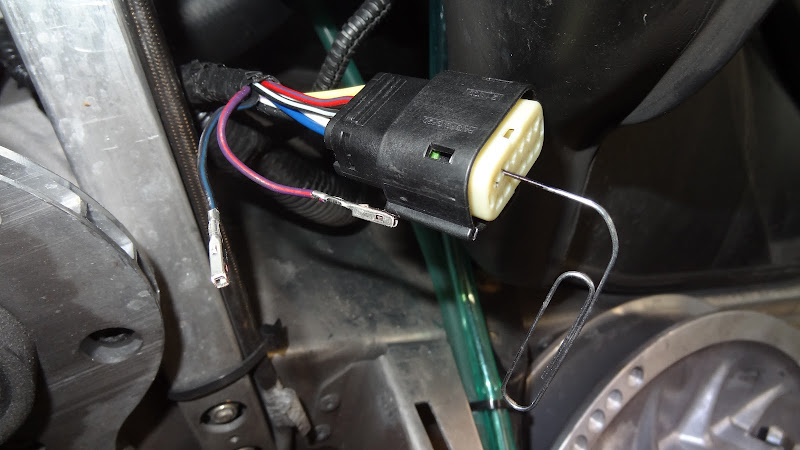
Step 14. Next tool we'll make from a large 1.75" (47-mm) paper clip
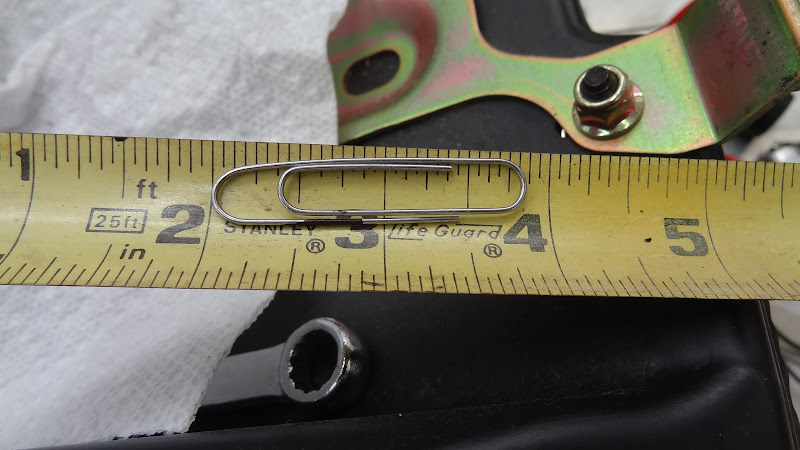
Step 15. Bend the outer leg out to ninety degrees and with a Sharpie, mark off 9/16" (14-mm) on the paperclip (not necessary but good for reference on the following steps)
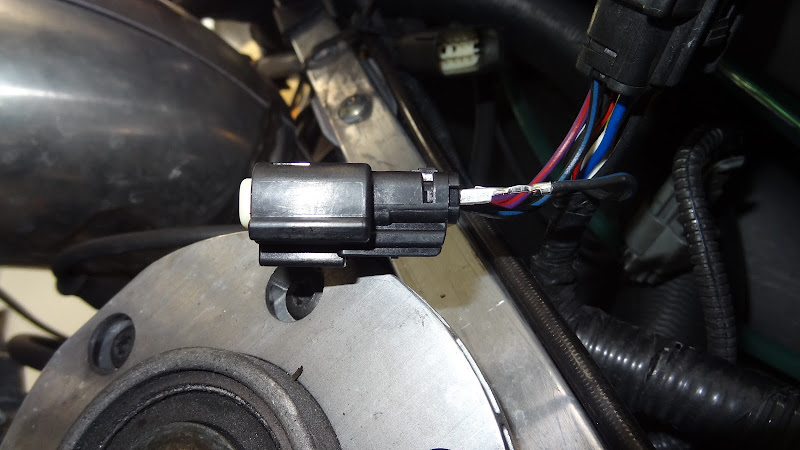
Step 16. With the connector position as shown (smooth edge on top, protrusion pointing down) start to insert the paperclip into the upper left pin location. Seating the paperclip to a depth of 9/16" (14-mm) while gently tugging on the black wire with the blue stripe will release the wire.
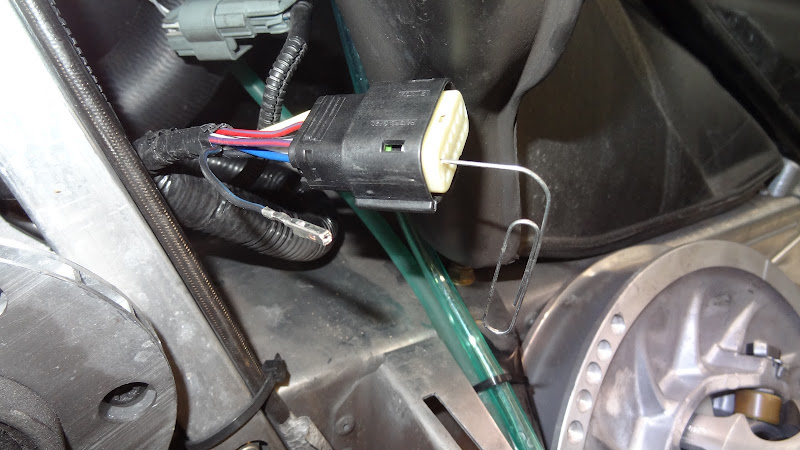
Step 17. Move over one spot to the right in the connector and insert the paperclip.
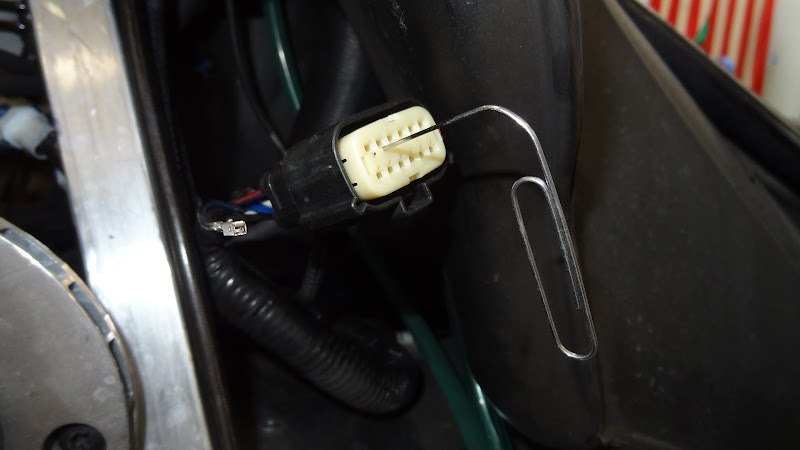
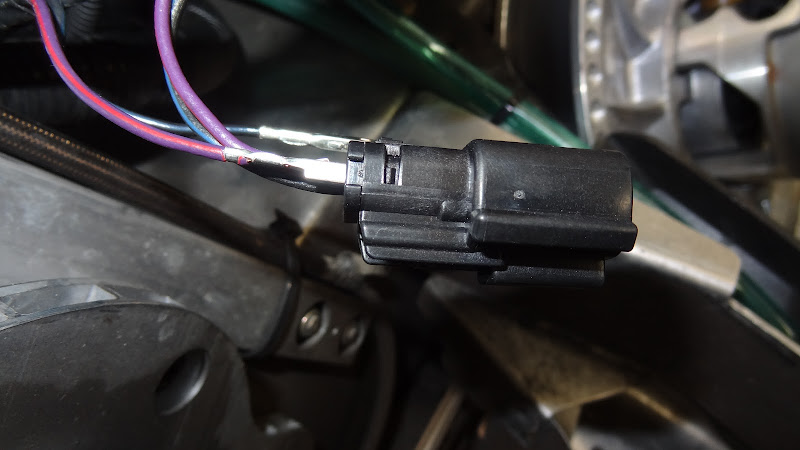
Step 18. Push the paperclip in 9/16" (14-mm) and pull on the purple wire with red stripe and remove the wire from the connector
Step 19. On the harness connector that came in the tether kit, press the tab down and unplug the connector


Step 20. Similar to the handlebar harness, use the same small screwdriver, insert the blade into the small slot on the white part of the connector and gently pry the white portion out part way

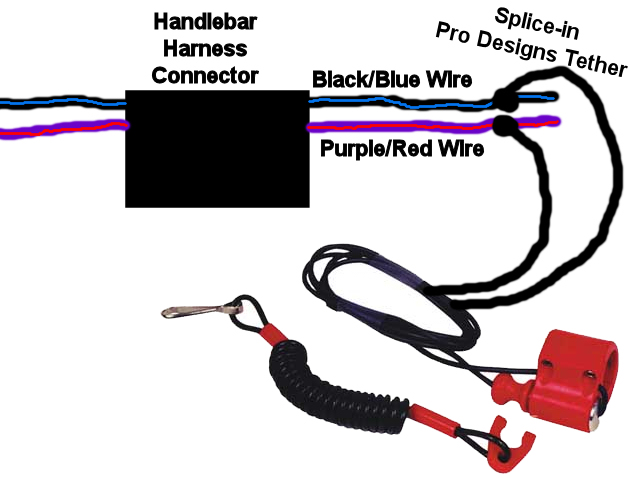
Step 21. Insert the new connector's (shown in step above) purple/red wire into the handlebar harness connector where the original factory purple/red wire was removed. Note: On the new wire, make sure the locking tab on the silver metal female socket is positioned on the same side as the flat side of the big plastic handlebar connector. Push the wire in until it audibly clicks
Step 22. Close-up of locking tab in previous step

Step 23. Next, repeat the above steps by inserting the black wire with blue stripe from the new connector into the last open spot on the factory handlebar harness connector. Ensure the locking tab is in the same orientation as mentioned in the previous step
Step 24. Now that the new connector is plugged into the original factory handlebar harness connector, insert the original purple/red wire into the open spot on the new connector (refer to yellow squiggly arrows)

Step 25. Note - Exactly the same locking tab orientation rule applies - little tab out towards the flat side of the connector (purple/red shown). Push purple/red wire in until it audibly clicks
Step 26. Repeat for the black/blue wire
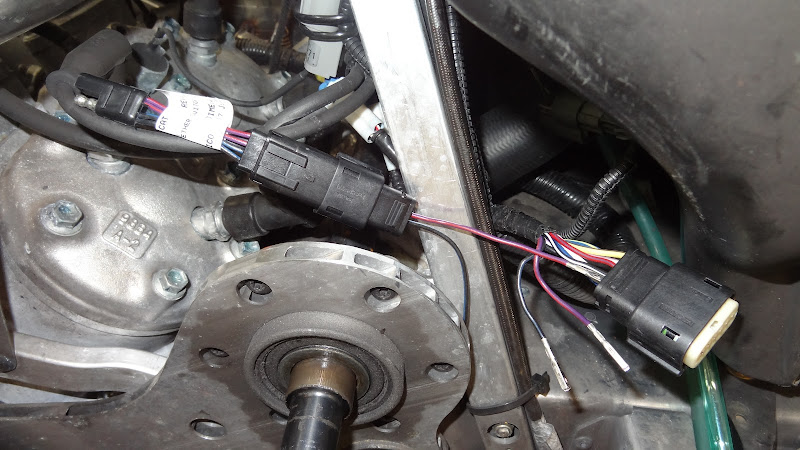
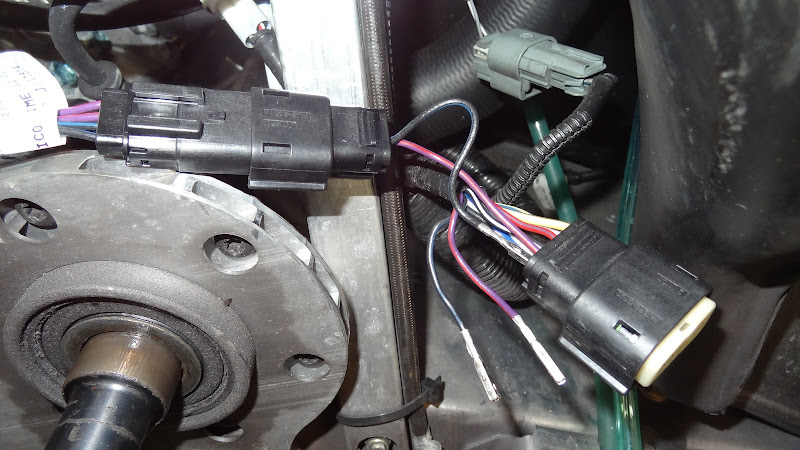
Step 27. Now that all the wires are seated, press in and seat the white part of both connectors (handlebar harness shown pressed in and new connector shown out and needing to be pressed in)
Step 28. Both connectors with white portions pressed in
Step 29. Ready for the next step
Step 30. Remove the two torx screws retaining the plastic console surround
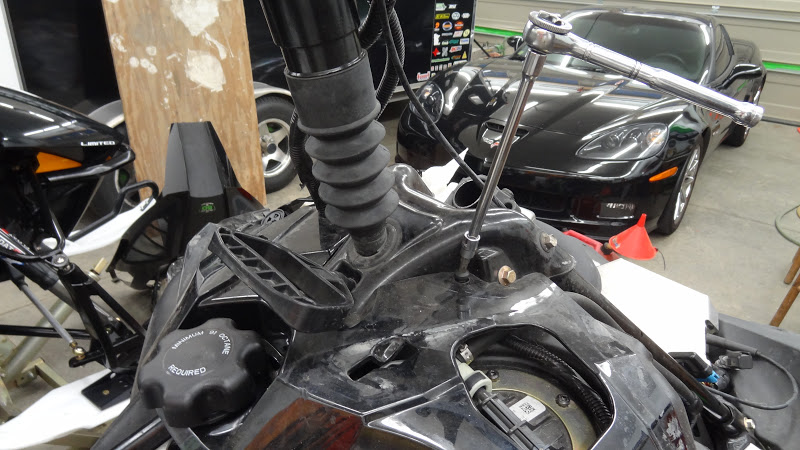
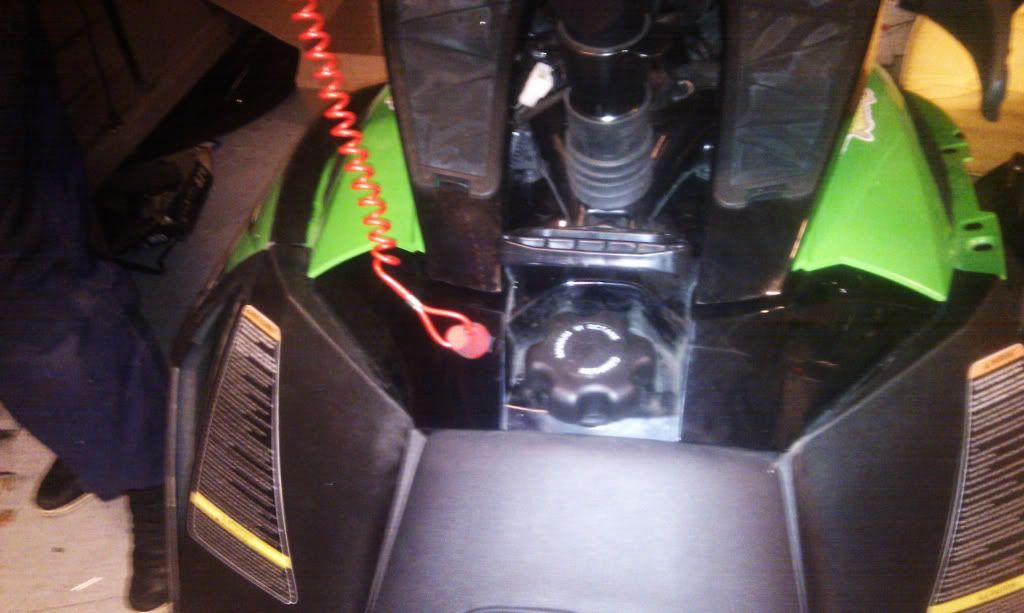
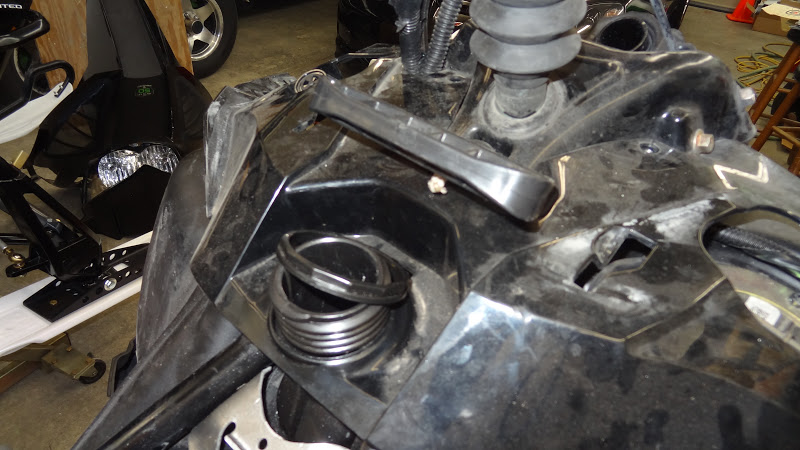
Step 31. Remove the gas cap and unthread the retaining ring nut
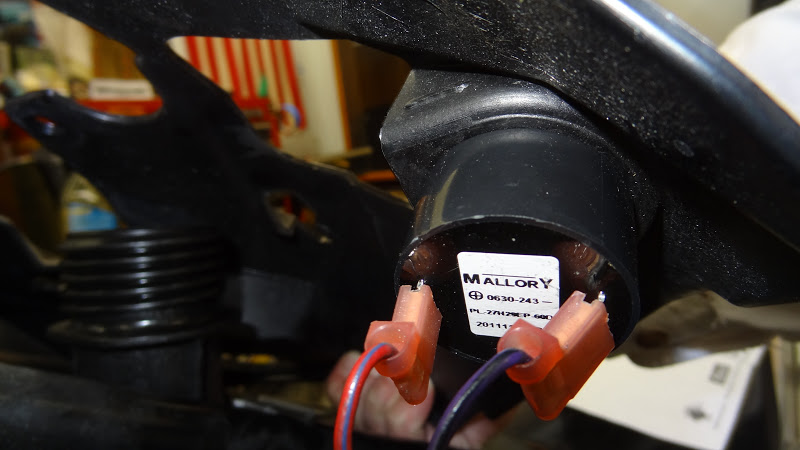
Step 32. On the left underside of the console, unplug the reverse beeper. Note: The red/blue wire is (+) and the purple/black wire is (-)
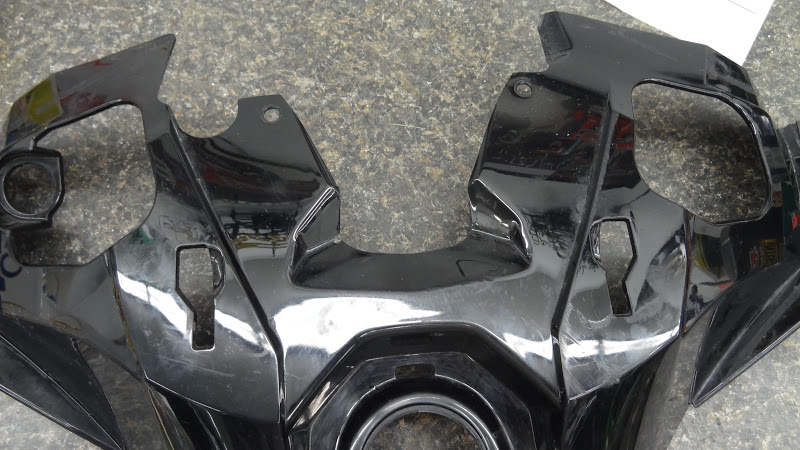
Step 33. Console on the work bench
 ''
''
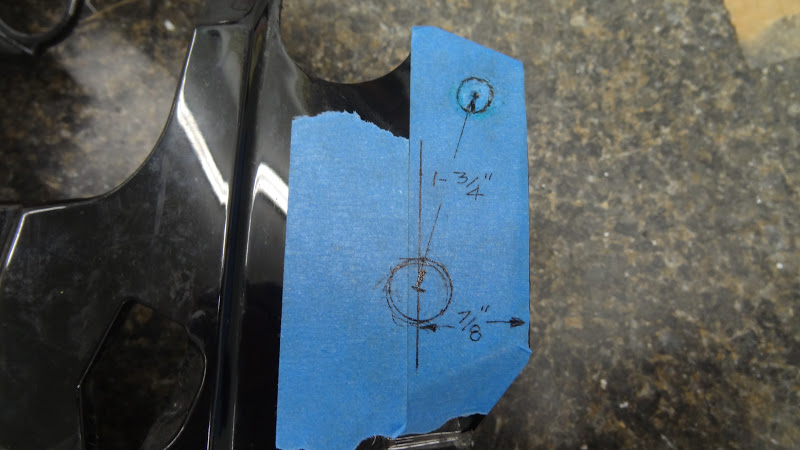
Step 34. Draw a line parallel to the edge that is offset 7/8" (22-mm). Next, measure from the center of the torx screw hole out 1-3/4" (44.5-mm) and mark where it intersects the 7/8" (22-mm) offset line.

Step 35. Close-up
Step 36. Use a 1/2" (13-mm) drill bit to drill the hole for the tether switch

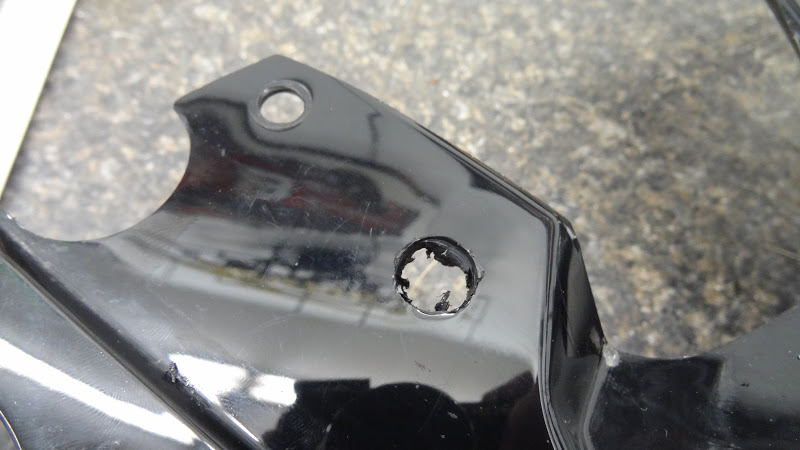
Step 37. Drilled hole

Step 38. Remove the masking tape
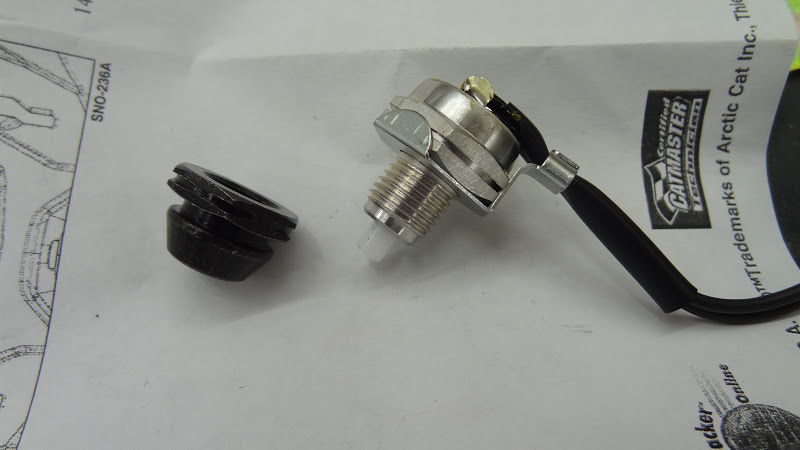
Step 39. Unthread the cover from the tether switch
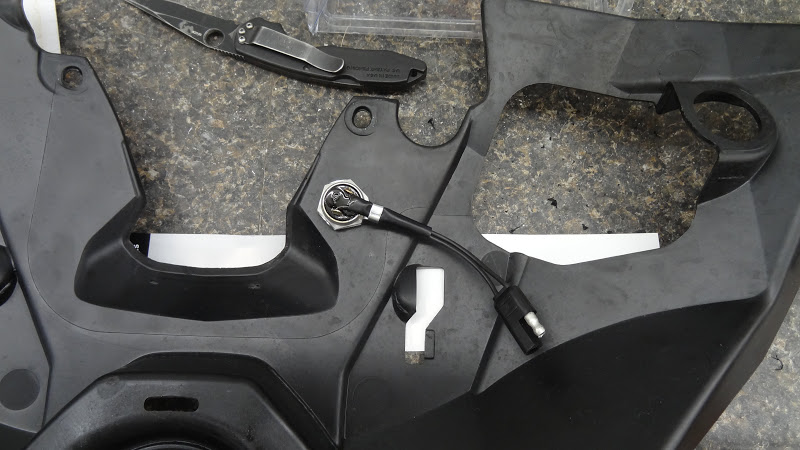
Step 40. Thread the switch into the backside of the console

Step 41. Point the wiring out towards the outside of the sled
Step 42. Place a 7/8" (22-mm) wrench on the switch
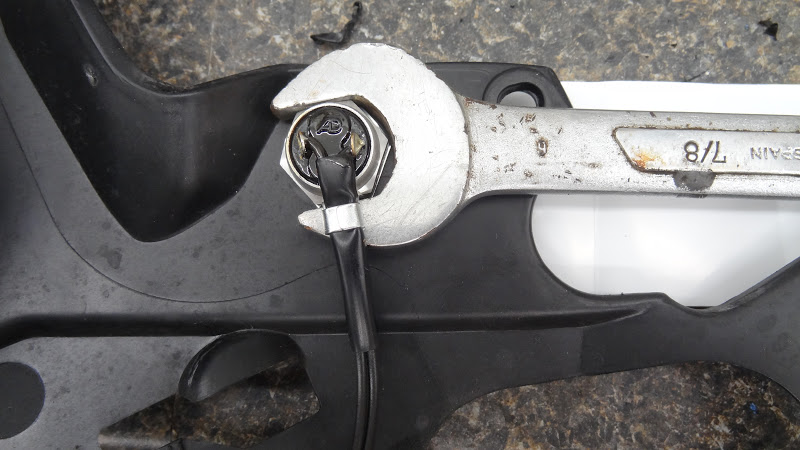
Step 43. Thread the black switch cover on by hand
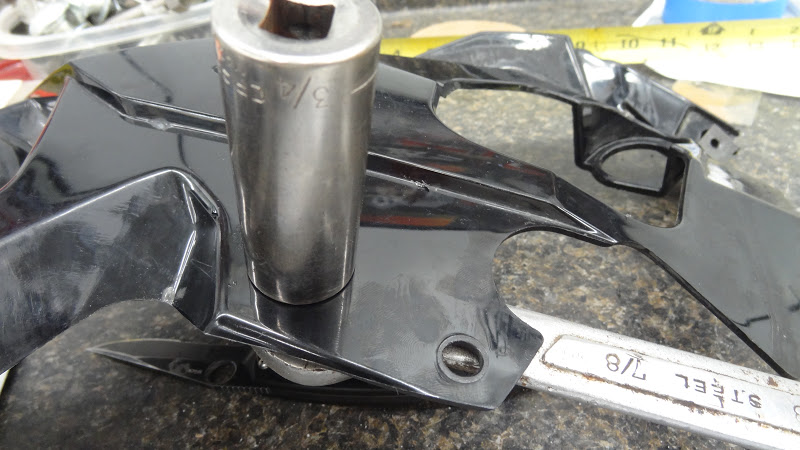
Step 44. Tighten switch cover with a 3/4" (19-mm) socket
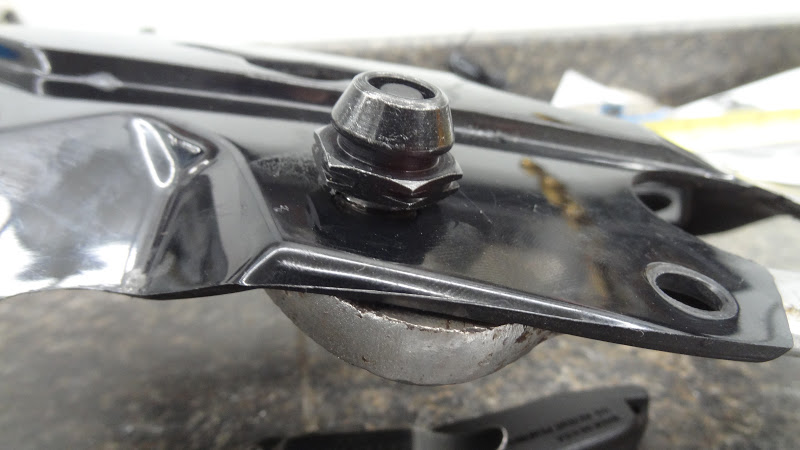
Installed

Step 45. Place console back into position on the sled, screw in the two torx screws and the fuel tank filler retaining ring and fuel cap.
Step 46. Next, from the switch in the console, route the wiring down past the radiator cap and plug it in to the mating 2-wire connector that was installed off the handlebar harness
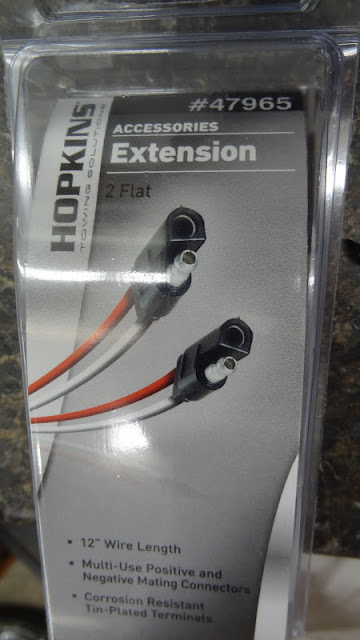
Not sure if I did something wrong or didn't route the wires properly but my wiring was too short to plug in the 2-wire connector. Instead of troubleshooting the wire routing, I simply used a 2-wire extension (found at auto-parts stores) that I had on the shelf.

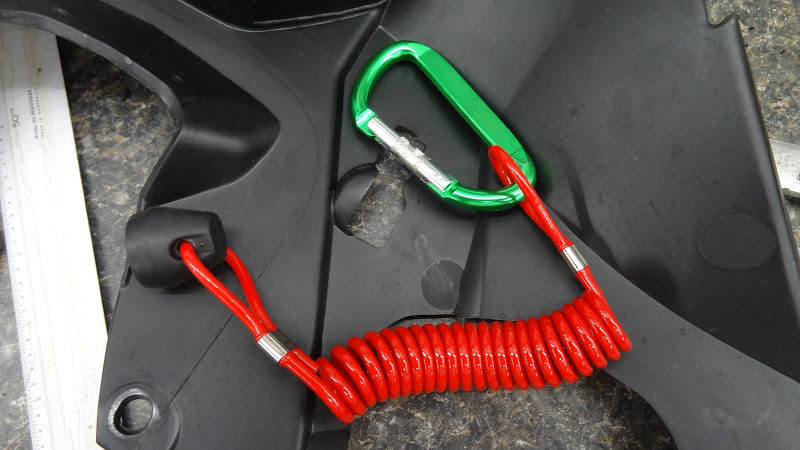
And the personalized finishing touch - Remove the clip from the tether

And install an Arctic Cat green carabiner for easier and quicker hook up to one's jacket ring
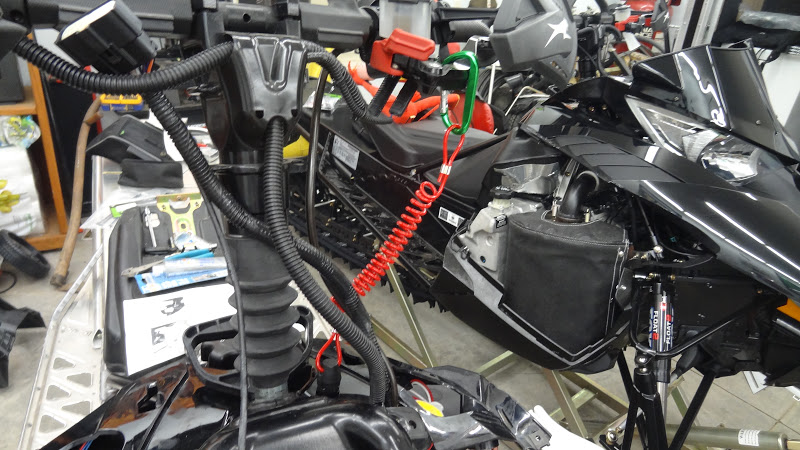
The carabiner nicely hooks on the brake lever for warming up the sled in the morning
Note: The photos are from my 2012 M800 Sno Pro with a December 2011 build date.
Package
Contents
Step 1. Remove both side panels
Step 2. Disconnect the hood harness
Step 3. Remove the four torx screws holding the upper hood
Step 4. Remove the hood
Step 5. Remove the torx screw at the rear of the seat (toss it in the steel recycle bin)
Step 6. Remove the seat
Step 7. With the seat removed, turn the quarter-turn fasterner on either side of the cowl panel and remove it
Step 8. Remove the belt (either by hand turning the helix to open the sheaves or by threading in the secondary bolt with the big washer in the 2012 toolkit)
Step 9. With the belt removed, unthread the bolt on the secondary and remove the clutch.
Step 10. This is the handlebar harness connector that we're after
Step 11. Cut the two tie-wraps securing the harness to the aluminum tube and separate the connector by pressing on the tab (smaller circle in pic)
Step 12. Connector unplugged
Step 13. Using a small flatblade screwdriver, insert it into the small slot on the white part of the connector and gently pry the white portion out about an 1/8" (3-mm) past the outer black housing.
Step 14. Next tool we'll make from a large 1.75" (47-mm) paper clip
Step 15. Bend the outer leg out to ninety degrees and with a Sharpie, mark off 9/16" (14-mm) on the paperclip (not necessary but good for reference on the following steps)
Step 16. With the connector position as shown (smooth edge on top, protrusion pointing down) start to insert the paperclip into the upper left pin location. Seating the paperclip to a depth of 9/16" (14-mm) while gently tugging on the black wire with the blue stripe will release the wire.
Step 17. Move over one spot to the right in the connector and insert the paperclip.
Step 18. Push the paperclip in 9/16" (14-mm) and pull on the purple wire with red stripe and remove the wire from the connector
Step 19. On the harness connector that came in the tether kit, press the tab down and unplug the connector
Step 20. Similar to the handlebar harness, use the same small screwdriver, insert the blade into the small slot on the white part of the connector and gently pry the white portion out part way
Step 21. Insert the new connector's (shown in step above) purple/red wire into the handlebar harness connector where the original factory purple/red wire was removed. Note: On the new wire, make sure the locking tab on the silver metal female socket is positioned on the same side as the flat side of the big plastic handlebar connector. Push the wire in until it audibly clicks
Step 22. Close-up of locking tab in previous step
Step 23. Next, repeat the above steps by inserting the black wire with blue stripe from the new connector into the last open spot on the factory handlebar harness connector. Ensure the locking tab is in the same orientation as mentioned in the previous step
Step 24. Now that the new connector is plugged into the original factory handlebar harness connector, insert the original purple/red wire into the open spot on the new connector (refer to yellow squiggly arrows)
Step 25. Note - Exactly the same locking tab orientation rule applies - little tab out towards the flat side of the connector (purple/red shown). Push purple/red wire in until it audibly clicks
Step 26. Repeat for the black/blue wire
Step 27. Now that all the wires are seated, press in and seat the white part of both connectors (handlebar harness shown pressed in and new connector shown out and needing to be pressed in)
Step 28. Both connectors with white portions pressed in
Step 29. Ready for the next step
Step 30. Remove the two torx screws retaining the plastic console surround
Step 31. Remove the gas cap and unthread the retaining ring nut
Step 32. On the left underside of the console, unplug the reverse beeper. Note: The red/blue wire is (+) and the purple/black wire is (-)
Step 33. Console on the work bench
Step 34. Draw a line parallel to the edge that is offset 7/8" (22-mm). Next, measure from the center of the torx screw hole out 1-3/4" (44.5-mm) and mark where it intersects the 7/8" (22-mm) offset line.
Step 35. Close-up
Step 36. Use a 1/2" (13-mm) drill bit to drill the hole for the tether switch
Step 37. Drilled hole
Step 38. Remove the masking tape
Step 39. Unthread the cover from the tether switch
Step 40. Thread the switch into the backside of the console
Step 41. Point the wiring out towards the outside of the sled
Step 42. Place a 7/8" (22-mm) wrench on the switch
Step 43. Thread the black switch cover on by hand
Step 44. Tighten switch cover with a 3/4" (19-mm) socket
Installed
Step 45. Place console back into position on the sled, screw in the two torx screws and the fuel tank filler retaining ring and fuel cap.
Step 46. Next, from the switch in the console, route the wiring down past the radiator cap and plug it in to the mating 2-wire connector that was installed off the handlebar harness
Not sure if I did something wrong or didn't route the wires properly but my wiring was too short to plug in the 2-wire connector. Instead of troubleshooting the wire routing, I simply used a 2-wire extension (found at auto-parts stores) that I had on the shelf.
And the personalized finishing touch - Remove the clip from the tether
And install an Arctic Cat green carabiner for easier and quicker hook up to one's jacket ring
The carabiner nicely hooks on the brake lever for warming up the sled in the morning
Note: The photos are from my 2012 M800 Sno Pro with a December 2011 build date.
Last edited:
")