
CANDADA-SLED PARTS (AKA:WILDCHILD) GAUGE LIFTER INSTALL W/INSTRUCTIONS & LOTS OF PICS
Here are some somewhat detailed installation instructions I put together for the Wildchild gauge lifter when I installed mine. These are only installation guidelines. I am sure there are other ways to install and some steps that may not be completely necessary, but this is how I installed mine so figured I would post this up.
I have also attached 2 links in this post for anyone who may want to download and/or print these out for future use. One is a Word document and the other is a PDF.
Link to Canada Sled Parts website.
http://canadasledparts.com/cgi-bin/p/awtp-product.cgi?d=canada-sled-parts&item=53604
Installation Instructions (Word File)
Installation Instructions (PDF File)
Wildchild Gauge lifter installation instructions for Polaris Pro Ride
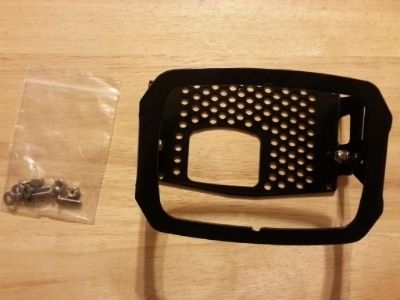
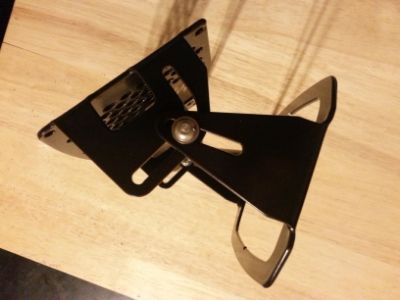
Items included in the box.
Step 1:
Remove the hood to gain access to the MFD (gauge), headlight and wiring. Unplug the hood wiring harness from the main wiring harness. Take entire hood assembly to a clean and dry area to start the installation of your Wildchild gauge lifter assembly.
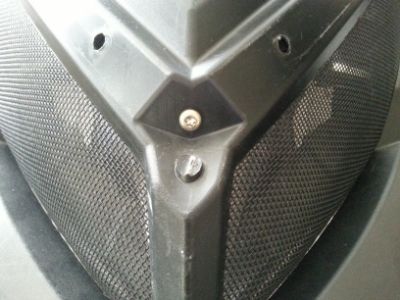
Step 2:
Remove the 6 push pins that attach the windshield to the hood, remove the windshield retainer and windshield to expose the headlight mounting screws.
Step 3:
Using the Torx bit, remove the black headlight mounting screws from each side of the hood and the gold mounting screw from the center of the hood.
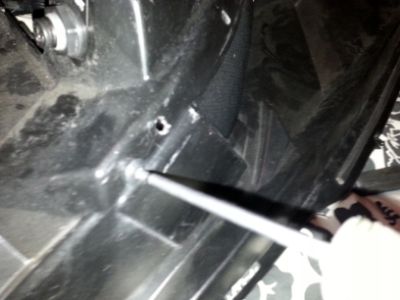
Step 4:
Turn the hood over to expose the underside of the hood and the remaining headlight mounting screws. Remove the 2 remaining gold mounting
screws.
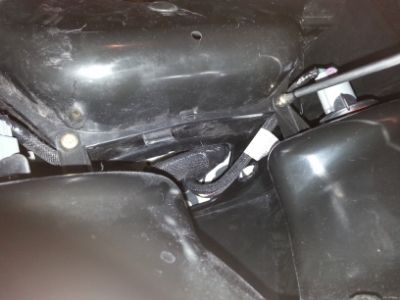
Step 5:
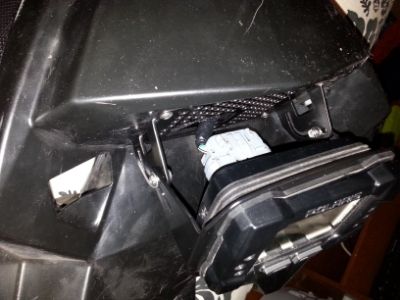
Lift the headlight out enough to reach the plug on the back of the MFD and key/ignition switch. Unplug the wiring harness from the back of the
MFD and key switch, pull the headlight assembly and wiring harness out and set aside.
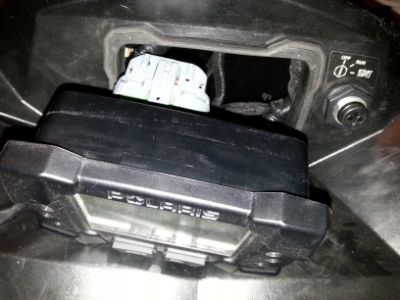
Step 6:
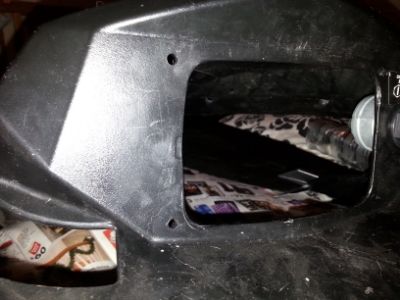
Press on the back of the MFD (gauge) towards the rear of the hood. This will press the MFD out of the rubber gasket in the hood. Remove
rubber gasket and set it and the MFD aside.
Step 7:
Leaving the key switch in place, take the base of the gauge lifter and set it over the MFD mounting hole in the hood. Using the Sharpie or spring loaded punch, mark the center of the 4 mounting holes that will be used the mount the lifter assembly to the hood. (Using the punch makes drilling the holes easier) Leaving the key switch in place during this step allows you to check the clearance between the gauge lifter and the key switch to ensure there is no interference once it is installed.
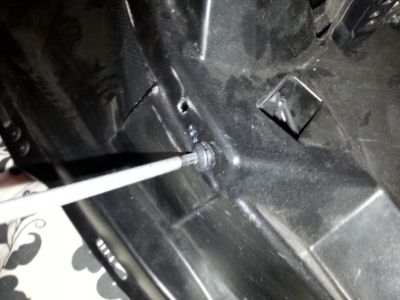
Step 8:
Using your drill and bit, drill out the marks made in the previous step to make 4 holes which will be used for mounting the base of the gauge lifter to the hood. (It is recommended to check the alignment of the mounting holes after drilling each hole to ensure everything lines up correctly.)
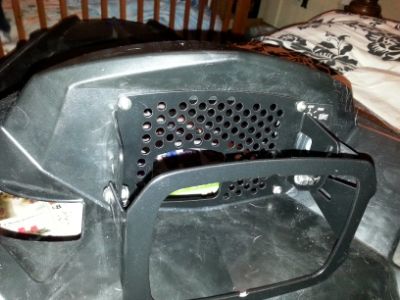
Step 9:
Install the gauge lifter base to the hood by placing the included 4 allen bolts through the 4 holes in the base of the gauge lifter and the 4
holes that were previously drilled in the hood. From the bottom/underside of the hood, place the included 4 washers onto the allen bolts and then place the included 4 nylock nuts onto the allen bolts and tighten the nuts onto the bolts. The gauge lifter base is now secured to the hood.
Step 10:
Place the rubber MFD gasket that was previously removed, into the face of the lifter assembly. Make sure it is sitting flush andstraight so the MFD will fit into the gasket correctly.
Step 11:
Place a small amount of liquid soap or something similar onto your fingertip and rub the inside perimeter of the rubber MFD gasket. The soap is used as a lubricant and allows the MFD to be slid into the rubber gasket with very little effort. Leaving the gasket dry makes sliding the MFD into the rubber gasket very difficult, so using a lubricant in this step is highly recommended.
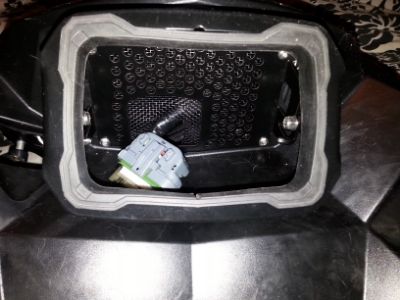
Step 12:
Take the wiring harness that was previously removed and from the bottom/underside of the hood, feed the plug that connects to the back of the MFD through the opening at the bottom of the gauge lifter base that is attached to the hood. Next, plug the connector onto the back of the MFD.
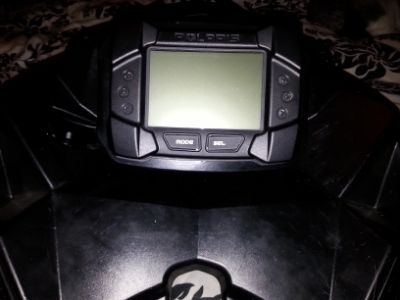
Step 13:
Re-assemble everything that was previously removed and disconnected using the reversed order that disassembly was completed in. Once the hood is reattached and the sled is back together, adjust the gauge lifter assembly to fit the viewing height and angle that works best for you.Tighten the allen bolt with the nylock nut on each side of the gauge lifter assembly. You are now ready to ride!
Here are some somewhat detailed installation instructions I put together for the Wildchild gauge lifter when I installed mine. These are only installation guidelines. I am sure there are other ways to install and some steps that may not be completely necessary, but this is how I installed mine so figured I would post this up.
I have also attached 2 links in this post for anyone who may want to download and/or print these out for future use. One is a Word document and the other is a PDF.
Link to Canada Sled Parts website.
http://canadasledparts.com/cgi-bin/p/awtp-product.cgi?d=canada-sled-parts&item=53604
Installation Instructions (Word File)
Installation Instructions (PDF File)
Wildchild Gauge lifter installation instructions for Polaris Pro Ride
Items included in the box.
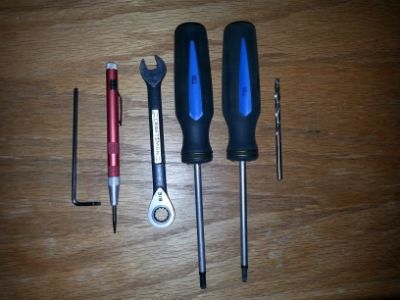
Tools Needed
Allen wrench
3/8 wrench
T25 and T30
Torx bit drivers
Sharpie or
spring loaded punch
Drill
Small drill
bit
Liquid soap or
lubricant of choice (Optional)
Step 1:
Remove the hood to gain access to the MFD (gauge), headlight and wiring. Unplug the hood wiring harness from the main wiring harness. Take entire hood assembly to a clean and dry area to start the installation of your Wildchild gauge lifter assembly.
Step 2:
Remove the 6 push pins that attach the windshield to the hood, remove the windshield retainer and windshield to expose the headlight mounting screws.
Step 3:
Using the Torx bit, remove the black headlight mounting screws from each side of the hood and the gold mounting screw from the center of the hood.
Step 4:
Turn the hood over to expose the underside of the hood and the remaining headlight mounting screws. Remove the 2 remaining gold mounting
screws.
Step 5:
Lift the headlight out enough to reach the plug on the back of the MFD and key/ignition switch. Unplug the wiring harness from the back of the
MFD and key switch, pull the headlight assembly and wiring harness out and set aside.
Step 6:
Press on the back of the MFD (gauge) towards the rear of the hood. This will press the MFD out of the rubber gasket in the hood. Remove
rubber gasket and set it and the MFD aside.
Step 7:
Leaving the key switch in place, take the base of the gauge lifter and set it over the MFD mounting hole in the hood. Using the Sharpie or spring loaded punch, mark the center of the 4 mounting holes that will be used the mount the lifter assembly to the hood. (Using the punch makes drilling the holes easier) Leaving the key switch in place during this step allows you to check the clearance between the gauge lifter and the key switch to ensure there is no interference once it is installed.
Step 8:
Using your drill and bit, drill out the marks made in the previous step to make 4 holes which will be used for mounting the base of the gauge lifter to the hood. (It is recommended to check the alignment of the mounting holes after drilling each hole to ensure everything lines up correctly.)
Step 9:
Install the gauge lifter base to the hood by placing the included 4 allen bolts through the 4 holes in the base of the gauge lifter and the 4
holes that were previously drilled in the hood. From the bottom/underside of the hood, place the included 4 washers onto the allen bolts and then place the included 4 nylock nuts onto the allen bolts and tighten the nuts onto the bolts. The gauge lifter base is now secured to the hood.
Step 10:
Place the rubber MFD gasket that was previously removed, into the face of the lifter assembly. Make sure it is sitting flush andstraight so the MFD will fit into the gasket correctly.
Step 11:
Place a small amount of liquid soap or something similar onto your fingertip and rub the inside perimeter of the rubber MFD gasket. The soap is used as a lubricant and allows the MFD to be slid into the rubber gasket with very little effort. Leaving the gasket dry makes sliding the MFD into the rubber gasket very difficult, so using a lubricant in this step is highly recommended.
Step 12:
Take the wiring harness that was previously removed and from the bottom/underside of the hood, feed the plug that connects to the back of the MFD through the opening at the bottom of the gauge lifter base that is attached to the hood. Next, plug the connector onto the back of the MFD.
Step 13:
Re-assemble everything that was previously removed and disconnected using the reversed order that disassembly was completed in. Once the hood is reattached and the sled is back together, adjust the gauge lifter assembly to fit the viewing height and angle that works best for you.Tighten the allen bolt with the nylock nut on each side of the gauge lifter assembly. You are now ready to ride!
Have fun and BE SAFE!
Last edited by a moderator: