
In the process of getting ready to rivet these boards into place I got in some practice tonight.
So, I shot my first rivets into my sled this evening and I used BOTH the generic and the ones I got from OFT Racing.
HOLY SMOKES
The difference is HUGE.
A rivet is NOT just a rivet!!!
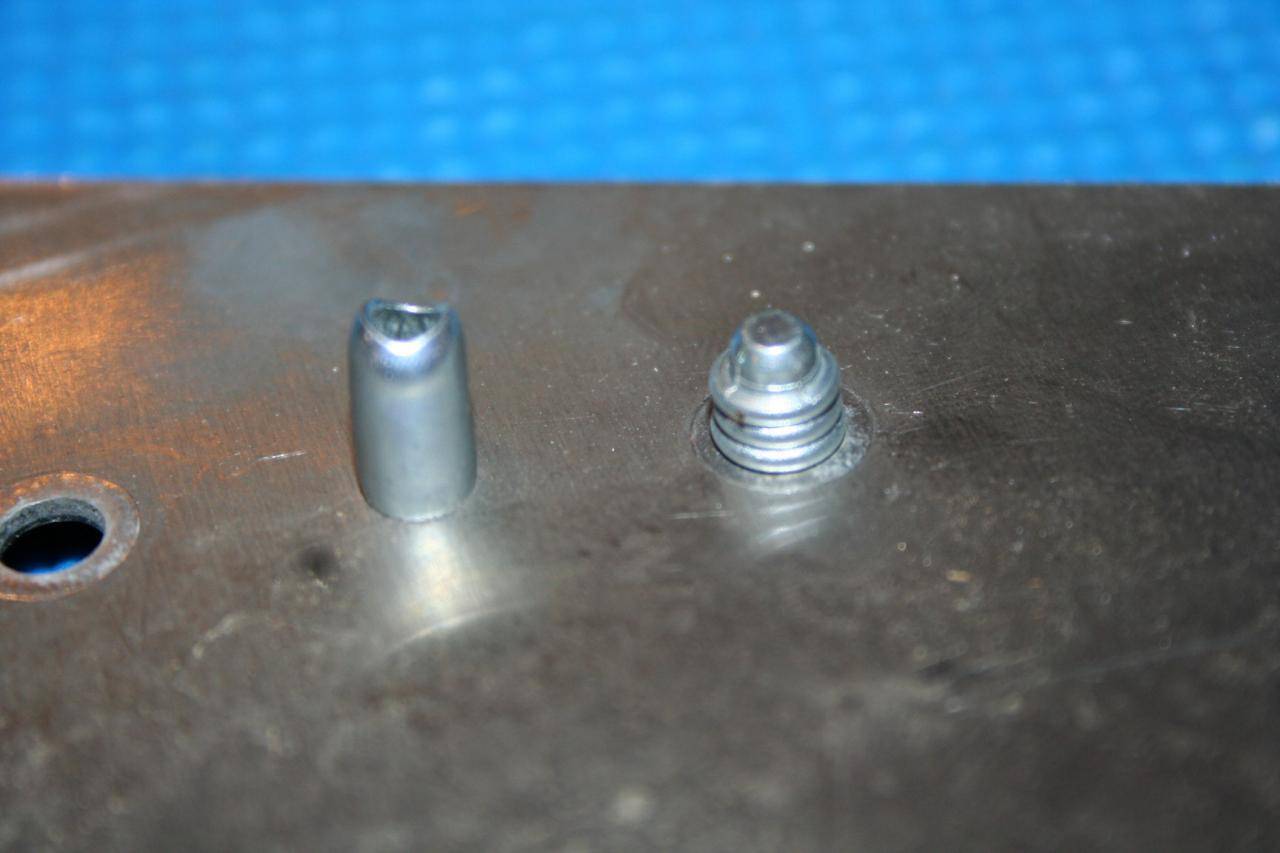
The Yamaha OEM Rivet from OFT on the right, and the generic one on the left!
Which one do you think is the better solution??
__________________
So, I shot my first rivets into my sled this evening and I used BOTH the generic and the ones I got from OFT Racing.
HOLY SMOKES
The difference is HUGE.
A rivet is NOT just a rivet!!!
The Yamaha OEM Rivet from OFT on the right, and the generic one on the left!
Which one do you think is the better solution??
__________________