I
Here's my custom build on my 2004 F7 firecat Big Bore 800 Aerocharger 53 Turbo, extended to 153" with home made tunnel extension, 2 wheel kit with 8" wheels, 8 tooth drivers, D&D big bore Y-Pipe, Speedwerx Ceramic Pipe, Clutch Kit with titanium primary spring, 50g base adjustable weights, geared, Digitron dual EGT, AEM AFR and Boost, fuel pump pressure, and fuel rail pressure, fuel pressure regulator, titanium A-Arms M series width, fox zero pro shocks valved for hillclimb, 6" handlebar riser, power valve spacers for big bore, and Protaper handlebars. I'm sure there's some i'm missing.
Started out like this with full speedwerx exhaust, clutch kit, geared lower, 141" track 2" lug, fuel reducer.

Then i blew it up in November of 2010 with catastrophic results...


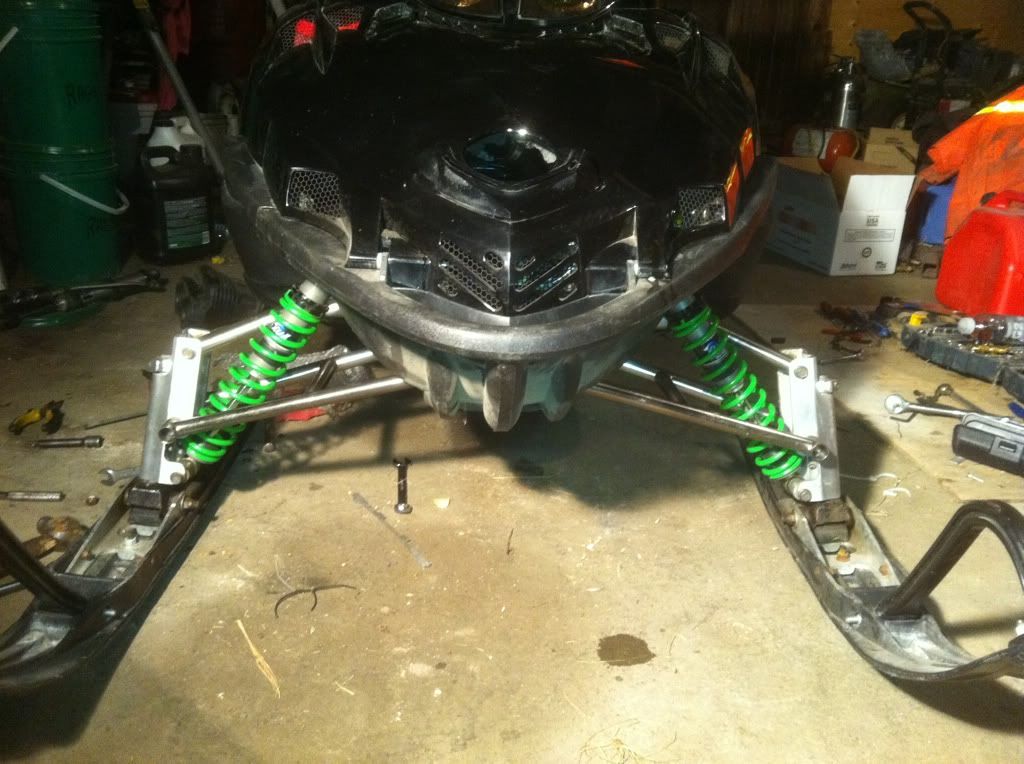
extended it to 153" with Mountain Cat Rails, and a home made tunnel extension, and put a D&D Big bore 800 on it.


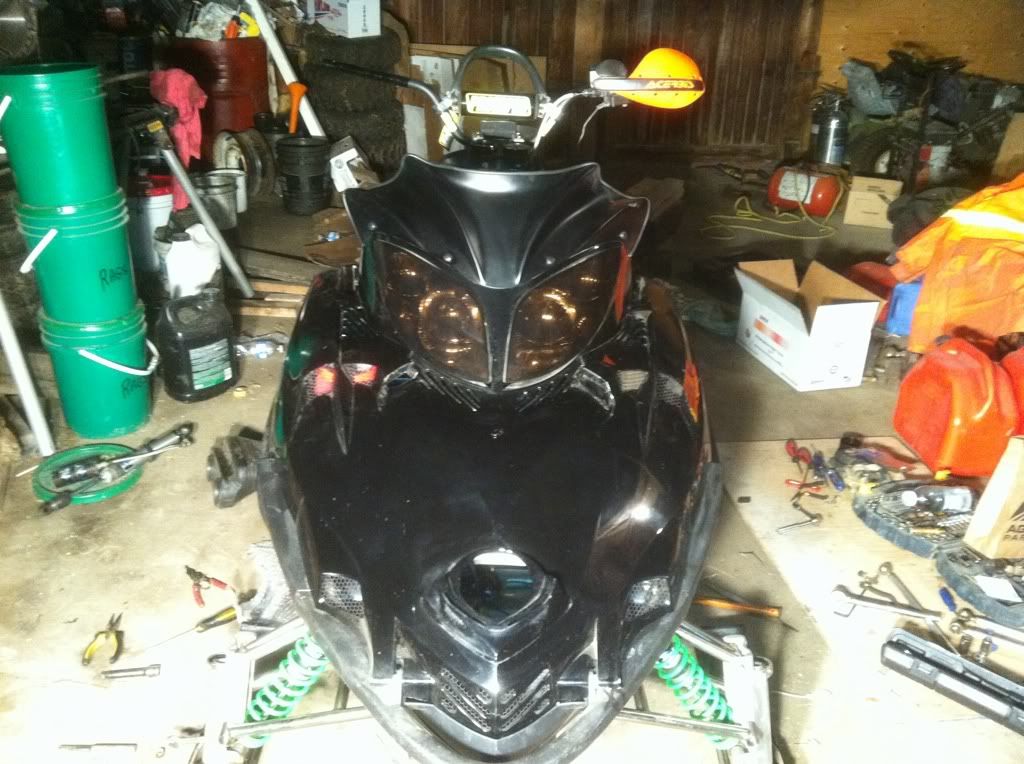
Had a trip to Revelstoke June 20, put taller bars on it, and Digitron Dual EGT with a D&D Big bore Y-pipe


Then she died 7km in on Frisby ridge, the coil decided to go on me on day 1, so we got her out, and then i put on a new coil, and found out a stator backplate bolt had the locktite break and wiggle out and rub on the stator, i replaced the stator, ignition sensor, and flywheel due to scoring, and that only started the itch to build during the summer, so i bought my self a turbo, and it began...
Started out by blacking it out

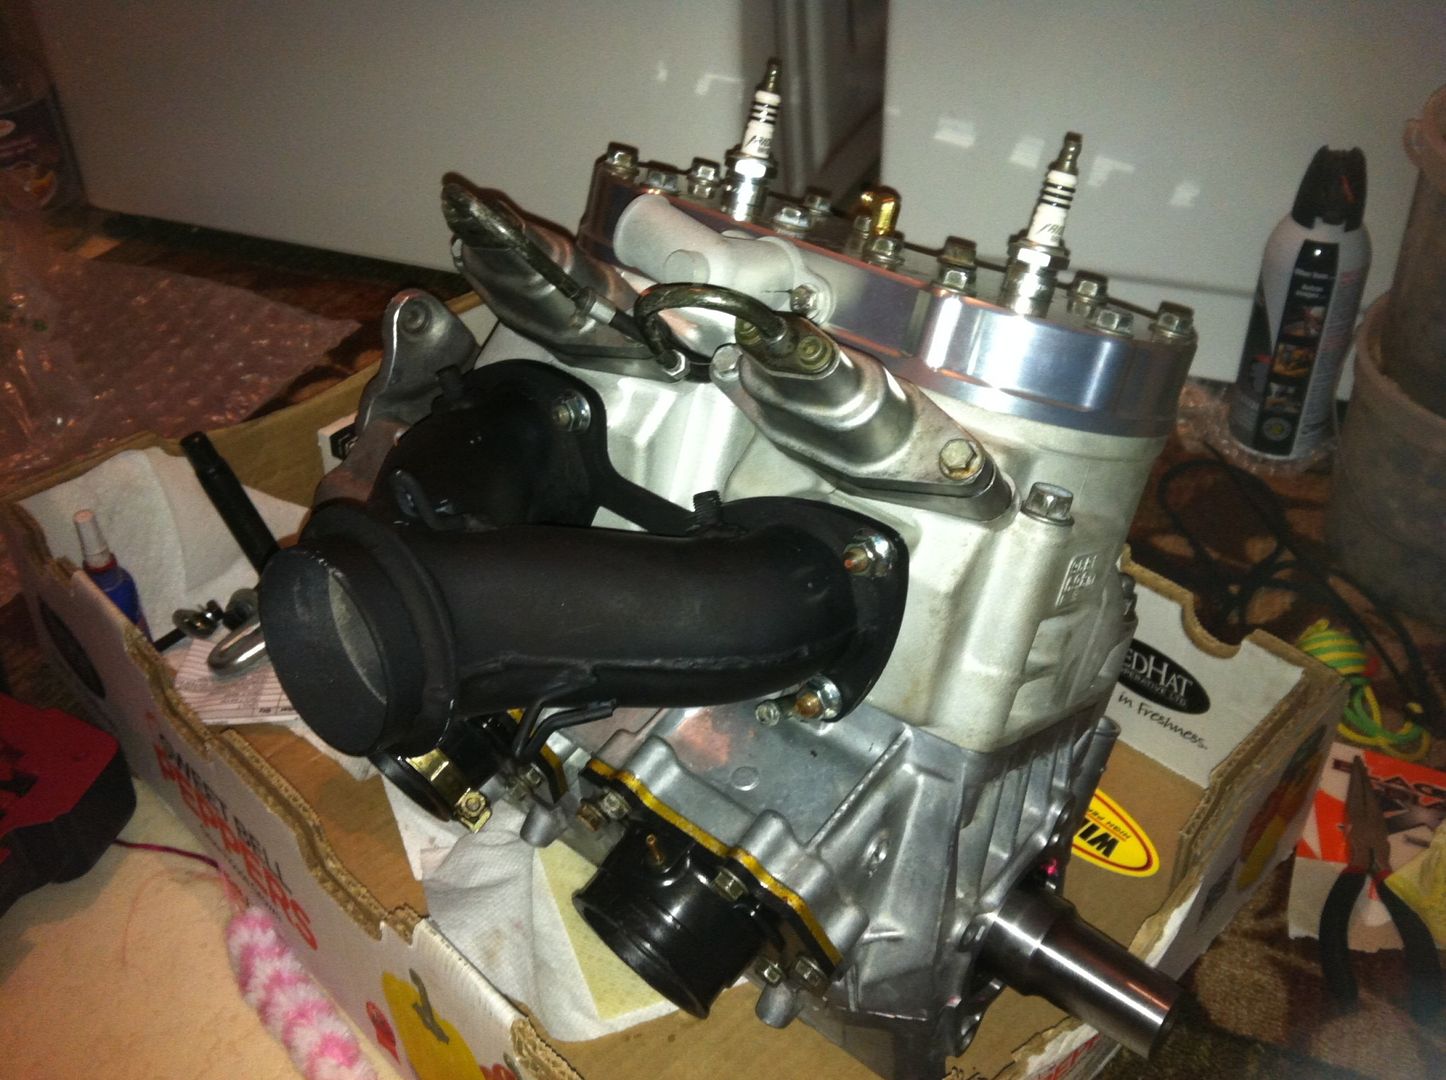
Started out just seeing how the turbo fit and the charge tube.

Then made a 2.5" downpipe out of my truck exhaust, cut on angles, welded it together for bends, and ground everything down to give it a smooth appearance.

I tack welded with arc welder on the outside, and mig welded the inside

Had to cut a little piece of the bulkhead to allow the air box to fit.

Painted the downpipe to prevent rust after i put an O2 bung on

Another test with the downpipe on this time, the charge tube is too long, needs trimming and re welding

Lots of wiring for my gauges, and just my attitude box.

Comparison between my MBRP can i had on it before, and my 2.5" downpipe i made, just needs paint.

O2 Sensor fits in the bung when the downpipe and brace is installed.

Painted the downpipe and brace

Another test fit, welded on spring hangers, and bolted the downpipe to the belly pan with grade 8 3/8" bolts, i dont think it's going to move.

Wiring mostly done

Couldn't figure out how to put this on, but here's my fuel pressure regulator.

Got my gauges all wired up.

Moved my ECU, and hooked up some boost lines to my turbo

And finally found the place to mount my fuel pressure regulator, still need to change the fuel rail pressure gauge so it's not so close to the pipe.

I have two gauges, one for fuel pump pressure, and other for fuel rail pressure(had two gauges, but no plugs haha) need a 90* angle piece to change the line so its not so close to the pipe.

Got my filter, but debating on where to place it.


Mounted my Dual EGT with bracket i made

Mounted Boost and Air Fuel Gauge as well

New Protaper Handlebars

Finishing up my titanium arms, but realized that the lower A arm bolt that goes through the spindle is a little bit larger in diameter then diameter of the hole in the A-Arm, so i can't fully put it on yet.

Still have a few things to do, put my new reeds in, have a new attack 20 track to cut down to 13.5" and straighten the lugs, buy new powder ski's, put on my blow off valve when it comes, same with a new windshield, and have to get a headlight delete kit for venting. Probably more as time goes on.
Really debating on buying a fabtech tunnel, they have one that i can get all powdercoated black, drop brackets, u-cooler, for a little over $1000 plus shipping... I want to but funds are running low for the build.
Let me know what you guys think. I know a lot of people wanted to do this, but i pulled the trigger.
Started out like this with full speedwerx exhaust, clutch kit, geared lower, 141" track 2" lug, fuel reducer.
Then i blew it up in November of 2010 with catastrophic results...
extended it to 153" with Mountain Cat Rails, and a home made tunnel extension, and put a D&D Big bore 800 on it.
Had a trip to Revelstoke June 20, put taller bars on it, and Digitron Dual EGT with a D&D Big bore Y-pipe
Then she died 7km in on Frisby ridge, the coil decided to go on me on day 1, so we got her out, and then i put on a new coil, and found out a stator backplate bolt had the locktite break and wiggle out and rub on the stator, i replaced the stator, ignition sensor, and flywheel due to scoring, and that only started the itch to build during the summer, so i bought my self a turbo, and it began...
Started out by blacking it out
Started out just seeing how the turbo fit and the charge tube.
Then made a 2.5" downpipe out of my truck exhaust, cut on angles, welded it together for bends, and ground everything down to give it a smooth appearance.
I tack welded with arc welder on the outside, and mig welded the inside
Had to cut a little piece of the bulkhead to allow the air box to fit.
Painted the downpipe to prevent rust after i put an O2 bung on
Another test with the downpipe on this time, the charge tube is too long, needs trimming and re welding
Lots of wiring for my gauges, and just my attitude box.
Comparison between my MBRP can i had on it before, and my 2.5" downpipe i made, just needs paint.
O2 Sensor fits in the bung when the downpipe and brace is installed.
Painted the downpipe and brace
Another test fit, welded on spring hangers, and bolted the downpipe to the belly pan with grade 8 3/8" bolts, i dont think it's going to move.
Wiring mostly done
Couldn't figure out how to put this on, but here's my fuel pressure regulator.
Got my gauges all wired up.
Moved my ECU, and hooked up some boost lines to my turbo
And finally found the place to mount my fuel pressure regulator, still need to change the fuel rail pressure gauge so it's not so close to the pipe.
I have two gauges, one for fuel pump pressure, and other for fuel rail pressure(had two gauges, but no plugs haha) need a 90* angle piece to change the line so its not so close to the pipe.
Got my filter, but debating on where to place it.
Mounted my Dual EGT with bracket i made
Mounted Boost and Air Fuel Gauge as well
New Protaper Handlebars
Finishing up my titanium arms, but realized that the lower A arm bolt that goes through the spindle is a little bit larger in diameter then diameter of the hole in the A-Arm, so i can't fully put it on yet.
Still have a few things to do, put my new reeds in, have a new attack 20 track to cut down to 13.5" and straighten the lugs, buy new powder ski's, put on my blow off valve when it comes, same with a new windshield, and have to get a headlight delete kit for venting. Probably more as time goes on.
Really debating on buying a fabtech tunnel, they have one that i can get all powdercoated black, drop brackets, u-cooler, for a little over $1000 plus shipping... I want to but funds are running low for the build.
Let me know what you guys think. I know a lot of people wanted to do this, but i pulled the trigger.