Install the app
How to install the app on iOS
Follow along with the video below to see how to install our site as a web app on your home screen.
Note: This feature may not be available in some browsers.

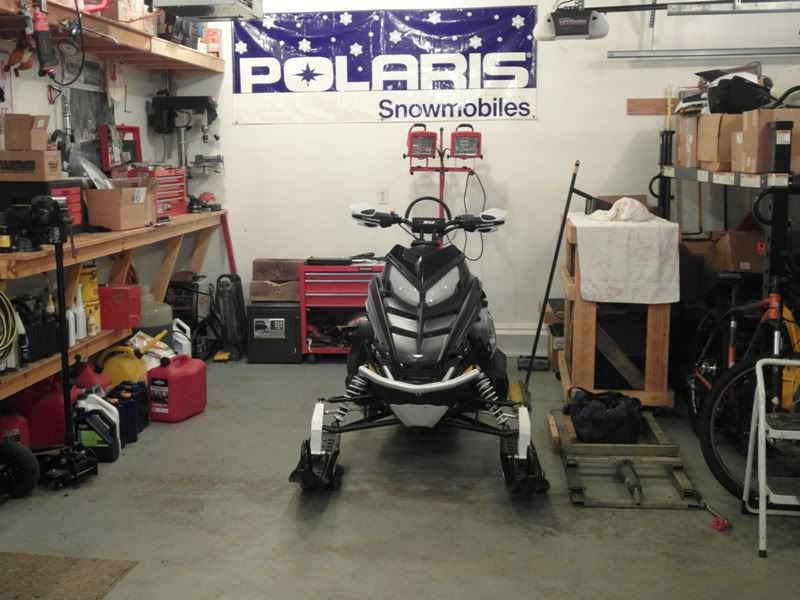
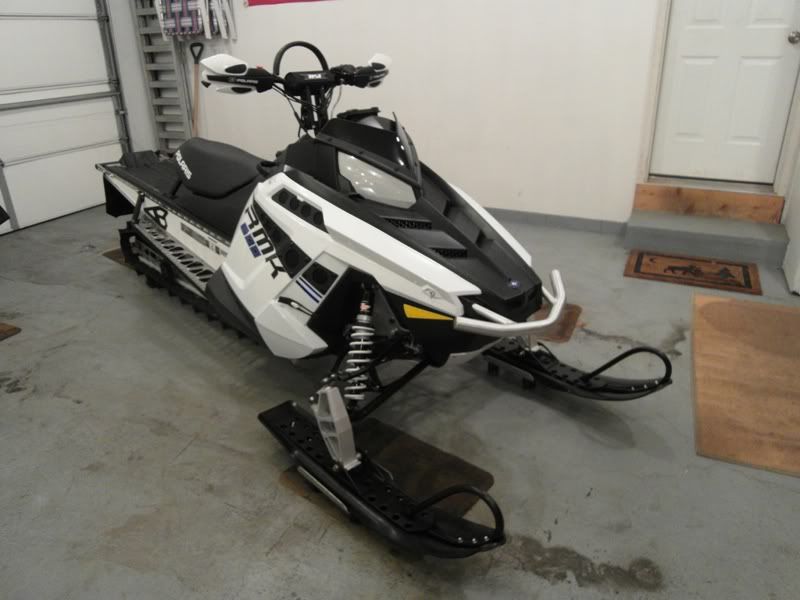
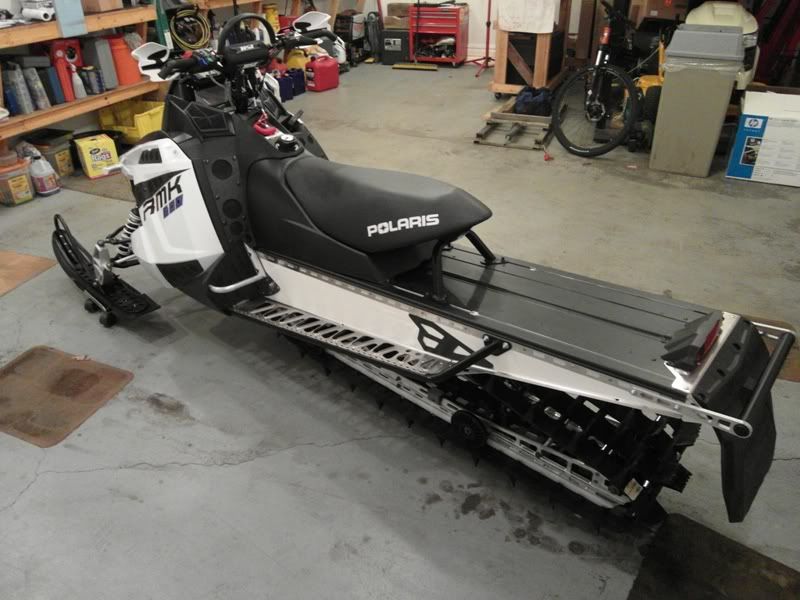
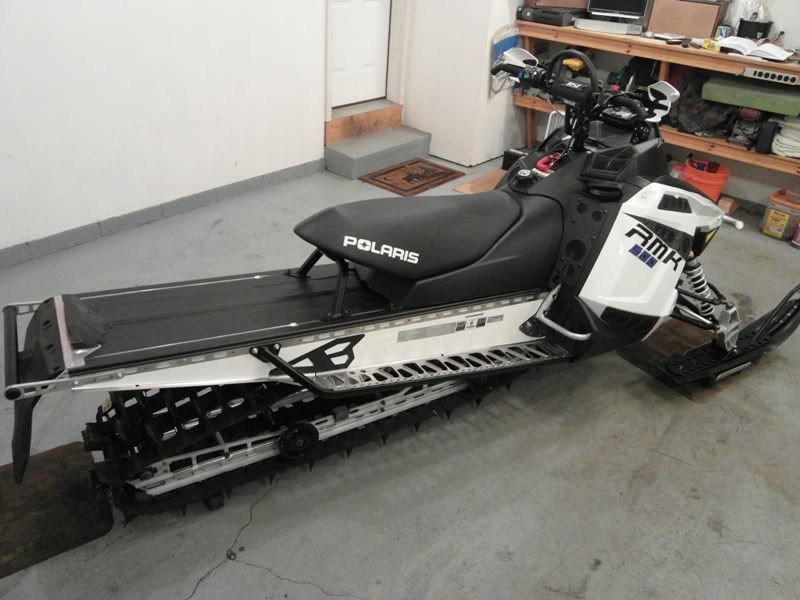
2012 RMK 600 - subtle upgrades
- Thread starter Jonce
- Start date
You are using an out of date browser. It may not display this or other websites correctly.
You should upgrade or use an alternative browser.
You should upgrade or use an alternative browser.
C
Looks pretty awesome! ill be ready to take this one off your hands next spring, you build reliable sleds.
J
Awesome looking sled! Any thought on powder coating the rails and front bumper? Black or white on those would look sweet!
Maybe next Summer I will do some powder coating, it's getting too close to the season to be tearing it down

Bad *** looking sled! Are those RSi bars on there? If so, which ones?
They are stock RMK bars. I noticed that the '12 sleds have a 3" riser and the handlebars have roughly a 2" rise. On my other standard RMK's, the stock riser was 5" or so and the bars were flat.
I should be getting the top end back next week from Carls Cycle. Can't wait to get this project buttoned up and then stare out the window for snow to fall.
E
great project, loved seing it transform
you mad some mad skillz my friend
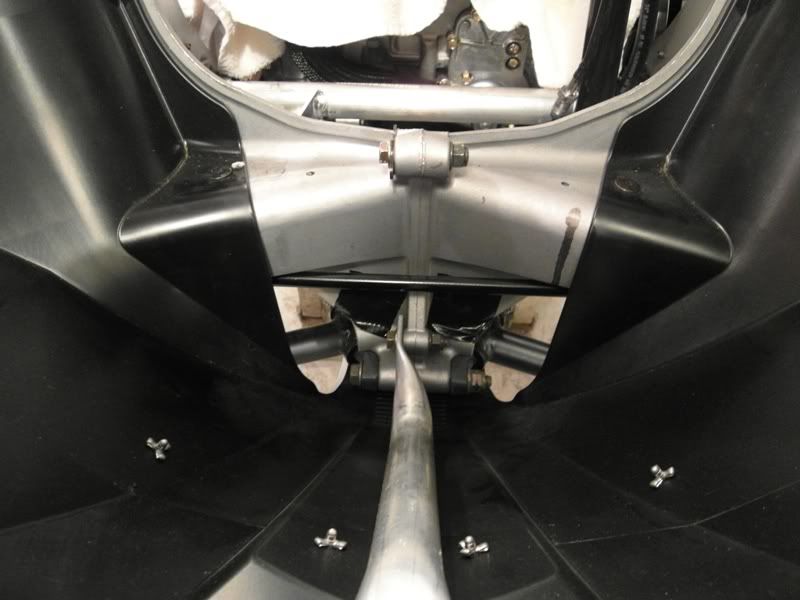
i really want to get a foot well vent, but my 2012 600 144 RMK is a bit different then the 800's

as you can see it has a few bends in it
any chance you can get your hands on one to make one??
you mad some mad skillz my friend
i really want to get a foot well vent, but my 2012 600 144 RMK is a bit different then the 800's
as you can see it has a few bends in it
any chance you can get your hands on one to make one??
J
great project, loved seing it transform
you mad some mad skillz my friend
i really want to get a foot well vent, but my 2012 600 144 RMK is a bit different then the 800's
as you can see it has a few bends in it
any chance you can get your hands on one to make one??
Thanks, I appreciate the compliments.
You know, I don't have any 2012 RMK 144's in our group this year but I do have a dealership close by.
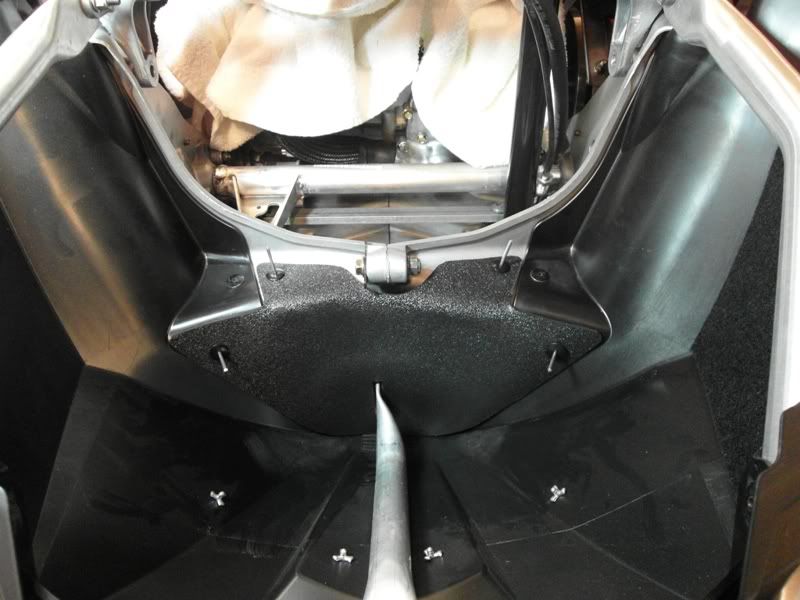
I don't think it would be all that hard to make a vent for that, just time consuming. I would guess that I have about 20-25 hours into my vents. Part of that time was figuring out what I really wanted. I wanted something different than everyone and something subtle but still functional.
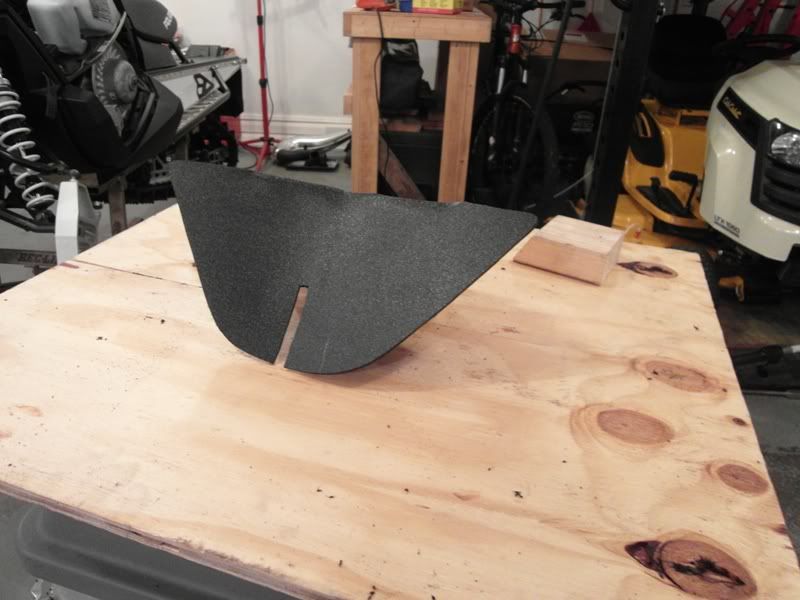
Process I used
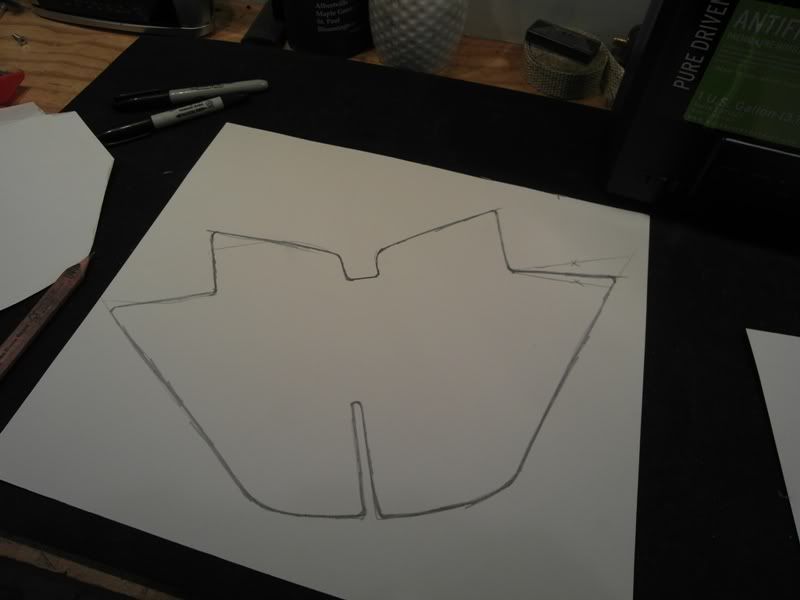
1. You need to get some poster board and make a template of the footwell - noting the ovals, aluminum or air space, and Z bends.
2. Then you would need to make another template (side profile) of the actual Z bend. This will be your guide for bending the ABS.
3. Trace #1 template to ABS - cut out.
4. Heat up ABS and bend per #2 template.
5. Cut out air flow holes.
6. Clean up edges with Dremel and/or belt sander.
7. Decide if you need to make it a two piece or one piece template.
8. Clean back side of ABS with Rubbing Alcohol a few times.
9. Lay a bead of adhesive on the backside of ABS and lay down the mesh.
10. Let cure over night - depends on the adhesive.
11. Add prefilter material - if wanted.
12. Cut excess mesh/pre-filter material off.
13. Install.
Of course I didn't add how many times you need to test fit. Good templates will limit this process but you should always test fit before drilling for rivets.
I won't have time to look at the local dealer this weekend due to a leaky crankshaft oil seal on my car that needs replacement. If I get time, I will swing by there and see how well my current template works.
wow, great work man that looks sharp, and almost has a factory look to it, i like your plywood press tool you made. keep up the good work.
J
Carls Cycle is shipping out the top end today so I am hoping to have it right around Thanksgiving time This is the last thing on my to do list.
This is the last thing on my to do list.nice work- how many hours do u have into it
hours?
hours?
J
hours?
Peeling decals = 1 hour
Headlight wrap = 1 hour
Tunnel wrap = 7-8 hours
Vents and templates = 20-25 hours
Tether, handguards, skid plate, bumper= 1 hour
Engine = 2.5 hours so far (disassembly and plastic removal)
Parts chasing (adhesive for vents, ABS plastic, rivets, prefilter material) = 1-2 hours
A lot of my time was figuring out how I want everything to look, function, and of course test fitting parts. I'm sure if there was a video camera in my garage, you would see the dog-head-tilt look several times throughout the project. I think it turned out decent for the tools/equipment I had available to me. I made a set of upper replacement vents for another guy on the forum and it only took 2.5 hours start to finish.
V
So add up all the hours and double it?
J
So add up all the hours and double it?
Sounds about right
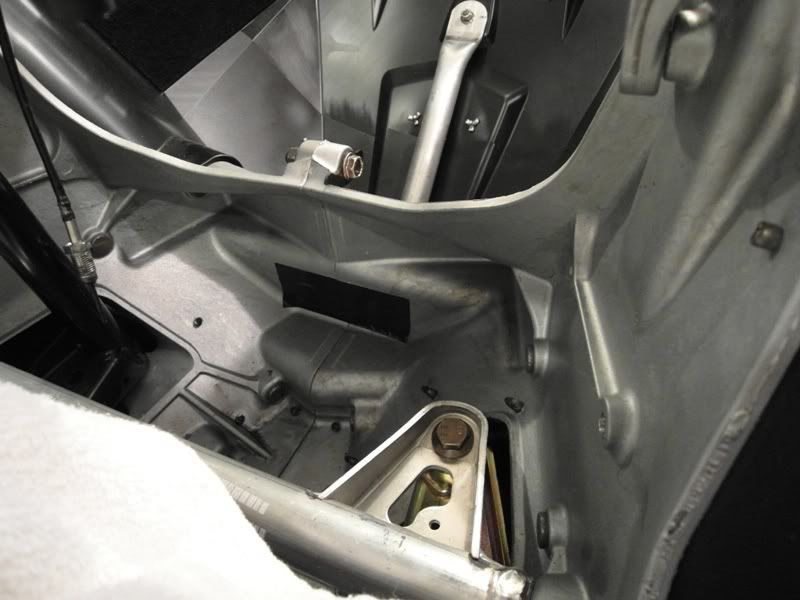
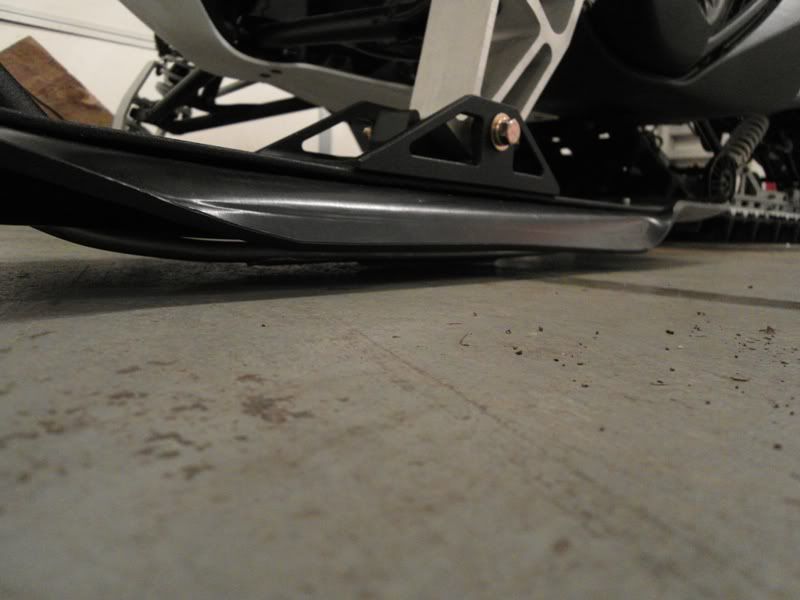
I built a belly pan block off for my sled today. Some folks say they get ice in the bulk head and some say it's not needed. I figured since the sled is still apart, why not make it.
Big factory opening
Added some tape to block off these holes
Made a template
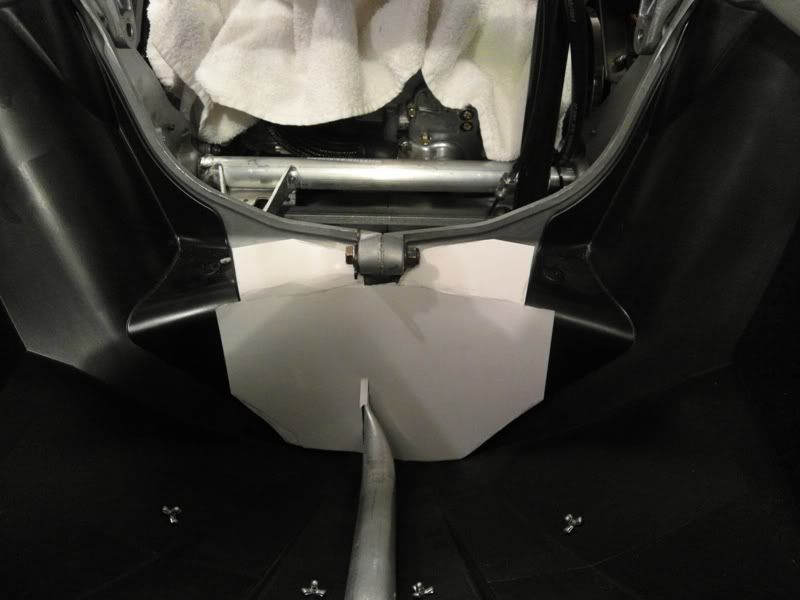
Modified template
Verified template fits

Cut out the ABS from template. Heated ABS to form the shape.
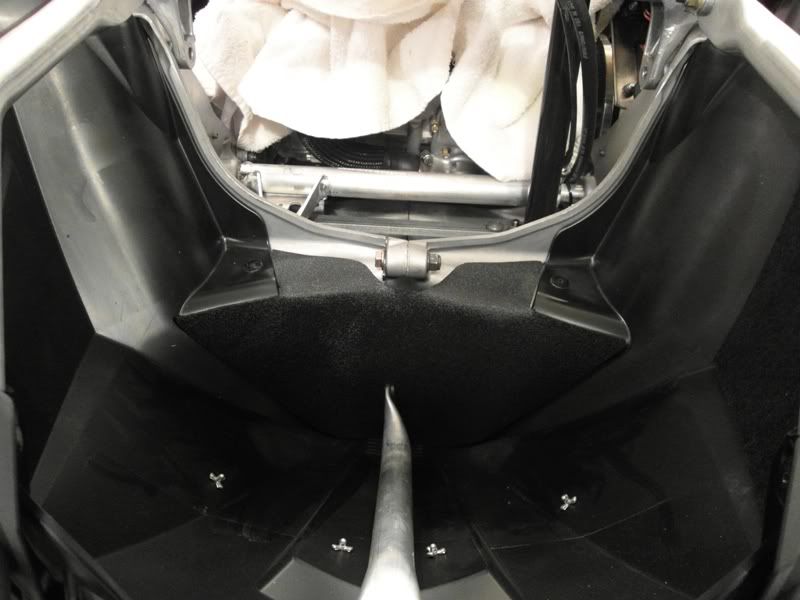

Cleaned up the edges with belt sander. Drilled holes for rivets.
Installed

E
looks great dude, you do such great work
V
I hope you have half as much fun riding it as you do tinkering on it. :face-icon-small-win
J
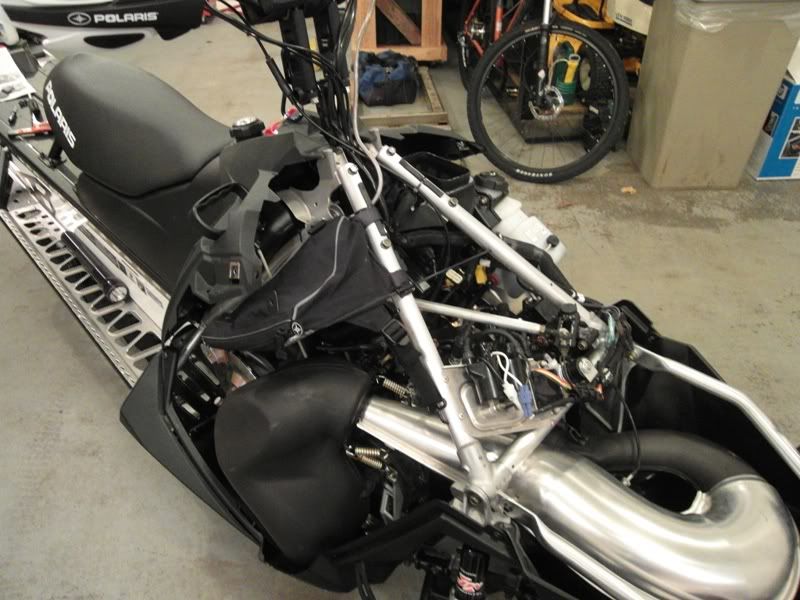
Got some parts in this week.

Got the top end installed

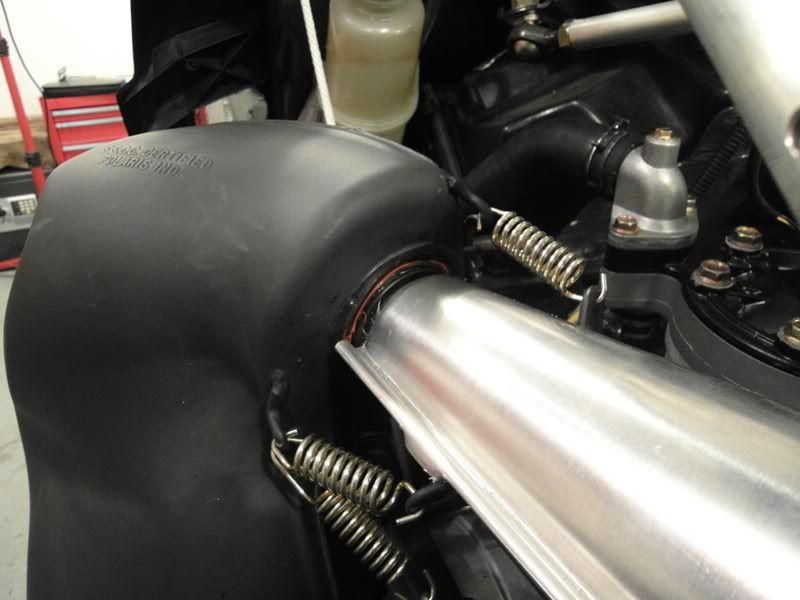
Exhaust installed
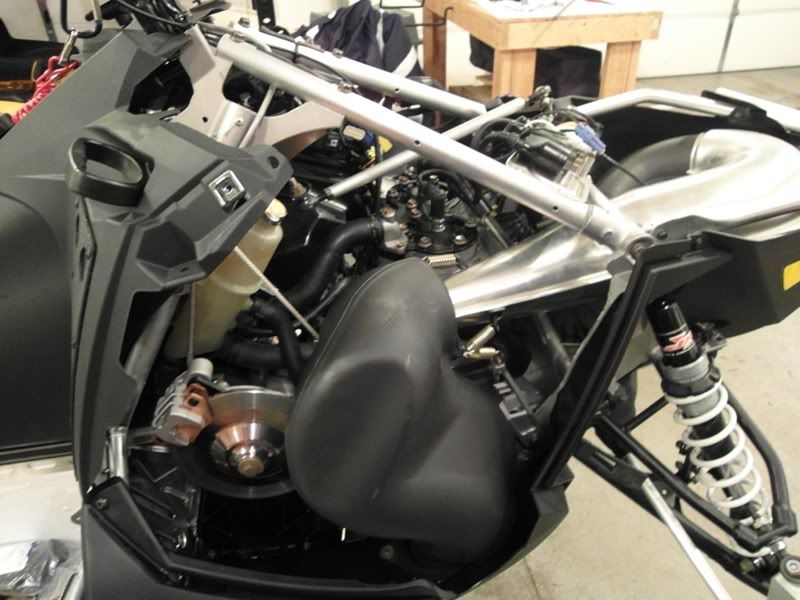
Added red RTV to exhaust joints
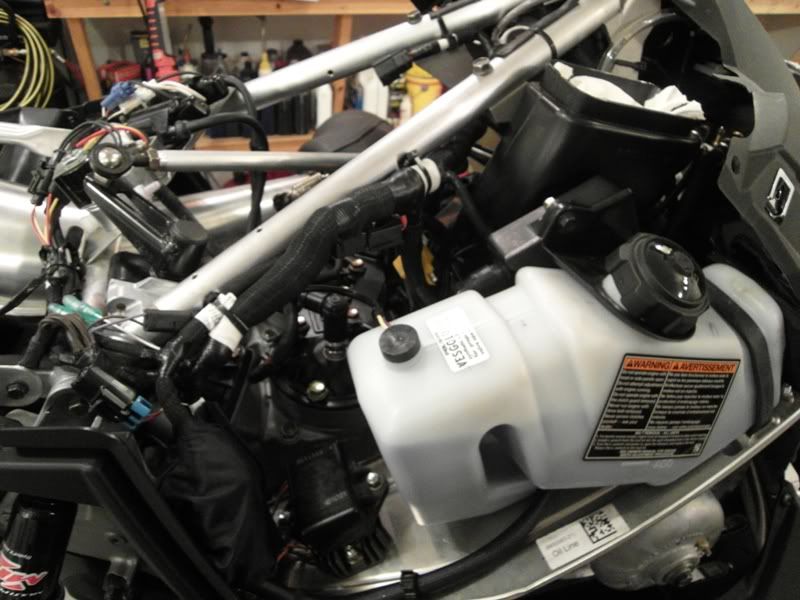
ECU installed and oil tank secured
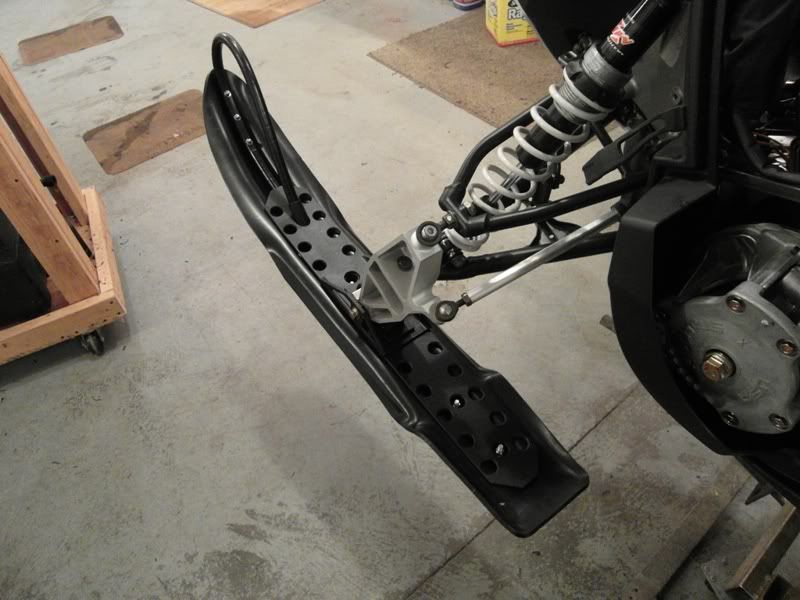
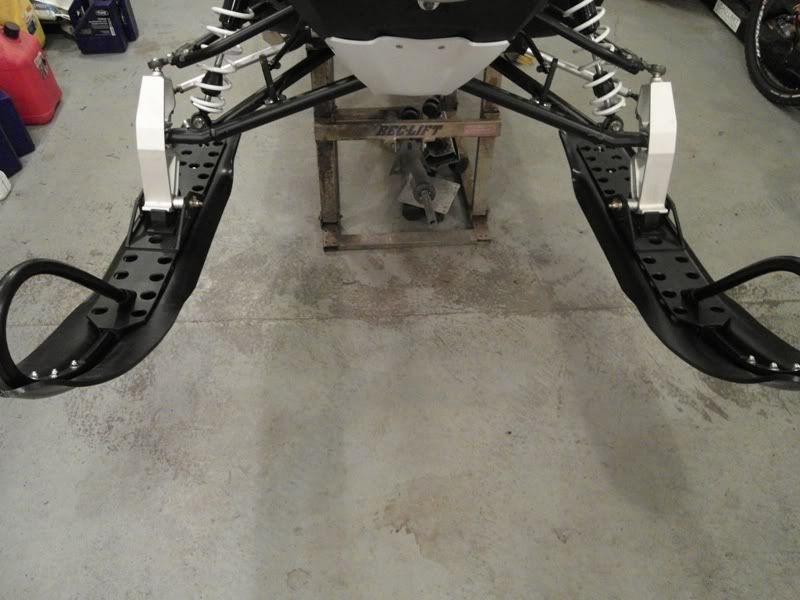
Pulled my skis off to make room for my new shoes - MODS Skis
Mods Skis installed
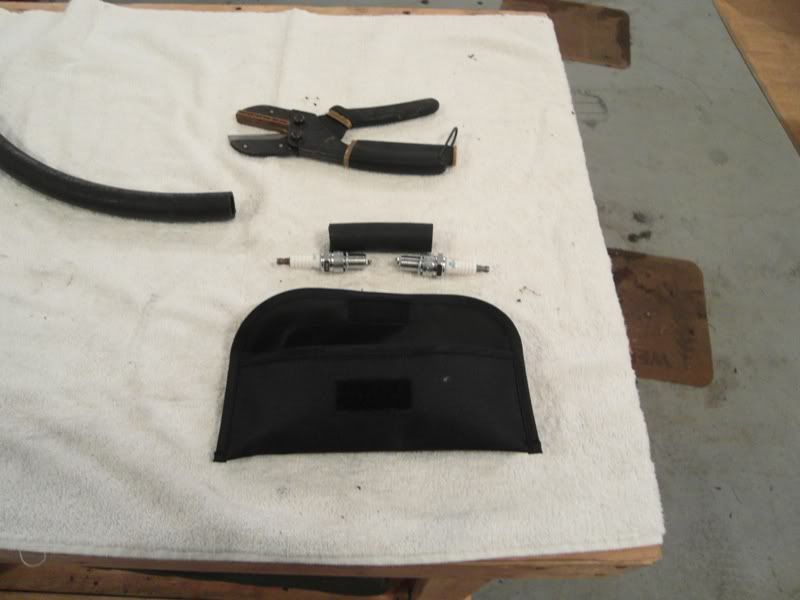
Needed to add a couple spark plugs to my tool kit but didn't want the gaps to be closed by bouncing around. Cut a piece of 3/4" rubber hose to keep them separated.
Got the top end installed
Exhaust installed
Added red RTV to exhaust joints
ECU installed and oil tank secured
Pulled my skis off to make room for my new shoes - MODS Skis
Mods Skis installed
Needed to add a couple spark plugs to my tool kit but didn't want the gaps to be closed by bouncing around. Cut a piece of 3/4" rubber hose to keep them separated.
J
Started the engine for its first heat cycle.
I will start it up tomorrow again for its second heat cycle.
Here's a pic of all the parts from Carls Cycle

I will start it up tomorrow again for its second heat cycle.
Here's a pic of all the parts from Carls Cycle
J
Looks great. Where did you get youre pre filter material from? thanks
Thanks
For the mesh, I purchased the material online a few years ago...sorry, can't remember the name of the place.
For prefilter, I picked it up at a craft store called JoAnn Fabrics. Hopefully it works out well
J
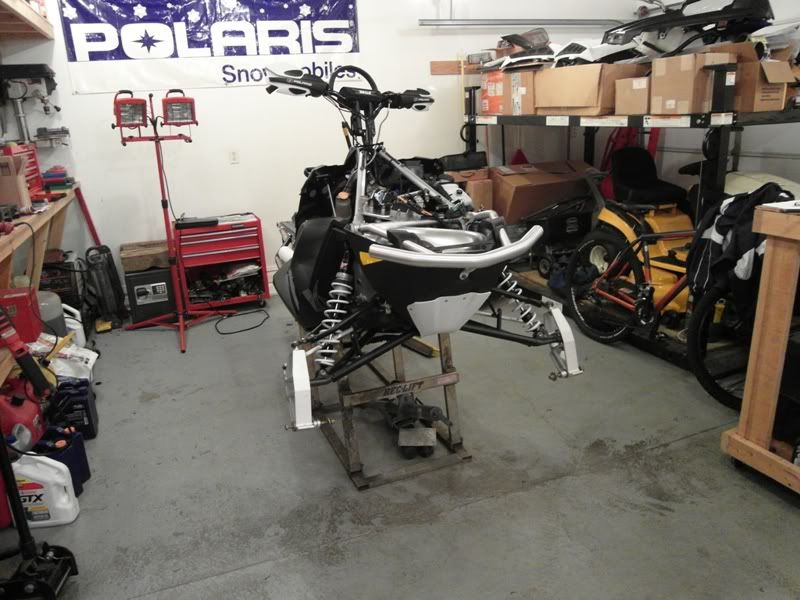
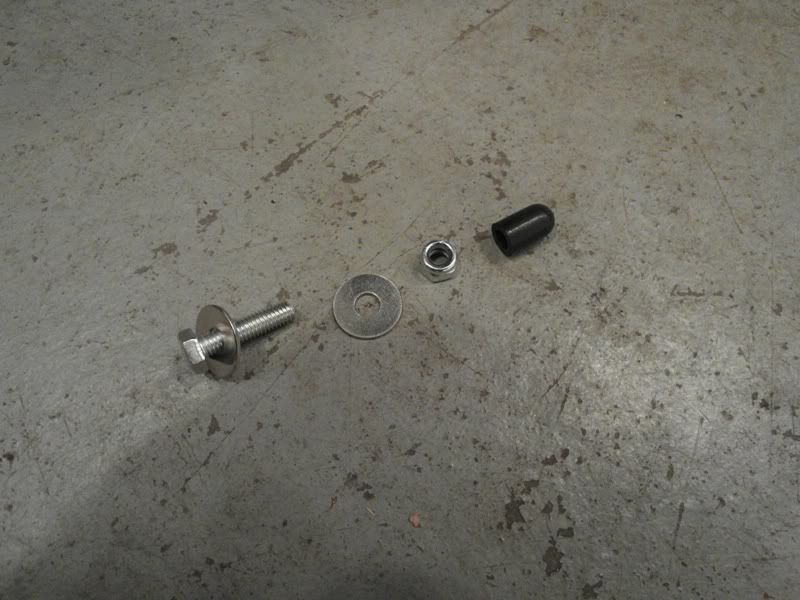
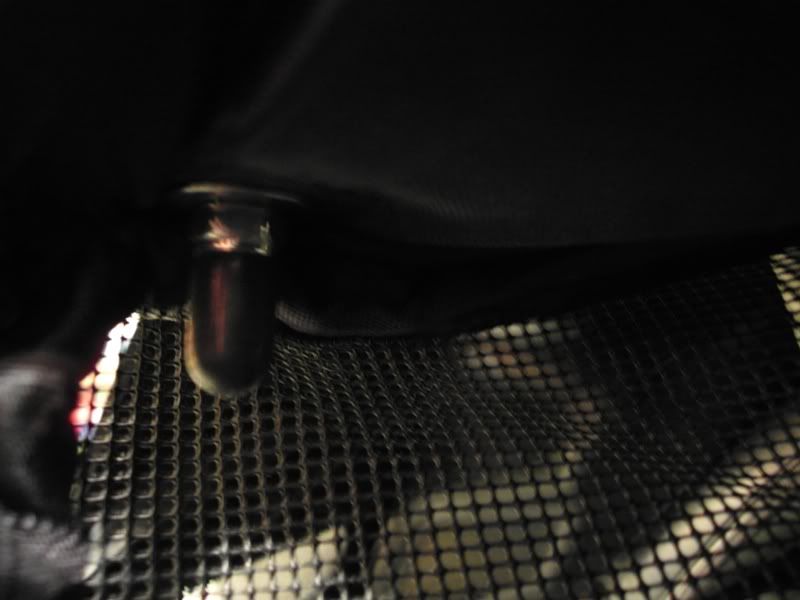
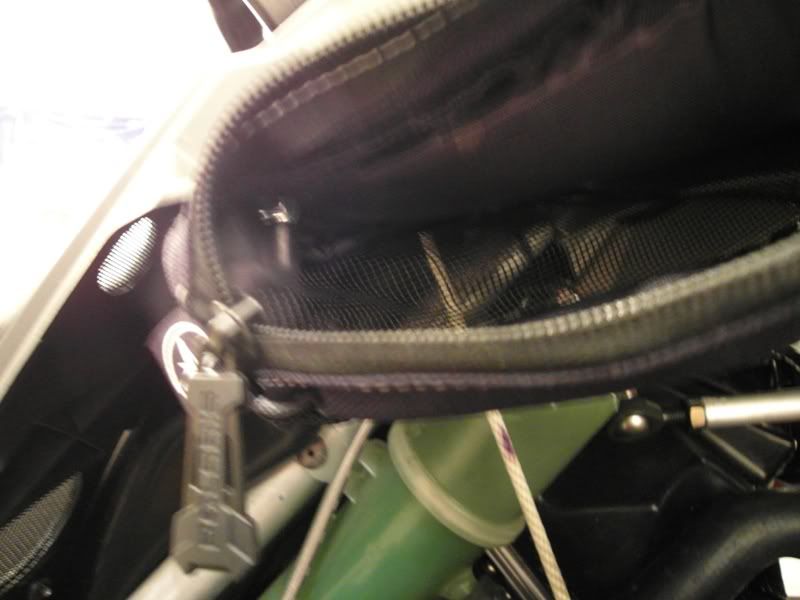
Finished up the second heat cycle and installed the hood, side panels, and Polaris goggle bag.
Goggle bag install
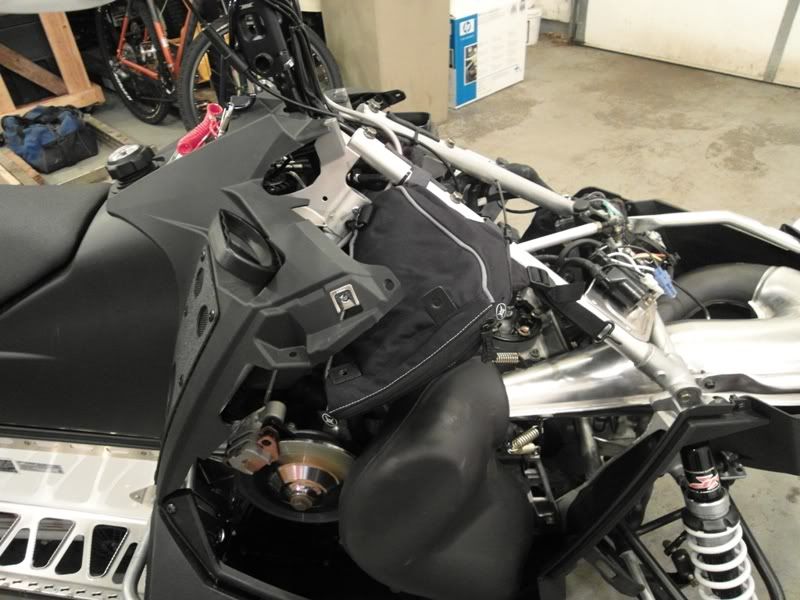
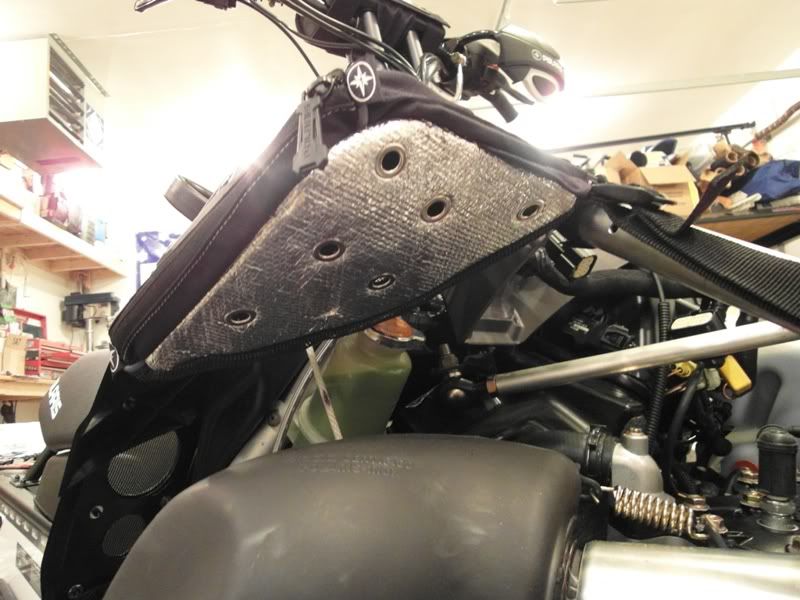
Added a rubber cap to the goggle bag to avoid scratching the goggle lense.
Finished up. Just need to add the registration stickers now, finish the 3rd heat cycle, and then do a once over for leaks/etc.
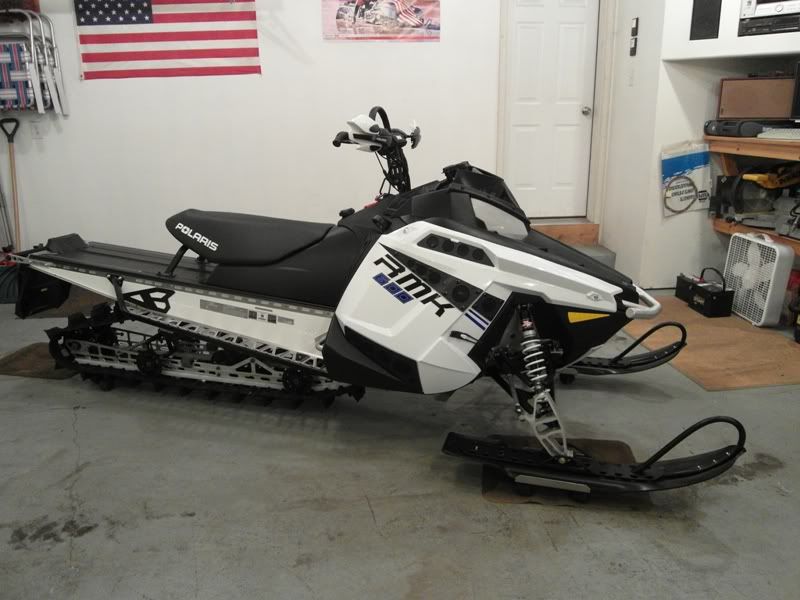

Off to the mountains next week to break it in and see how it performs.
Goggle bag install
Added a rubber cap to the goggle bag to avoid scratching the goggle lense.
Finished up. Just need to add the registration stickers now, finish the 3rd heat cycle, and then do a once over for leaks/etc.
Off to the mountains next week to break it in and see how it performs.
Similar threads
F
- Replies
- 5
- Views
- 2K
- Replies
- 6
- Views
- 3K
- Replies
- 5
- Views
- 2K
- Replies
- 24
- Views
- 5K
- Replies
- 4
- Views
- 2K