
This project has been in the works for the last 6 months or so.
My dad and I have been riding big bore King Cats for a many years now. We like the motor, and don't want to change. Carbs are simple, parts are cheap. We did want the benefits of a newer chassis. Motor won't easily fit in an M-series (it's been done, but a lot of work) and ProClimb chassis are expensive, and also look like a lot of work. Figured we could get the motor in a Pro, but they're also expensive. Decided to start with a Dragon, and figured much of what we learned would transfer when we found a Pro for a price we could stomach.
Picked up a used 2008 rolling chassis at the end of last year. Was supposed to be a 2010, but the price was right.
Started initial fitting of the motor:
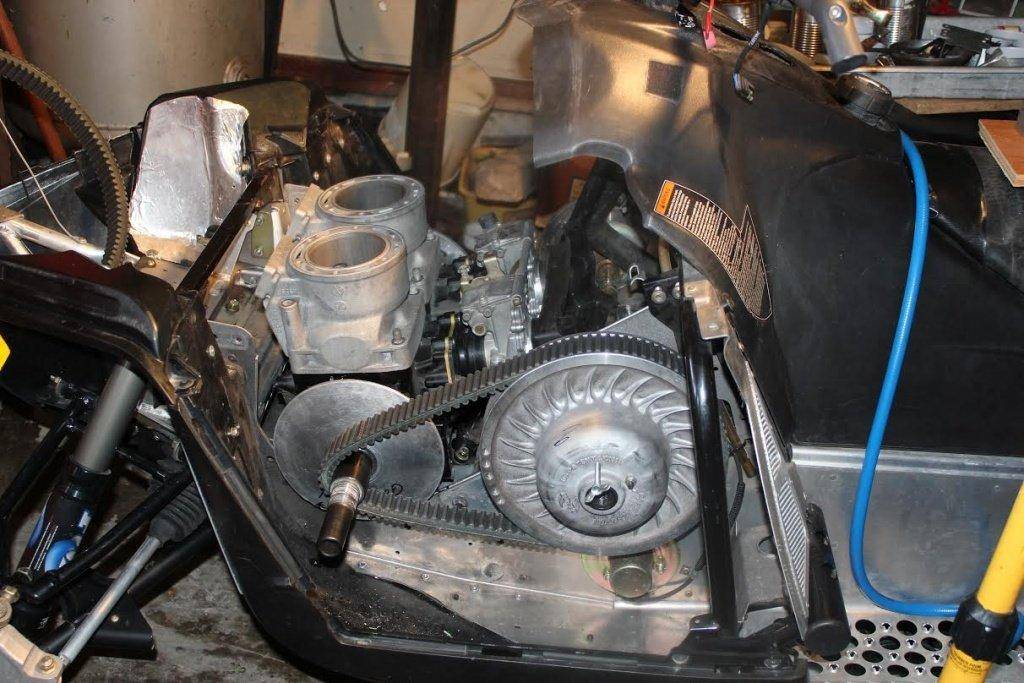
Looks pretty good, think this will fit without a ton of mods necessary.
We tried to set up to run the same belt our King Cats do, but the C-C is too long. So we're running M8 belts. 0627-046
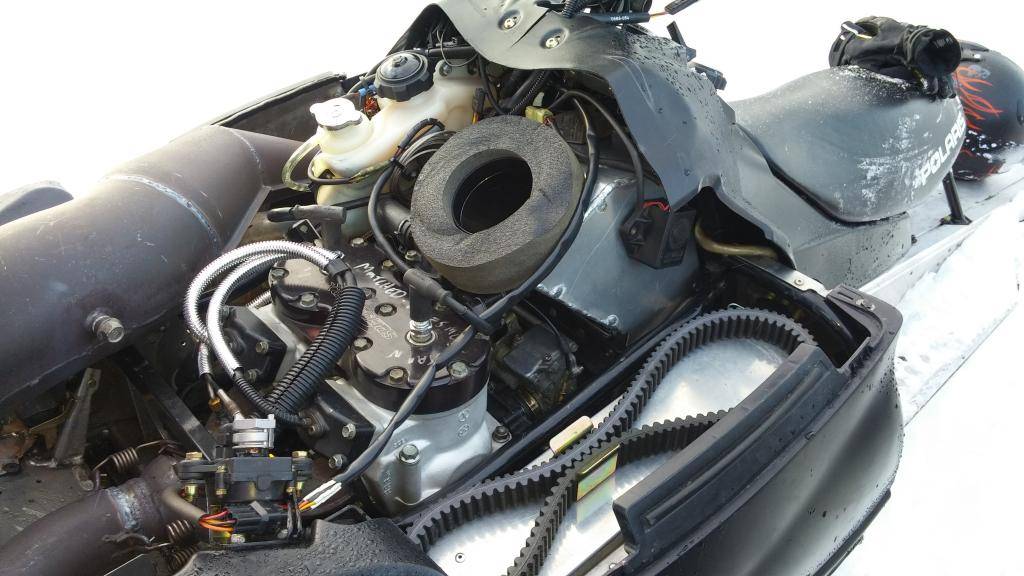
To mount the motor, we used two stock RMK PTO side motor straps. Replaced the stock mag strap with one of the stock PTO side straps. This gave a level surface. We bolted two additional straps between the stock mounts, and bolted to the bosses on the Cat crankcase. PTO side could almost work with the stock location. You could get the motor slightly lower using a plate, but we ran into issues as is with carb clearance, and with the crankcase hitting the bulkhead on the PTO side.

Mounted the fuel pump to an aluminum scrap bolted to the motor strap. Fuel line is just plumbed to a plate blocking off the hole for the EFI fuel pump.
Stock RMK oil tank and coolant bottle were used. This sled had the heat exchanger in the front of the tunnel, and it is plumbed to a secondary loop that bypasses the thermostat.

Not pictured, but we used the stock RMK torque stop, just cut and re-welded it to fit the larger motor.
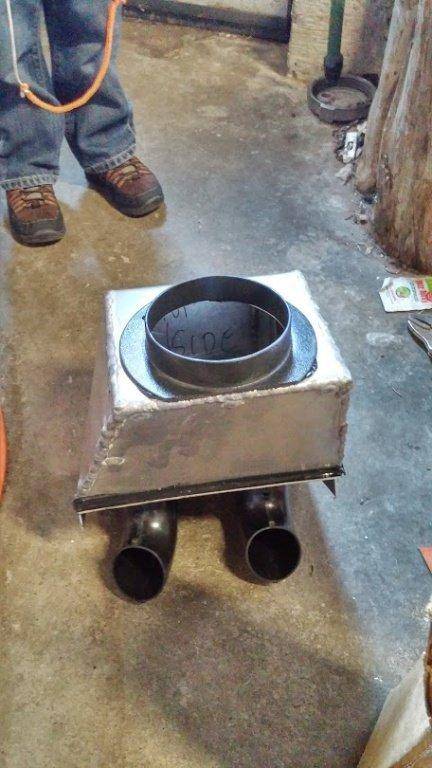
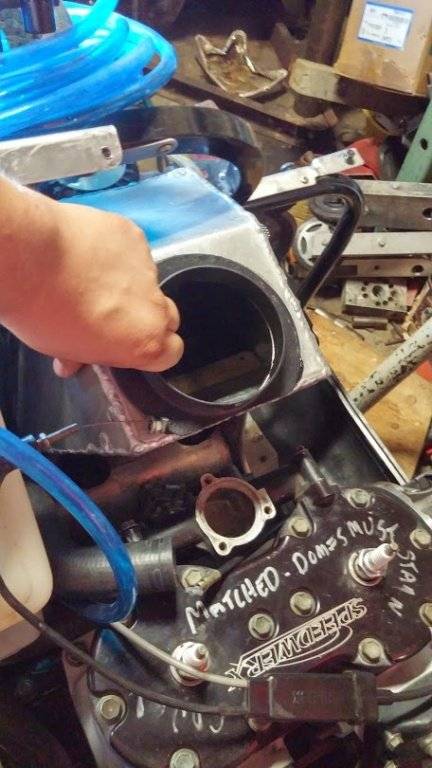
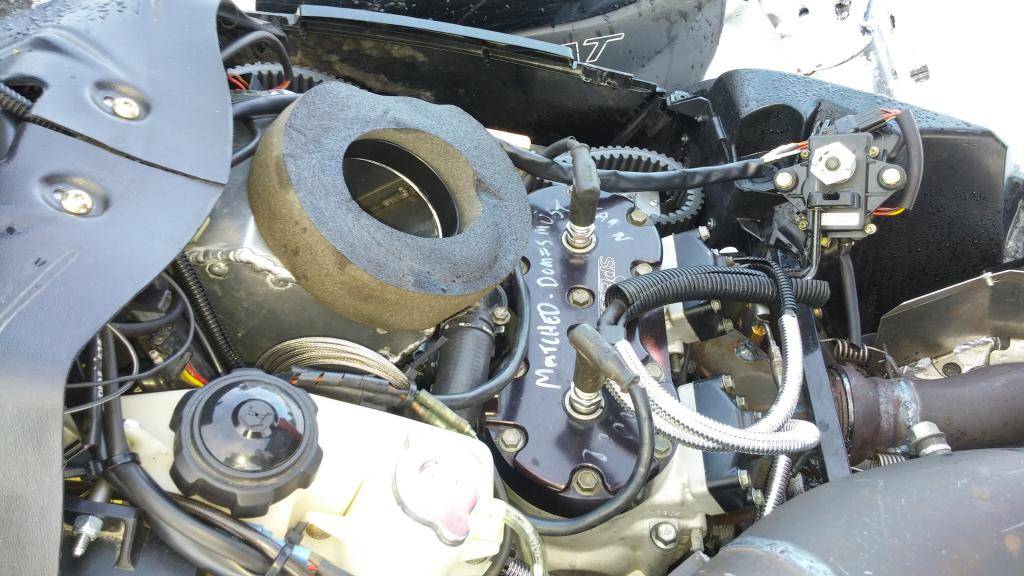
Cut the bottom off a stock King Cat airbox, to fit the carb boots. Had to modify it to fit around the jackshaft. Built an aluminum top, that holds the stock Cat baffle plate, and matches up to the stock RMK intake from the hood. Nearly hits the thermostat, but clears.
We measured the stock Cat 900 pipe, and our Black Magic singles that we run. Turns out the stock Cat 900 pipe is almost exactly the same dimensions as the stock Polaris 800 pipe. Cat pipe is ~2" longer. The Black Magic pipe was a larger diameter, but slightly shorter than the Cat pipe.
We cut the tail and head pipe off a stock Cat pipe, and likewise the stock RMK pipe. Welded the Cat pieces on the Polaris, matched it to the can we are using (SLP M1000 can), and called it a day.
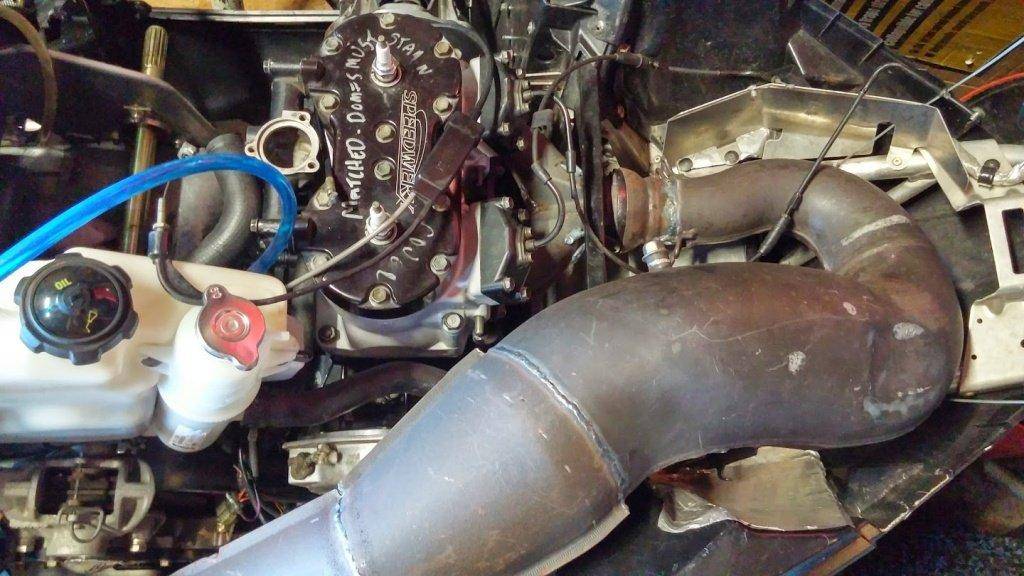
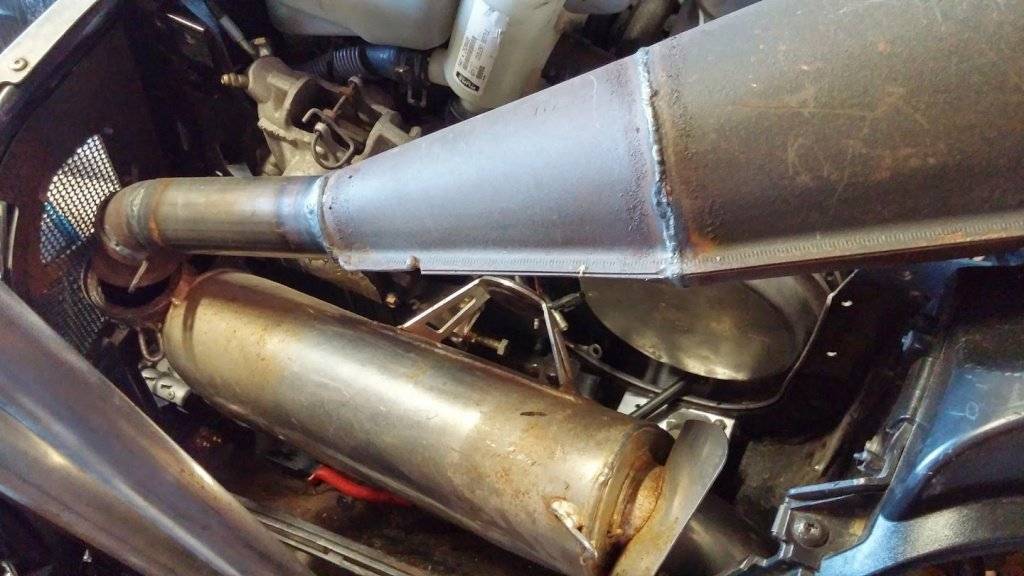
We did have to cut the top spring mount off the y-pipe, as it didn't clear the strut brace. Mounted one on either side to compensate.
The can is mounted to the frame rail on the PTO side, and a brace underneath. No can modifications necessary, so should be able to use any M1000 can. We did have to put a rubber bumper on one of the chaincase mounting bolts, to keep it stable.
Used the stock RMK brake caliper, and a cat (wilwood) master cylinder. We don't remember for sure what the brake line came from, but it fit.
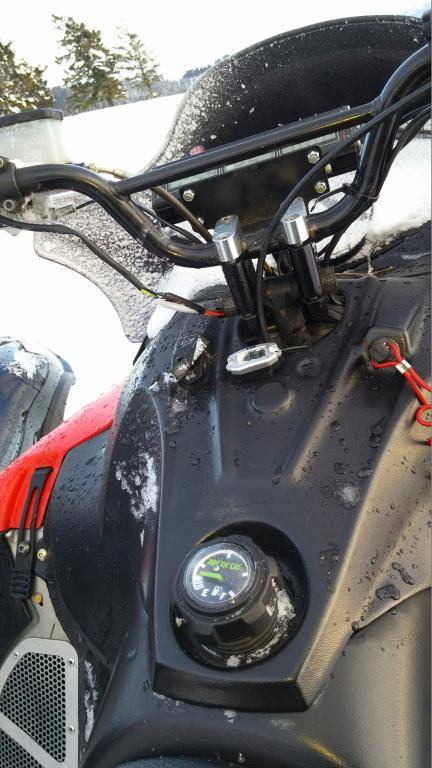
We didn't try to hook up any of the stock electronics, so the only gauge is the Avenger III. EGTs and Tach.
Used handlebars from a Cat Sabercat, because we like the bend to them. The chassis came with a broken gas cap, but luckily older Cat ones fit just fine. Not accurate, but it plugs the hole.
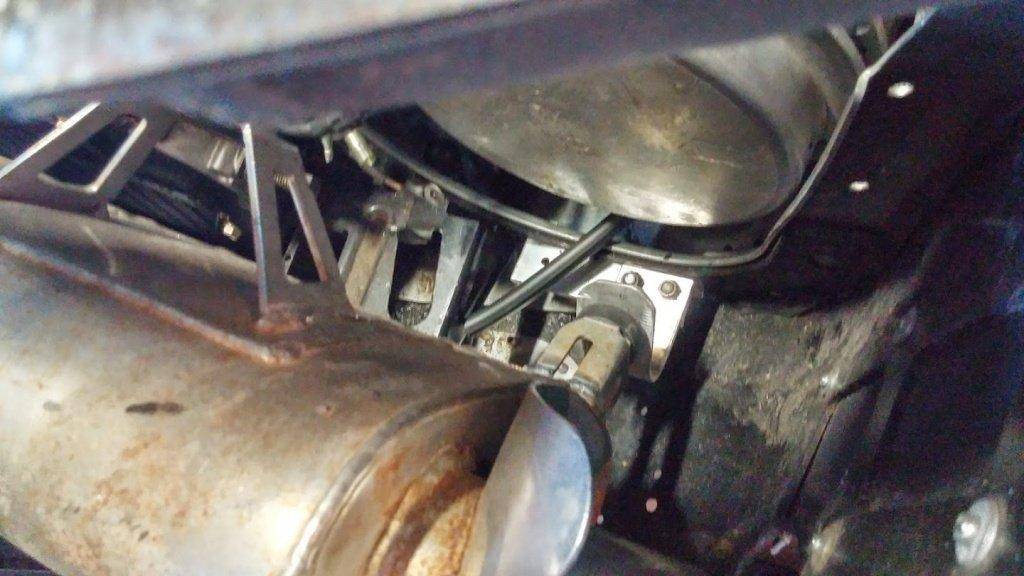
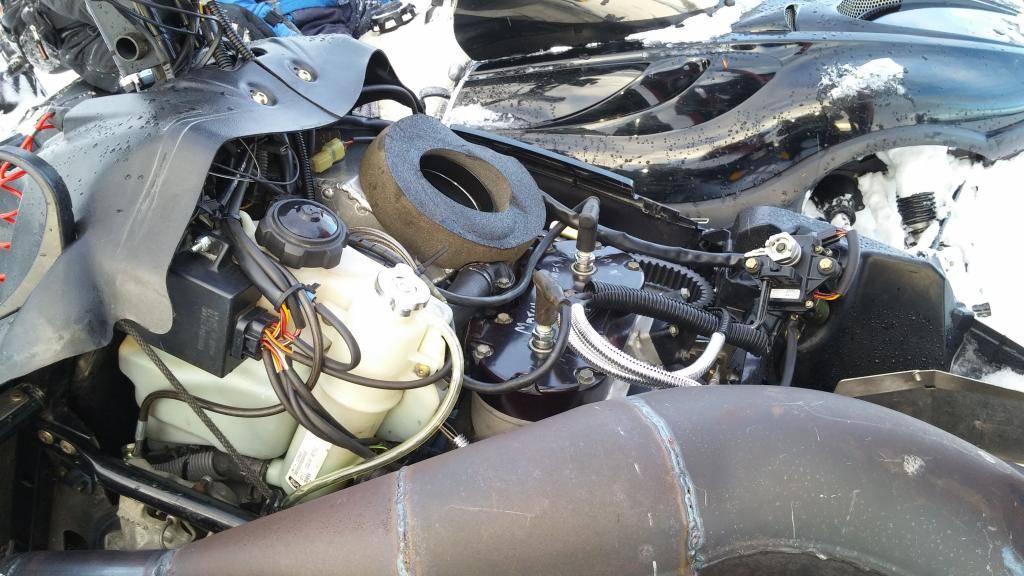
The most interesting part was figuring out where to mount all the Cat electronics. The RMK has them all on top of the clutch cover, and we didn't want to do that. Didn't want to risk taking them all out with a blown belt.
We ended up mounting the CDI to the outside of the oil tank, and routing all the wires around. Had to extend the wiring harness to the exhaust valve servomotor by almost 3 feet, because the servo wouldn't fit anywhere except the PTO side shock tower. Voltage regulator is mounted under the dash. Other electronic boxes for the exhaust valves are velcroed to the airbox.
Modified a Cat clutch cover, and it's pretty well done. There's a massive bundle of wires just stuffed under the dash though.
First time on the snow, last Sunday:
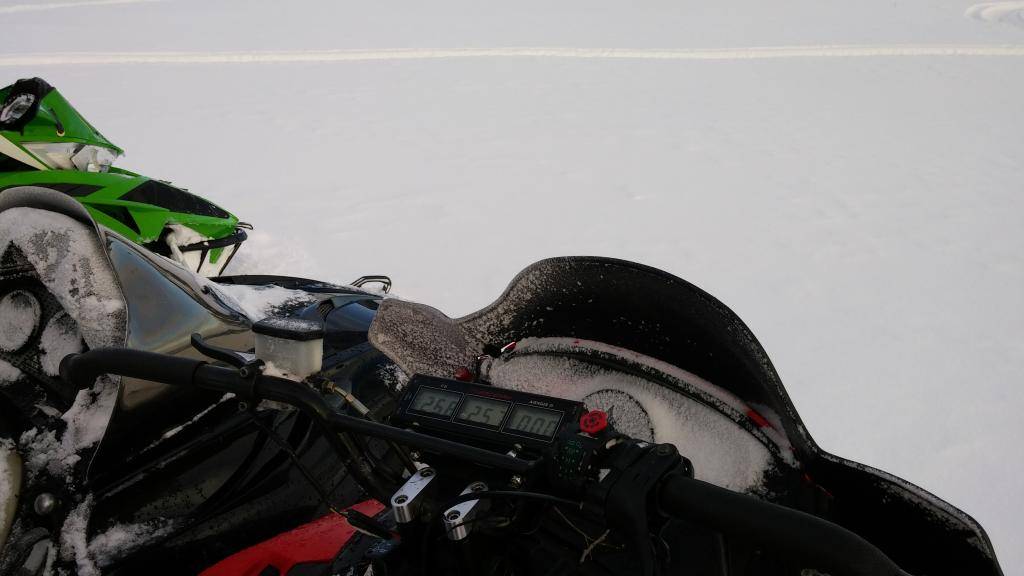
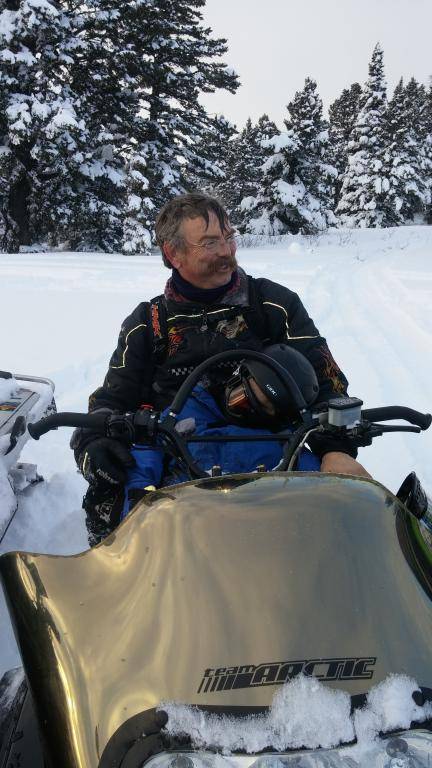
First real ride, today. It ran really well. We had the belt too tight, and were running a harder compound -060 belt. At lunchtime, we swapped to the -046 belt, and fixed the deflection. Totally changed the performance for the better. Might not even mess with the clutching anymore. Same primary setup as all our other sleds with this motor, and the secondary is stock 800 RMK. Revs to ~7500 climbing, ~7650 running flat out down the trail.
We had my dad's King Cat with a 156x2.5 Camo Extreme with us today, and this was better in every aspect except cruising down the trail. The sway bar had been removed before we got the sled. We also didn't go through the rear suspension settings, just made sure everything was tight and greased.
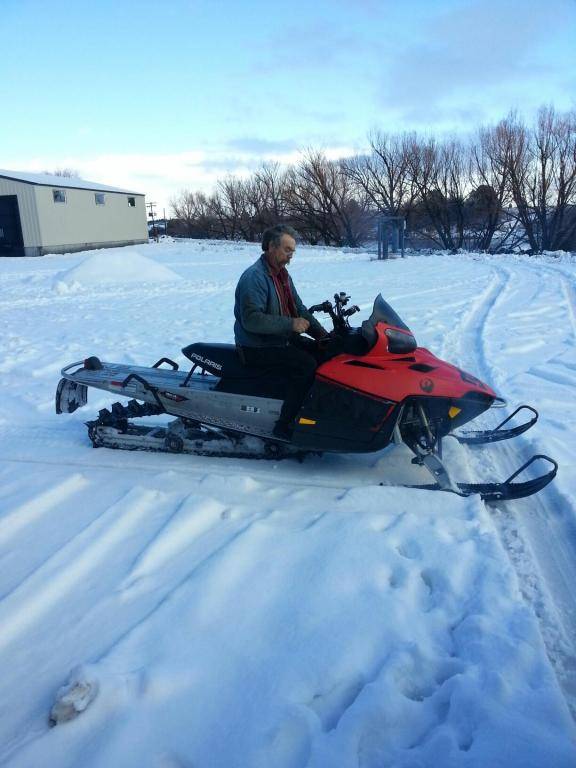
No action shots, since I'm the one with the camera, but we did tire out my 3 (nearly 4) year old son. He fell asleep on the ride back with Grandpa:
My dad and I have been riding big bore King Cats for a many years now. We like the motor, and don't want to change. Carbs are simple, parts are cheap. We did want the benefits of a newer chassis. Motor won't easily fit in an M-series (it's been done, but a lot of work) and ProClimb chassis are expensive, and also look like a lot of work. Figured we could get the motor in a Pro, but they're also expensive. Decided to start with a Dragon, and figured much of what we learned would transfer when we found a Pro for a price we could stomach.
Picked up a used 2008 rolling chassis at the end of last year. Was supposed to be a 2010, but the price was right.
Started initial fitting of the motor:
Looks pretty good, think this will fit without a ton of mods necessary.
We tried to set up to run the same belt our King Cats do, but the C-C is too long. So we're running M8 belts. 0627-046
To mount the motor, we used two stock RMK PTO side motor straps. Replaced the stock mag strap with one of the stock PTO side straps. This gave a level surface. We bolted two additional straps between the stock mounts, and bolted to the bosses on the Cat crankcase. PTO side could almost work with the stock location. You could get the motor slightly lower using a plate, but we ran into issues as is with carb clearance, and with the crankcase hitting the bulkhead on the PTO side.
Mounted the fuel pump to an aluminum scrap bolted to the motor strap. Fuel line is just plumbed to a plate blocking off the hole for the EFI fuel pump.
Stock RMK oil tank and coolant bottle were used. This sled had the heat exchanger in the front of the tunnel, and it is plumbed to a secondary loop that bypasses the thermostat.
Not pictured, but we used the stock RMK torque stop, just cut and re-welded it to fit the larger motor.
Cut the bottom off a stock King Cat airbox, to fit the carb boots. Had to modify it to fit around the jackshaft. Built an aluminum top, that holds the stock Cat baffle plate, and matches up to the stock RMK intake from the hood. Nearly hits the thermostat, but clears.
We measured the stock Cat 900 pipe, and our Black Magic singles that we run. Turns out the stock Cat 900 pipe is almost exactly the same dimensions as the stock Polaris 800 pipe. Cat pipe is ~2" longer. The Black Magic pipe was a larger diameter, but slightly shorter than the Cat pipe.
We cut the tail and head pipe off a stock Cat pipe, and likewise the stock RMK pipe. Welded the Cat pieces on the Polaris, matched it to the can we are using (SLP M1000 can), and called it a day.
We did have to cut the top spring mount off the y-pipe, as it didn't clear the strut brace. Mounted one on either side to compensate.
The can is mounted to the frame rail on the PTO side, and a brace underneath. No can modifications necessary, so should be able to use any M1000 can. We did have to put a rubber bumper on one of the chaincase mounting bolts, to keep it stable.
Used the stock RMK brake caliper, and a cat (wilwood) master cylinder. We don't remember for sure what the brake line came from, but it fit.
We didn't try to hook up any of the stock electronics, so the only gauge is the Avenger III. EGTs and Tach.
Used handlebars from a Cat Sabercat, because we like the bend to them. The chassis came with a broken gas cap, but luckily older Cat ones fit just fine. Not accurate, but it plugs the hole.
The most interesting part was figuring out where to mount all the Cat electronics. The RMK has them all on top of the clutch cover, and we didn't want to do that. Didn't want to risk taking them all out with a blown belt.
We ended up mounting the CDI to the outside of the oil tank, and routing all the wires around. Had to extend the wiring harness to the exhaust valve servomotor by almost 3 feet, because the servo wouldn't fit anywhere except the PTO side shock tower. Voltage regulator is mounted under the dash. Other electronic boxes for the exhaust valves are velcroed to the airbox.
Modified a Cat clutch cover, and it's pretty well done. There's a massive bundle of wires just stuffed under the dash though.
First time on the snow, last Sunday:
First real ride, today. It ran really well. We had the belt too tight, and were running a harder compound -060 belt. At lunchtime, we swapped to the -046 belt, and fixed the deflection. Totally changed the performance for the better. Might not even mess with the clutching anymore. Same primary setup as all our other sleds with this motor, and the secondary is stock 800 RMK. Revs to ~7500 climbing, ~7650 running flat out down the trail.
We had my dad's King Cat with a 156x2.5 Camo Extreme with us today, and this was better in every aspect except cruising down the trail. The sway bar had been removed before we got the sled. We also didn't go through the rear suspension settings, just made sure everything was tight and greased.
No action shots, since I'm the one with the camera, but we did tire out my 3 (nearly 4) year old son. He fell asleep on the ride back with Grandpa:
Last edited: