
Quality and type of hose and the clamps that you use with it are CRUCIAL to a safe installation. Hoses and clamps must be matched.
Worm-screw hose clamps should NOT be used for any reason.
DO NOT cut/reuse any of the hose from your original Polaris fuel filter assembly.
If you do not have experience with hoses and fuel systems and safety procedures in hose routing and mounting... DO NOT ATTEMPT THIS INSTALLATION
---------------------------------------------------------------------------------------------------------------------------------------------
Big thanks to EricW and Davey for the the leads on this.
NOTE: This filter will NOT fit into the stock location and will need to be relocated. It is considerably larger than stock.
If your sled is under warranty still... use of this filter assembly could void your warranty.
Heres the quick and easy way to get a great filter in there and not have to deal with waiting.
The 3300 filter has about 4 times the filter area of the stock and costs about $12 at your NAPA store. (CARQUEST as well has Wix filters... #33300 )
You can also substitute the HOLLEY filter later if you wish and still use the same quick connects.
NAPA auto parts will have all you need
Parts list:
NAPA part numbers for the hose depend on the size of the roll they are cutting from and have in stock.
They cut to length for you except for the 2ft packs.
5/16" --- 250 ft roll #H354, 25 ft roll #H349, 2ft package #H344
3/8" --- 250 ft roll #H355, 25 ft roll #H350, 2ft package #H358
NOTE: The hose clamps are NOT normal worm drive clamps... NOT what you want... you want clamps made specifically for fuel injection hose and fitted correctly.
REMOVE the old filter according to instructions in the Polaris service manual.
Take an old fuel filter assembly and CAREFULLY file/grind off the crimp-collar on the fuel injection rail end (the end with the O-Rings)... Do the same for the quick disconnect on the other end.
Install the hose on the fuel rail fitting with the clamp... Blow out the hose with a little brake cleaner to make sure there is no crap in the line.... put a little 2 stroke oil on the o-rings and install that onto the rail...snake the hose up and out of area so you can get access to it and the filter ... oil tank etc that was removed to get to the fitting on the fuel rail
Cool thing about this is that you will not have to pull this crap again to change the filter.
Now... with that done...take one of the 5/16 quick disconnects and install it on the hose with clamp.. blow it out well and put it on the fuel tank fitting.
NOTE: Use the original 5/16" QD from the Polaris assembly and install it on the tank side of the line... the Napa QD's have built in release tabs that make changes easy.. and you will not have to remove the line from the tank fitting.
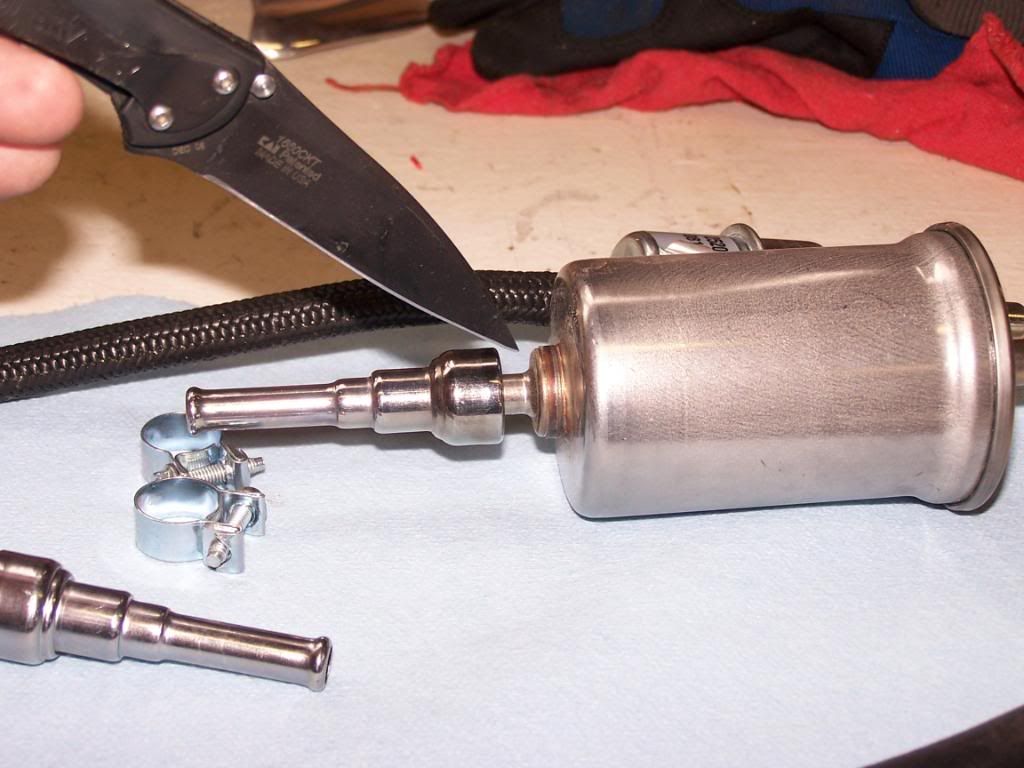
You can see in the photo that the fuel filter is really close to the QD... difficult to get a release tool in there... which is reason for the one with the release tabs to be on the filter side.
Take the other two quick disconnects and push them onto the filter (no hose yet)
TECH TIP: using a smear of two stroke oil helps to lube the o rings in the QD's and makes them easier to remove/install
Figure out the best place to put the filter on the lines... cut the lines where they need to be... put on your clamps... push them onto the QD's and tighten the clamps... secure the filter and there you have it.
Photo from EricW
Notice how close the fitting is to the filter... VERY difficult to get the removal tools between that and the filter... the other one has the release built-in and can be activated easily


Worm-screw hose clamps should NOT be used for any reason.
DO NOT cut/reuse any of the hose from your original Polaris fuel filter assembly.
If you do not have experience with hoses and fuel systems and safety procedures in hose routing and mounting... DO NOT ATTEMPT THIS INSTALLATION
---------------------------------------------------------------------------------------------------------------------------------------------
Big thanks to EricW and Davey for the the leads on this.
NOTE: This filter will NOT fit into the stock location and will need to be relocated. It is considerably larger than stock.
If your sled is under warranty still... use of this filter assembly could void your warranty.
Heres the quick and easy way to get a great filter in there and not have to deal with waiting.
The 3300 filter has about 4 times the filter area of the stock and costs about $12 at your NAPA store. (CARQUEST as well has Wix filters... #33300 )
You can also substitute the HOLLEY filter later if you wish and still use the same quick connects.
NAPA auto parts will have all you need
Parts list:
- 18" NAPA/Gates 3/8" Barricade fuel injection hose (see below for part numbers)
- 18" NAPA/Gates 5/16" Barricade fuel injection hose (see below for part numbers)
- 2ea Hose clamps made just for the 3/8" fuel injection hose... NAPA has them #705-1227 (14-16mm)
- 2ea Hose clamps made just for the 5/16" fuel injection hose... NAPA has them (13-15mm) #7-5-1226
- 1ea Fuel filter #3300 (WIX 33300)
- 1ea 3/8" fuel injection Quick dissconnect (NAPA #730-4927 )
- 1ea 5/16" fuel injecton hose Quick Dissconnect (NAPA #730-4926 )
NAPA part numbers for the hose depend on the size of the roll they are cutting from and have in stock.
They cut to length for you except for the 2ft packs.
5/16" --- 250 ft roll #H354, 25 ft roll #H349, 2ft package #H344
3/8" --- 250 ft roll #H355, 25 ft roll #H350, 2ft package #H358
NOTE: The hose clamps are NOT normal worm drive clamps... NOT what you want... you want clamps made specifically for fuel injection hose and fitted correctly.
REMOVE the old filter according to instructions in the Polaris service manual.
Take an old fuel filter assembly and CAREFULLY file/grind off the crimp-collar on the fuel injection rail end (the end with the O-Rings)... Do the same for the quick disconnect on the other end.
Install the hose on the fuel rail fitting with the clamp... Blow out the hose with a little brake cleaner to make sure there is no crap in the line.... put a little 2 stroke oil on the o-rings and install that onto the rail...snake the hose up and out of area so you can get access to it and the filter ... oil tank etc that was removed to get to the fitting on the fuel rail
Cool thing about this is that you will not have to pull this crap again to change the filter.
Now... with that done...take one of the 5/16 quick disconnects and install it on the hose with clamp.. blow it out well and put it on the fuel tank fitting.
NOTE: Use the original 5/16" QD from the Polaris assembly and install it on the tank side of the line... the Napa QD's have built in release tabs that make changes easy.. and you will not have to remove the line from the tank fitting.
You can see in the photo that the fuel filter is really close to the QD... difficult to get a release tool in there... which is reason for the one with the release tabs to be on the filter side.
Take the other two quick disconnects and push them onto the filter (no hose yet)
TECH TIP: using a smear of two stroke oil helps to lube the o rings in the QD's and makes them easier to remove/install
Figure out the best place to put the filter on the lines... cut the lines where they need to be... put on your clamps... push them onto the QD's and tighten the clamps... secure the filter and there you have it.
Photo from EricW
Notice how close the fitting is to the filter... VERY difficult to get the removal tools between that and the filter... the other one has the release built-in and can be activated easily
Last edited:

