
B
So here's a quick log/how to, ect of how I installed the Team Tied driven clutch on my 2007 Summit Adrenaline 800r 151.
When I first opened up the box there didn't seem much to it, so I figured I would give it a run and install the new driven on my own. I have not yet fired the sled up or ridden but, for the most part the install went smooth. I did run into a few small issues, but I'll pose those questions at the bottom of the write up.
NOTE: I've never done any clutch work at all on a sled so please feel free to chime in with any input if it appears I did something wrong
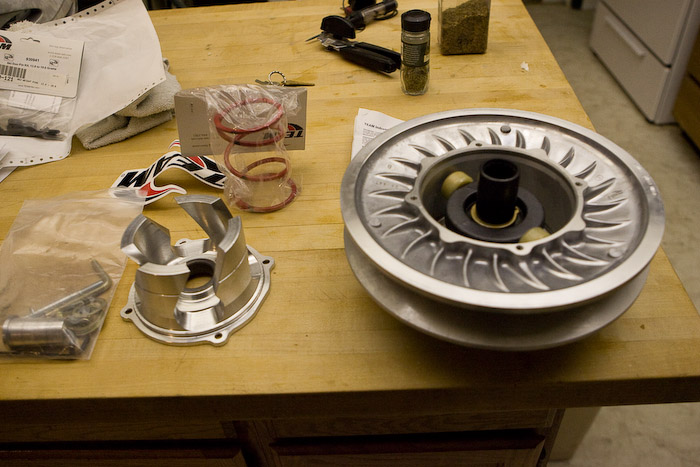
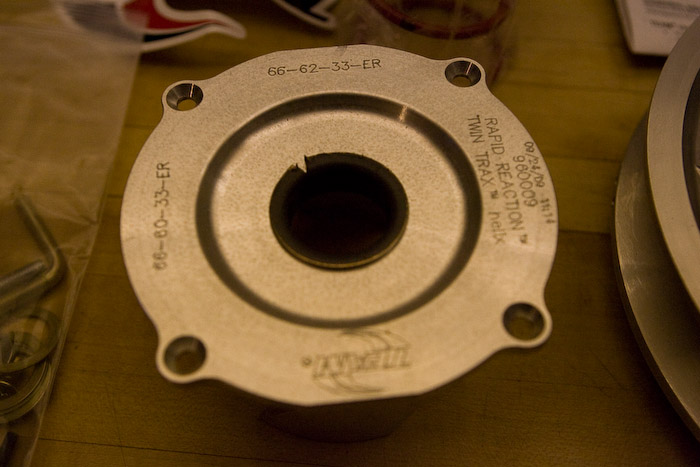
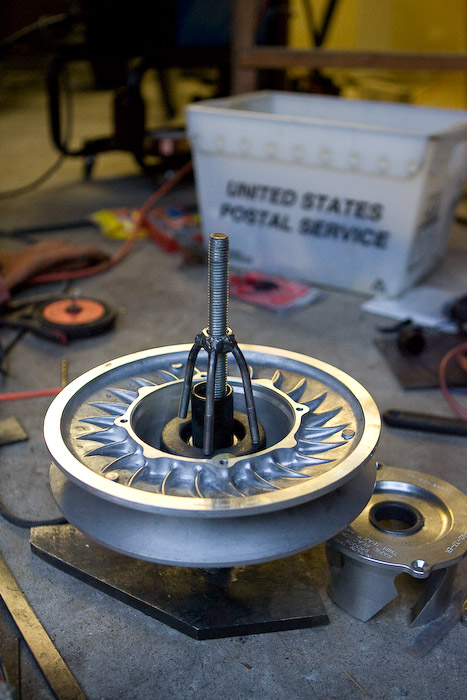
New goodies from SLP/Team. Spoke to a tech at Team he recommended for a stock 800r @ 9000' plus to go with the Red & Black Spring, and a 66-60.36/66-62.33 helix.
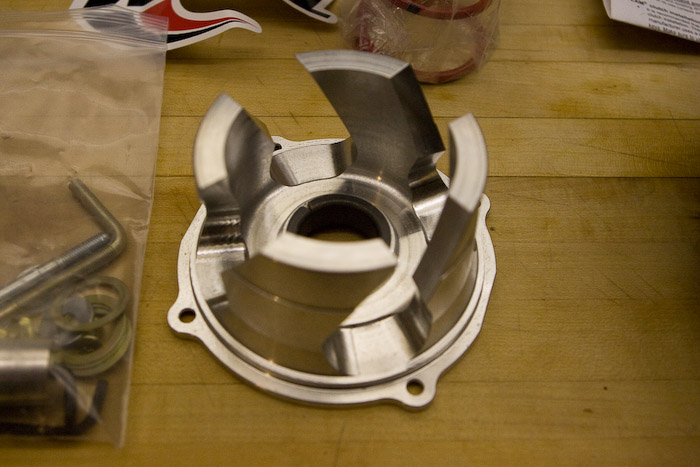
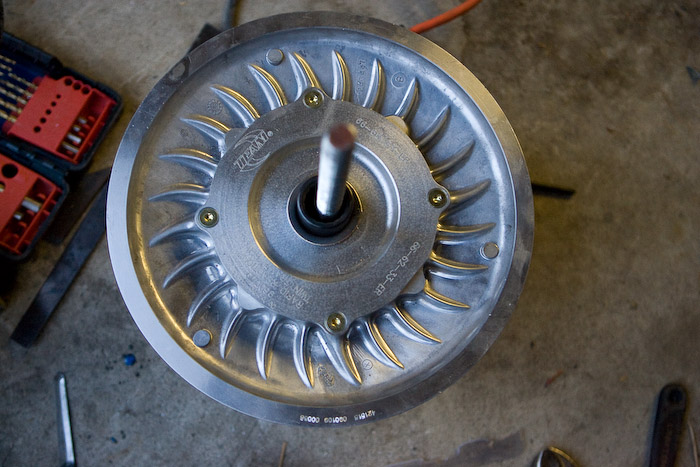
(here are some more shots of the helix and clutch. )
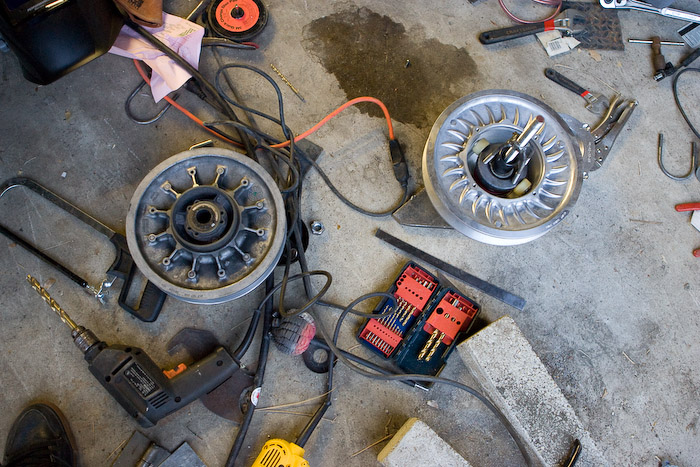
first thing I did was pull the old driven off, not much to show here pull off your belt, remove your tool bag holder, and unbolt the one bolt holding the driven and pull it off, I also marked the distance from the rear sheeve to the frame to give me an idea of where to shim the new clutch.
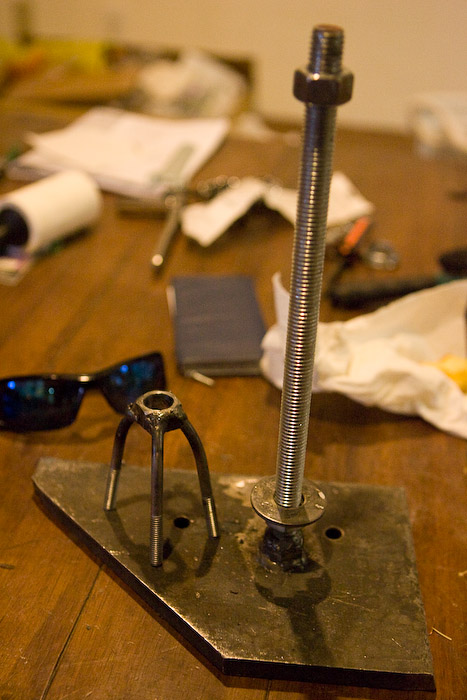
Next thing I did was build a spring compressor. You can see it below. It cost about 3$, I welded a nut to a thick plate of metal, then welded a piece of all thread into the nut, I then welded a washer on top of another nut to create a "movable" platform That I can use to raise or lower the height of what I'm working on from the bottom, after that came the tricky part. I cut up a bunch of U bolts to make a 3 Prong press (leaving room for snap ring pillers). I then welded those prongs to a Nut, and drilled out the center of the nut so it would slide along the all thread. After that, it was just a matter of taking a 4th nut and using a wrench to tighten down the press to push on the spider gear (i think that's what it's called)
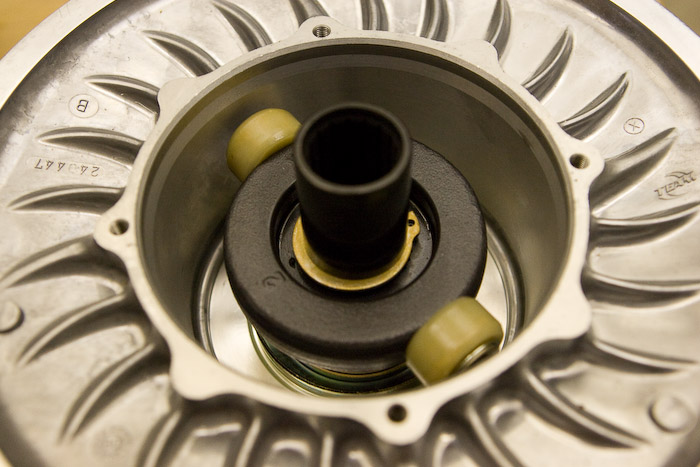
With my spring compressor completed, I put the clutch on, dropped in the spring compressed on the spider gear (??is this right), and then snapped the ring in the grove. I make sure to line up the spider gears X with the X on the sheave. (I don't know what difference it makes but it seemed like a smart idea haha), one snag I had was making sure the marker lined up with the shaft and the spider gear, you're best bet is to line this up the best you can before you start compressing, and as you get to where it needs to line up (or it won't go any further) carefully compress to see if everything lines up, if the spider won't slide EFFORTLESSLY decompress a few times, shift the spider gear again and try again. If you feel any resistance at all it's not lining up. Don't force it! It took maybe 3 times with eyeballing it before I started to compress.
After that I went ahead and installed the helix, (for the first of many times)..
I used a tiny bit of Blue Lock Tight, and torqued it.
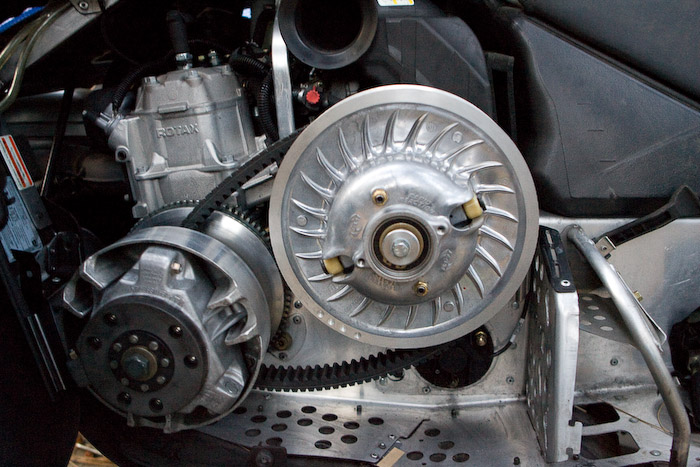
I then went ahead and installed the new clutch back on the sled
..ah crap the belt is way to loose
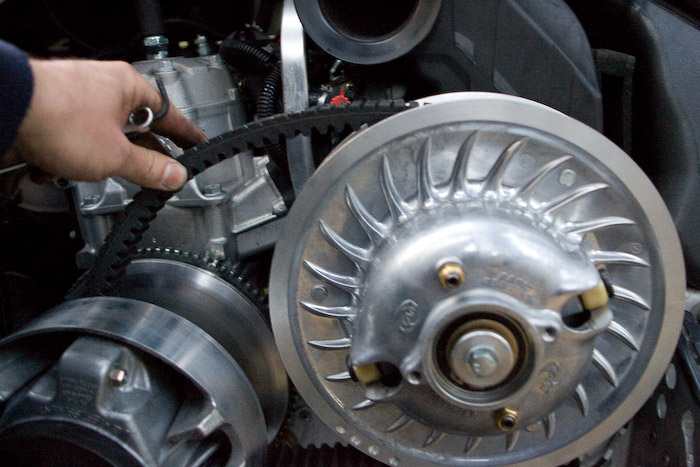
This took me a bit to figure out, as I thought I had pulled the screws all the way out to allow the sheeve to move in, at this point the obvious escaped me. I pulled the clutch back off pulled the helix back out and continued to "dick" with it, eventually I realized without the belt on and the adjustment screws loosened I could get the sheeves to close all the way. (at this point.. nite time sorry no pics) I went ahead and reinstalled the driven clutch (in the dark with a flash light in my mouth hahah).. And the same thing Happend after spreading the sheaves to get the belt on.. Poof they wouldn't close.. This where I noticed the obvious.. the belt was wedging them apart and I had to carefully unstick the belt to get the sheeves to close and push the belt back up to the top of the sheeves.. I have a strange feeling this could have been accomplished in 5 seconds by just firing up the sled.. After getting the belt to sit as high as I could (I couldn't seem to float it*), I then pulled out the screw that spreads the sheeves, and tigthend down the adjustment bolts.
(note I also installed a little blue lock tight on bolt used to install the driven clutch)
here is a photo of the stock compared to the team tied clutch.
Ok so my questions, and feedback.
1st I have to say as somebody who doesn't know anything about clutches I think the install went pretty smooth, I do wish the instructions would have shown all the parts with labels, as according to the instructions I was missing some bolts (that I didn't need), and it kept referring to parts that hell if i knew what they were.. ha.
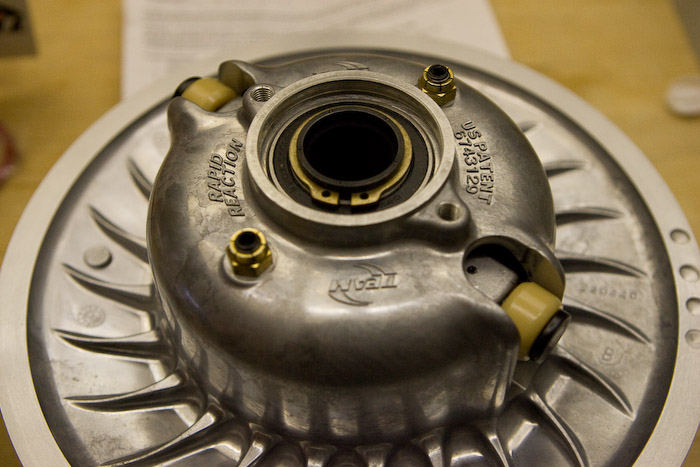
2nd. I made sure to line up the X on the spider gear (i believe that's what it's called with the X on the sheeve (photo for reference prior to lining up X on spider with X on sheeve.), but there was also an X on the front sheeve which I had no way of lining up with all the other X's.. It didn't rotate. Are they supposed to line up??
3rd. When reading this (http://www.gates.com/brochure.cfm?brochure=1033&location_id=542), it talks about lining up the spring in the cups? I didn't really see any groves our delinting marks, so I just plopped the spring in torqued it down and dropped in the snap ring (is this bad?)
4th. I can't seem to float the belt, even if I pull the adjustment screws all the way out the at best it will go level with the sheeves. No matter how hard I try to pull the belt back any further it won't strech to allow the driven clutch to close the sheaves any further. The only thing I haven't tried is firing it up and spinning the clutch.
Thanks again for checking this out, please let me know if you have any questions for me, and I'd be grateful for any help with my questions or if somebody can point out any gross failures, or things I may have overlooked on my part.
Thanks again
-Brahm
When I first opened up the box there didn't seem much to it, so I figured I would give it a run and install the new driven on my own. I have not yet fired the sled up or ridden but, for the most part the install went smooth. I did run into a few small issues, but I'll pose those questions at the bottom of the write up.
NOTE: I've never done any clutch work at all on a sled so please feel free to chime in with any input if it appears I did something wrong
New goodies from SLP/Team. Spoke to a tech at Team he recommended for a stock 800r @ 9000' plus to go with the Red & Black Spring, and a 66-60.36/66-62.33 helix.
(here are some more shots of the helix and clutch. )
first thing I did was pull the old driven off, not much to show here pull off your belt, remove your tool bag holder, and unbolt the one bolt holding the driven and pull it off, I also marked the distance from the rear sheeve to the frame to give me an idea of where to shim the new clutch.
Next thing I did was build a spring compressor. You can see it below. It cost about 3$, I welded a nut to a thick plate of metal, then welded a piece of all thread into the nut, I then welded a washer on top of another nut to create a "movable" platform That I can use to raise or lower the height of what I'm working on from the bottom, after that came the tricky part. I cut up a bunch of U bolts to make a 3 Prong press (leaving room for snap ring pillers). I then welded those prongs to a Nut, and drilled out the center of the nut so it would slide along the all thread. After that, it was just a matter of taking a 4th nut and using a wrench to tighten down the press to push on the spider gear (i think that's what it's called)
With my spring compressor completed, I put the clutch on, dropped in the spring compressed on the spider gear (??is this right), and then snapped the ring in the grove. I make sure to line up the spider gears X with the X on the sheave. (I don't know what difference it makes but it seemed like a smart idea haha), one snag I had was making sure the marker lined up with the shaft and the spider gear, you're best bet is to line this up the best you can before you start compressing, and as you get to where it needs to line up (or it won't go any further) carefully compress to see if everything lines up, if the spider won't slide EFFORTLESSLY decompress a few times, shift the spider gear again and try again. If you feel any resistance at all it's not lining up. Don't force it! It took maybe 3 times with eyeballing it before I started to compress.
After that I went ahead and installed the helix, (for the first of many times)..
I used a tiny bit of Blue Lock Tight, and torqued it.
I then went ahead and installed the new clutch back on the sled
..ah crap the belt is way to loose
This took me a bit to figure out, as I thought I had pulled the screws all the way out to allow the sheeve to move in, at this point the obvious escaped me. I pulled the clutch back off pulled the helix back out and continued to "dick" with it, eventually I realized without the belt on and the adjustment screws loosened I could get the sheeves to close all the way. (at this point.. nite time sorry no pics) I went ahead and reinstalled the driven clutch (in the dark with a flash light in my mouth hahah).. And the same thing Happend after spreading the sheaves to get the belt on.. Poof they wouldn't close.. This where I noticed the obvious.. the belt was wedging them apart and I had to carefully unstick the belt to get the sheeves to close and push the belt back up to the top of the sheeves.. I have a strange feeling this could have been accomplished in 5 seconds by just firing up the sled.. After getting the belt to sit as high as I could (I couldn't seem to float it*), I then pulled out the screw that spreads the sheeves, and tigthend down the adjustment bolts.
(note I also installed a little blue lock tight on bolt used to install the driven clutch)
here is a photo of the stock compared to the team tied clutch.
Ok so my questions, and feedback.
1st I have to say as somebody who doesn't know anything about clutches I think the install went pretty smooth, I do wish the instructions would have shown all the parts with labels, as according to the instructions I was missing some bolts (that I didn't need), and it kept referring to parts that hell if i knew what they were.. ha.
2nd. I made sure to line up the X on the spider gear (i believe that's what it's called with the X on the sheeve (photo for reference prior to lining up X on spider with X on sheeve.), but there was also an X on the front sheeve which I had no way of lining up with all the other X's.. It didn't rotate. Are they supposed to line up??
3rd. When reading this (http://www.gates.com/brochure.cfm?brochure=1033&location_id=542), it talks about lining up the spring in the cups? I didn't really see any groves our delinting marks, so I just plopped the spring in torqued it down and dropped in the snap ring (is this bad?)
4th. I can't seem to float the belt, even if I pull the adjustment screws all the way out the at best it will go level with the sheeves. No matter how hard I try to pull the belt back any further it won't strech to allow the driven clutch to close the sheaves any further. The only thing I haven't tried is firing it up and spinning the clutch.
Thanks again for checking this out, please let me know if you have any questions for me, and I'd be grateful for any help with my questions or if somebody can point out any gross failures, or things I may have overlooked on my part.
Thanks again
-Brahm
Last edited:
 Please post any other info you think would be helpful as you come across it, the pictures help.