Team SKI-DOO Clutch

Published in the February 2012 Issue White Out & Wide Open—The Blog

The following information was provided by Jason Koskela, product development and testing coordinator for Team Industries.

1. Using the stock belt removal tool, you open the sheaves of the secondary clutch so you can remove the belt.


2. Loosen and remove retaining nut on the backside of the jackshaft bearing.


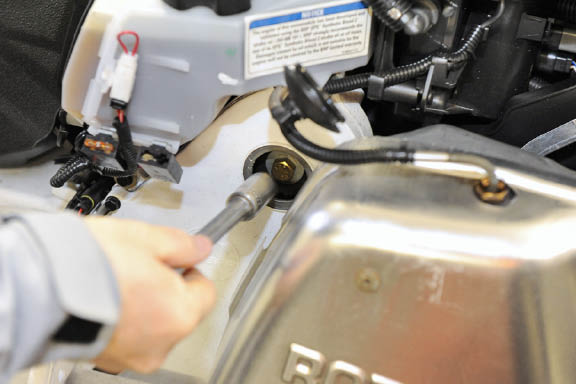
3. Remove oil fill plug and remove the bolt that retains the top sprocket.


4. Tap on the end of the shaft to start removing it. Use a long screwdriver or 3/8 extension hold pressure on the shaft until it is out of the chaincase housing. This will keep the chain and sprocket together and hold up the spacer that goes on the back side of the sprocket.


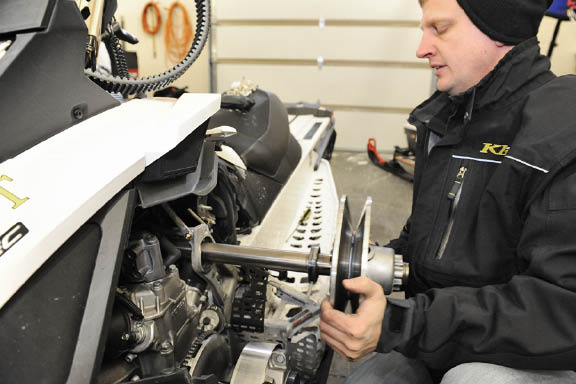
5. Remove stock clutch and shaft assembly and set aside.


6. As long as you leave the socket extension in place, it will hold the sprocket and chain in place until you install the jackshaft. By holding up the sprocket and chain, it eliminates the necessity of removing the exhaust pipe and chaincase cover and all the mess that goes with that.


7. Slide new hollow shaft in slowly and align in sprocket, make sure other helper holds tension against shaft with the tool holding the sprocket and spacer up. Once the shaft is started in the sprocket you can tap on the end of the shaft with a dead blow hammer until the shaft is flush with gear.


8. Once the shaft is in place, you can install bolt and re-install the oil fill plug.


9. Reinstall OEM bearing retainer and tighten nut on the back.


10. Attach the jackshaft retainer.


11. Now it's time to install the secondary spring in tied clutch. The spring is supplied in the clutch kit.


12. Using team compression tool to compress spring and install snap-ring makes the job simple and easy.


13. Now install the helix in its recommended setting.


14. Now comes the fun--removing the primary clutch. You must have the proper clutch puller to insure you don't cause damage to your crank shaft during the process.


15. Once the primary clutch is removed, use the clutch puller to separate the two halves. Tap on the end of the puller until the two halves separate, then remove puller from clutch.


16. Make sure to have button retaining clips installed before removing outer clutch half or all the buttons will fall out during removal.


17. Install spring tool and remove the three screws holding the spring cup on.


18. Now install the new primary spring supplied in the kit.


19. Use the spring compression tool to compress the spring and reinstall the three screws that hold it in.


20. The curved part of clutch arm is always facing up and the cotter pin head faces out.


21. Remove the cotter pins and stock clutch pins.


22. The new Team adjustable pins are 10.5 grams empty. Add weight to make them 13.8 grams for the kit.


23. Now reinstall the primary clutch and torque it to OEM specs.


24. Sliding the outer primary half together, align the arrow on cover with marks on sheave.


25. Reinstalling the primary.


26. Use a recommended alignment bar to align and shim properly. This tool is not supplied in the kit.


27. Finally, install the mounting plug that allows the clutch to float side to side.

  • Like what you read?

    Want to know when we have important news, updates or interviews?

  • Join our newsletter today!

    Sign Up

You Might Also Be Interested In...

Share

Send to your friends!

Welcome to Snowest!

Have a discount code on us.

Discount Code: